Learn to Crochet
Mosaic Hats TM
Have you always wanted to create beautiful crocheted colorwork but been afraid of working with more than one yarn at a time? If so, mosaic colorwork is the technique for you!
These complicated-looking patterns are created by working simple two-row stripes. On successive rows, stitches are worked into the rows below to create the intricate patterns. It's as easy as that!
With concise instructions and photos, this book will take you step by step through the creation of basic mosaic fabric. There are useful patterns for seven hats in teens, women's and men's sizes so you can showcase your new skills. No one needs to know how easyand funthese gorgeous hats are to make. It'll be our special secret!
Let's get started!
Table of Contents
General Information
Table of Contents
Guide
Pages
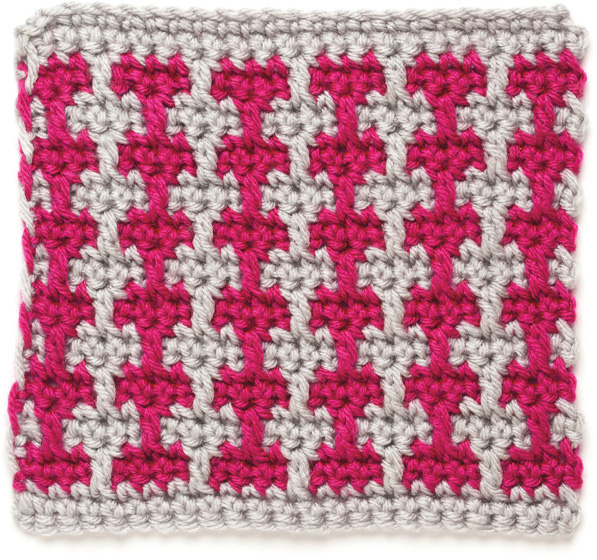
This fascinating colorwork technique requires just one color per row and is created using simple crochet stitches. Chain-2 spaces are used as placeholders where stitches of the other color will be worked. In subsequent rows, double crochet stitches are used to cover those chain-2 spaces and add the appropriate color in the desired spot in the pattern.
Let's learn how to do mosaic colorwork while stitching the 3-in-1 mosaic pattern stitch used in the 3-in-1 Hat chapter.
Begin with the foundation rows. Theyre worked once at the beginning of a project and are not repeated. The rows will each be the height of a single crochet stitch, so each one will have one chain at the beginning of the subsequent row to bring the yarn and hook up to the height required to work that row.
With gray, chain a multiple of 4.
Foundation row 1 (RS): Sc in 2nd ch from hook (see Photo 1) and in each ch across, turn.

Foundation row 2 is a wrong-side row.
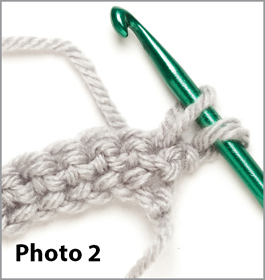
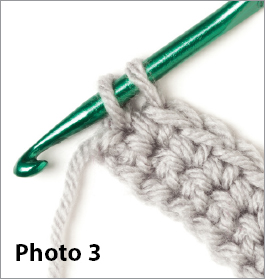
Foundation row 2 (WS): Ch 1, sc in first sc (see Photo 2) and in each sc across (see Photo 3), change color to magenta in last st, turn.
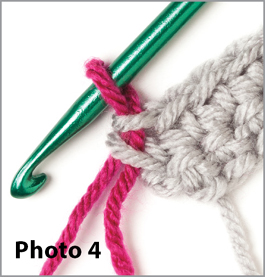
To change color at the end of the row, work the last stitch to the last yarn over (2 loops on the hook), drop gray, leaving a 6-inch tail, draw magenta through the 2 loops (see Photo 4). One loop of magenta is on the hook and now you're ready to begin the next row.
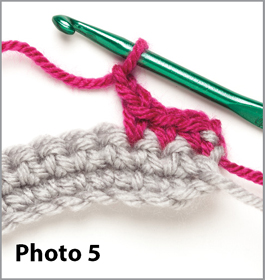
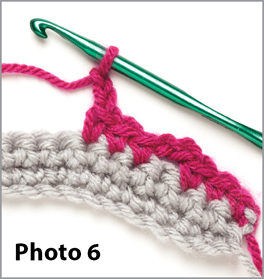
Foundation row 3 (RS): Ch 1, sc in each of first 3 sc (see Photo 5), *ch 2, sk next sc, sc in each of next 3 sc (see Photo 6), rep from * across, turn.
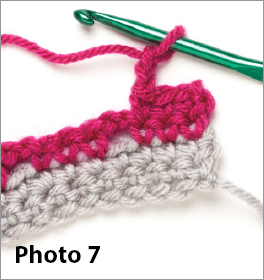
Foundation row 4 (WS): Ch 1, sc in each of first 3 sc (see Photo 7), *ch 2, sk next ch-2 sp, sc in each of next 3 sc, rep from * across, change color to gray, turn.
To minimize the number of yarn tails that will need to be woven in at the end of a mosaic project, there's no need to cut the yarn at the end of each two-row stripe. Instead, carry the yarn loosely up the wrong side of the fabric until it is used again (see Photo 8). Hint: If you twist the yarns in opposite directions each time you change color (grabbing the new yarn from above this time and from below the next time), you'll avoid tangling the yarns as you go!

Now begin the main pattern with row 1 and gray:
Row 1 (RS): Ch 1, sc in first sc, *ch 2, sk next sc, sc in next sc**, working in front of ch-2 sps of previous 2 rows, dc in next sk st 3 rows below (see Photo 9), sc in next sc (see Photo 10), rep from * across, ending last rep at **, turn.
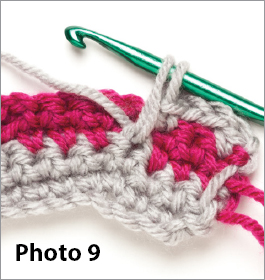
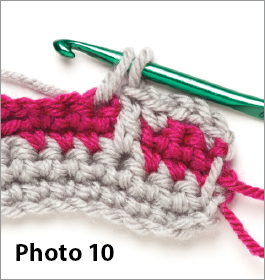
As you continue with the pattern, working rows 24, be sure to skip the next stitch or chain space for each chain-2 made and always work your double crochet stitches in front of the chain-2 spaces of the previous two rows.
Row 2: Ch 1, sc in first sc, *ch 2, sk next ch-2 sp**, sc in each of next 3 sts, rep from * across, ending last rep at **, sc in last sc, change color to magenta, turn.
Row 3: Ch 1, sc in first sc, *dc in next sk st 3 rows below, sc in next sc**, ch 2, sk next sc, sc in next sc, rep from * across, ending last rep at **, turn.
Row 4: Ch 1, sc in each of first 3 sc, *ch 2, sk next ch-2 sp, sc in each of next 3 sc, rep from * across, change color to gray, turn.
At the end of row 4, begin again with row 1not with the foundation rows (see Photo 11).
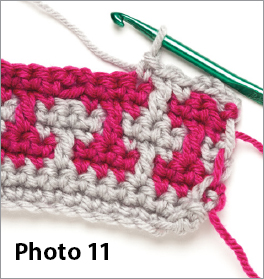
Repeat rows 14 for pattern.
After youve completed all repeats of rows 14, you'll need to work 2 last rows that omit the chain-2 spaces to avoid having holes in the fabric. With gray on your hook, continue as follows:
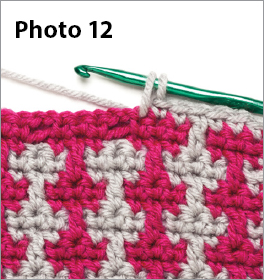
Next row (RS): Ch 1, sc in each of first 3 sc, *dc into the next sk st 3 rows below, sc in each of next 3 sc (see Photo 12), rep from * across, turn.
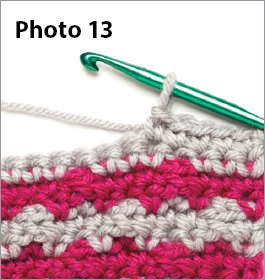
Last row: Ch 1, sc in each st across (see Photo 13). Fasten off. 

Skill Level

Finished Sizes
Instructions given fit teen; changes for woman and man are in [ ].
Finished Measurements


