Shelly Krzyzewski - Four Seasons Quilling Sampler
Here you can read online Shelly Krzyzewski - Four Seasons Quilling Sampler full text of the book (entire story) in english for free. Download pdf and epub, get meaning, cover and reviews about this ebook. year: 2015, publisher: Annies, genre: Detective and thriller. Description of the work, (preface) as well as reviews are available. Best literature library LitArk.com created for fans of good reading and offers a wide selection of genres:
Romance novel
Science fiction
Adventure
Detective
Science
History
Home and family
Prose
Art
Politics
Computer
Non-fiction
Religion
Business
Children
Humor
Choose a favorite category and find really read worthwhile books. Enjoy immersion in the world of imagination, feel the emotions of the characters or learn something new for yourself, make an fascinating discovery.

- Book:Four Seasons Quilling Sampler
- Author:
- Publisher:Annies
- Genre:
- Year:2015
- Rating:4 / 5
- Favourites:Add to favourites
- Your mark:
Four Seasons Quilling Sampler: summary, description and annotation
We offer to read an annotation, description, summary or preface (depends on what the author of the book "Four Seasons Quilling Sampler" wrote himself). If you haven't found the necessary information about the book — write in the comments, we will try to find it.
Shelly Krzyzewski: author's other books
Who wrote Four Seasons Quilling Sampler? Find out the surname, the name of the author of the book and a list of all author's works by series.


Four Seasons Quilling Sampler — read online for free the complete book (whole text) full work
Below is the text of the book, divided by pages. System saving the place of the last page read, allows you to conveniently read the book "Four Seasons Quilling Sampler" online for free, without having to search again every time where you left off. Put a bookmark, and you can go to the page where you finished reading at any time.
Font size:
Interval:
Bookmark:
If you are an Annies customer and have a question about the instructions on a pattern you have purchased, please visit:
AnniesCatalog.com/pages/customer_care/pattern_services.html
To download templates for easy printing, view the
download instructions at the end of this book or click
the Templates chapter in the Table of Contents.
Table of Contents
Getting Started
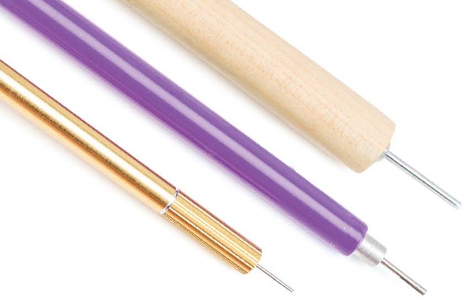
To launch your adventure in quilling, all you'll need are a few basic tools and supplies. Your first purchase should be either a slotted or needle quilling tool. For beginners, a slotted tool is helpful in holding the ends of quilling strips securely as you start to roll paper strips. As you advance your skills, a needle tool will allow you to create smaller, more professional-looking centers in your quilled shapes. Both tools are available at craft stores and online.
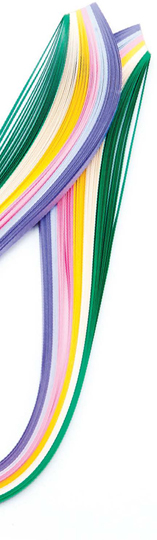
Youll also want to purchase quilling strips. These are available in single- or multicolored packs as well as various widths. For practice, use a paper trimmer and text-weight paper to cut your own quilling strips.
To use the slotted tool, slide the end of a paper quilling strip into the slot. Turn the tool as directed with one hand as you guide the paper strip with the other to create a basic paper coil.
Apply a tiny amount of glue to the end of the coil and hold it in place for a few moments to dry. The finished coil can be used as is or pinched into any desired shape. To create additional quilled shapes, refer to the Quilled Shape Gallery on pages 35. Alternatively, you may leave the coil end unglued and use the rolled strip as a loose scroll or form it into a shaped scroll.
If you prefer a coil not to have the center crimp that a slotted tool produces, create your shapes with a needle tool. Quilling with a needle tool requires some practice to achieve an evenly rolled coil with a tiny, round center.
Using the thumb and index finger of whichever hand feels most comfortable for you, roll the paper around the needle using relaxed, even pressure, while holding the handle steady with the other hand.
Many different glues are available to crafters, and each person seems to have a favorite when it comes to quilling. The main thing is to use only a scant amount as no glue should show on a finished project.
The most commonly recommended glue is any brand that dries clear. The main thing to remember is to use a very small amount so that no glue shows on your finished piece.
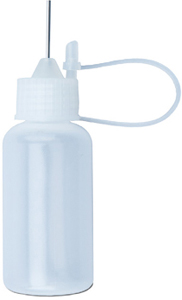
To apply glue to coils, many quillers use a refillable, precision-tip glue bottle. You can also dip the point of a paper piercer, T-pin or toothpick into a puddle of glue, then carefully apply to your quilled shape.
It is helpful to work on a nonstick craft sheet or waxed paper while assembling quilled components with glue.
When gluing assembled quilling to cardstock or mat board, spread a thin layer of craft glue on a nonstick surface. Hold the quilled shape with tweezers, touch the underside to glue and place directly on the backing surface. Avoid sliding the quilling into position as this will leave a shiny trail of glue. 

When making cards, use double-sided adhesive to secure cardstock or paper layers to a card front. A glue stick can also be used and allows for a bit of repositioning, but the layers may not hold as well long-term.
By Shelly Krzyzewski & Ann Martin
C Scroll
Roll each end of strip toward center; the midsection will curve gracefully.

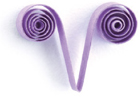
V Scroll
Fold strip in half and roll each end outward.
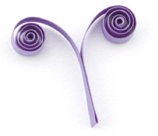
Modified V Scroll
Fold strip in half. Roll one end away from fold and the other end toward fold.

Y Scroll
Fold the strip of paper in half and roll the ends outward like a V Scroll. Spread glue between the strips at the base and press together.
Heart Scroll
Fold strip in half and roll each end inward toward midpoint.

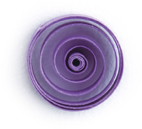
Tight Coil
Roll strip on tool and adhere end in place without allowing coil to relax. Slide coil off tool.
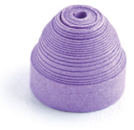
Domed Tight Coil (Grape Roll)
Form a Tight Coil and gently push up from underside of coil with the ball of a glass-head pin or fingers. Apply a thin coat of glue inside dome to hold rounded shape.
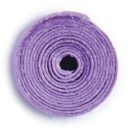
Loose (Closed) Coil
Roll one end of strip and slide coil off tool. Tighten coil or allow it to relax to create coil of desired size; adhere end to outer edge.
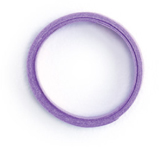
Ring Coil
Use a cylindrical object to form a ring of desired size. Wrap strip around the object several times; adhere end and slide coil off object.
Teardrop
Form a Loose (Closed) Coil. Pinch the joining spot to create a point.

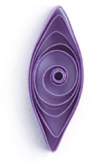
Marquise
Form a Loose (Closed) Coil. Pinch opposite sides to create two points, taking care to keep coil center positioned in center of Marquise.
Font size:
Interval:
Bookmark:
Similar books «Four Seasons Quilling Sampler»
Look at similar books to Four Seasons Quilling Sampler. We have selected literature similar in name and meaning in the hope of providing readers with more options to find new, interesting, not yet read works.
Discussion, reviews of the book Four Seasons Quilling Sampler and just readers' own opinions. Leave your comments, write what you think about the work, its meaning or the main characters. Specify what exactly you liked and what you didn't like, and why you think so.