 PUBLISHER: Amy Marson CREATIVE DIRECTOR: Gailen Runge EDITORS: Liz Aneloski and Katie Van Amburg TECHNICAL EDITOR: Helen Frost COVER/BOOK DESIGNER: April Mostek PRODUCTION COORDINATOR: Tim Manibusan PRODUCTION EDITOR: Jennifer Warren ILLUSTRATOR: Mary E. Flynn PHOTO ASSISTANT: Mai Yong Vang HAND MODEL: Kristi Visser PHOTOGRAPHY by Diane Pedersen of C&T Publishing, Inc., unless otherwise noted Published by C&T Publishing, Inc., P.O. Box 1456, Lafayette, CA 94549 DedicationWith needle and threadHer soft heart that was tatteredWas mended again.This book is dedicated to all whose heart may need a little mending here and there. May God bless you with a peace that passes understanding.
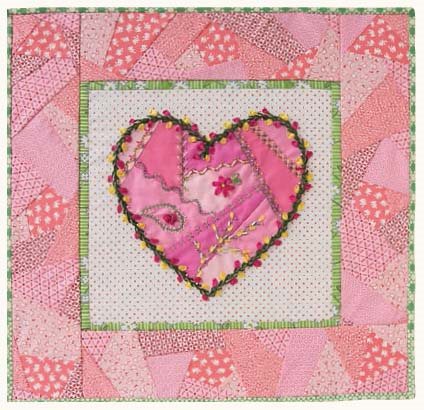 A Mended Heart, 20 20, by Valerie Bothell, 2016 Acknowledgments This book is a culmination of many years of stitching, and I would like to thank my family for supporting me by giving me the time to stitch daily. (My boys have spent many hours watching their mom play with her ribbons.) I would like to thank Jacob Bothell for the beautiful author photo he took for me and Craig Bothell for the many glasses of ice tea he brought me. I have many friends who inspired me and supported me as I wrote this book.
A special thank-you to Andrea Hankins, who came along and picked me up at just the right timethat means so much to me. Many thanks also to the members of my Bible study: Peggy Collins and her girls Lindsay, Candice, Shelly, Shiloh, Norma Ward, Donna Glanville, and Jillian Hurst. A very special thank-you to Amy Marson, Roxane Cerda, and Liz Aneloski for seeing my vision for this book and giving me the chance to make it come to life. I feel honored. 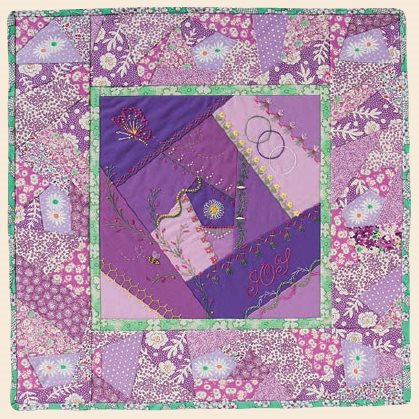 Joyful Beginnings, 17 17, by Valerie Bothell, 2015 Many thanks to Judith Baker Montano and Carole Samples for inspiring me many years ago when I started to crazy quilt. Introduction Welcome to the wonderful world of joyful embellishments! I have been a crazy quilter for over twenty yearsI never get tired of it! My eye has always been drawn to different embroidery stitches used in vintage quilts. Introduction Welcome to the wonderful world of joyful embellishments! I have been a crazy quilter for over twenty yearsI never get tired of it! My eye has always been drawn to different embroidery stitches used in vintage quilts.
I love to see how creative quilters were with their needle and thread. Several years ago, I had the opportunity to view one of the best-known crazy quilts, My Crazy Dream, which is owned by the International Quilt Study Center & Museum in Lincoln, Nebraska. It was made by Mary M. Hernandred Ricard between the years of 1877 and 1912. There were several things that surprised me about this crazy quilt, the main one being that it wasnt finished! There were places where the embroidery had been marked with a pencil but hadnt been completed. The stitching that is complete is beautiful, intricate, and creativeall things that I admire.
When I talk about making crazy quilts, people often seem to think that crazy quilting is too time-consuming, a lot of work, and maybe not even worth the effort. Then I think about Mary Ricard working on a crazy quilt for more than 35 years. Why did she spend so much time on that quilt? The answers may vary for each quilter, but I know why I work on crazy quilts: because I love it and it soothes my soul. Several years ago, I went through a fairly tough time and decided to challenge myself by making a crazy quilt in which every seam would have a different stitch combination. I started with a center section composed of 9 pink blocks. The quilt kept growing with the addition of a bright green border with 16 blocks.
About 6 months later, I decided to add an outer purple border with 24 blocks. At first the project seemed overwhelming, but I decided to think about it in smaller increments. I am very goal oriented, so I did the math. I realized that if I did 1 seam a day for 5 days a week, I would have a little over 250 seams done by the end of 1 year! As I stitched on my blocks every day and completed the goals I had made for myself, the tough time faded away; my heart began to heal. I also ended up with a beautiful crazy quilt composed of 49 blocks and 500 different stitch combinations. Valerie Bothell Crazy Quilt Piecing The 49 blocks included in my crazy quilt were made using the Montano Centerpiece Method. Valerie Bothell
 Crazy Quilt Piecing The 49 blocks included in my crazy quilt were made using the Montano Centerpiece Method.
In addition to this method, I have also included the Montano Fan Method as an option if you would like to mix the two different piecing methods in your quilt. I made each block 6 6 so that I could easily take them with me in a small bag. montano centerpiece method Cut a 5-sided fabric shape, and pin it right side up in the center of a muslin square. Cut a rectangular piece that fits on one side of the center fabric. Pin the rectangular piece wrong side up, aligning it with the straight edge. Sew with an seam allowance.
Press open. Working clockwise, cut the next piece of fabric. It should be long enough to cover the rectangular piece of fabric and the next side of the 5-sided shape. Pin the piece wrong side up and sew with an seam allowance. Trim the excess fabric from the seam and press open. TIP To make the block more interesting, start cutting different fabric shapes other than the rectangular shape you started with.
Repeat Steps 25 for the third, fourth, and fifth sides of the 5-sided shape. Continue working clockwise until you have completely covered the muslin. TIP It is always a good idea to repeat some fabrics a couple of times in a block. Strategically place them so that the block looks balanced. 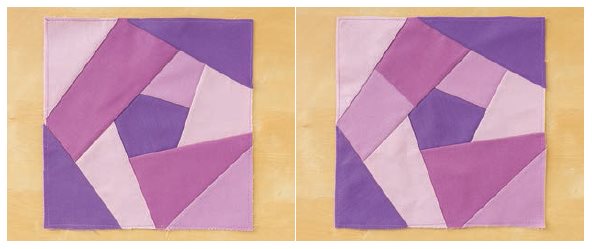 Trim the outside edges even with the muslin square. Sew around the perimeter of the block from the edge.
This keeps the outer edges of the fabric in place. TIP You can give a block a crazier look by sewing together two pieces of fabric and then treating them as one piece when you sew them in place. montano fan method Cut a 5-sided fabric shape with a 90 corner. Pin it to the upper left corner of a muslin square, right side up. Working clockwise, cut a rectangular piece that fits on the top right raw edge of the 5-sided shape. Pin the rectangular piece wrong side up, aligning it with the straight edge of the 5-sided shape.
Sew an seam allowance. Press open. Cut a third piece of fabric. It should be long enough to cover the previous rectangular piece of fabric and align with the next side of the 5-sided shape. (Some of the rectangle will extend beyond this new piece and will be trimmed later.) Pin the piece wrong side up and sew with an seam allowance.
Next page

 PUBLISHER: Amy Marson CREATIVE DIRECTOR: Gailen Runge EDITORS: Liz Aneloski and Katie Van Amburg TECHNICAL EDITOR: Helen Frost COVER/BOOK DESIGNER: April Mostek PRODUCTION COORDINATOR: Tim Manibusan PRODUCTION EDITOR: Jennifer Warren ILLUSTRATOR: Mary E. Flynn PHOTO ASSISTANT: Mai Yong Vang HAND MODEL: Kristi Visser PHOTOGRAPHY by Diane Pedersen of C&T Publishing, Inc., unless otherwise noted Published by C&T Publishing, Inc., P.O. Box 1456, Lafayette, CA 94549 DedicationWith needle and threadHer soft heart that was tatteredWas mended again.This book is dedicated to all whose heart may need a little mending here and there. May God bless you with a peace that passes understanding.
 A Mended Heart, 20 20, by Valerie Bothell, 2016 Acknowledgments This book is a culmination of many years of stitching, and I would like to thank my family for supporting me by giving me the time to stitch daily. (My boys have spent many hours watching their mom play with her ribbons.) I would like to thank Jacob Bothell for the beautiful author photo he took for me and Craig Bothell for the many glasses of ice tea he brought me. I have many friends who inspired me and supported me as I wrote this book.
 Joyful Beginnings, 17 17, by Valerie Bothell, 2015 Many thanks to Judith Baker Montano and Carole Samples for inspiring me many years ago when I started to crazy quilt. Introduction Welcome to the wonderful world of joyful embellishments! I have been a crazy quilter for over twenty yearsI never get tired of it! My eye has always been drawn to different embroidery stitches used in vintage quilts. Introduction Welcome to the wonderful world of joyful embellishments! I have been a crazy quilter for over twenty yearsI never get tired of it! My eye has always been drawn to different embroidery stitches used in vintage quilts.
 Crazy Quilt Piecing The 49 blocks included in my crazy quilt were made using the Montano Centerpiece Method. Valerie Bothell
 Cut a 5-sided fabric shape, and pin it right side up in the center of a muslin square. Cut a rectangular piece that fits on one side of the center fabric. Pin the rectangular piece wrong side up, aligning it with the straight edge. Sew with an seam allowance.
 Trim the outside edges even with the muslin square. Sew around the perimeter of the block from the edge.
 Cut a 5-sided fabric shape with a 90 corner. Pin it to the upper left corner of a muslin square, right side up. Working clockwise, cut a rectangular piece that fits on the top right raw edge of the 5-sided shape. Pin the rectangular piece wrong side up, aligning it with the straight edge of the 5-sided shape.