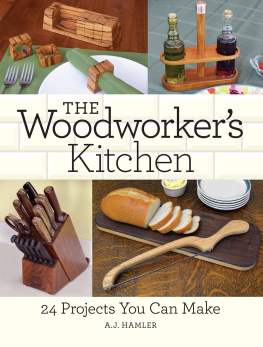
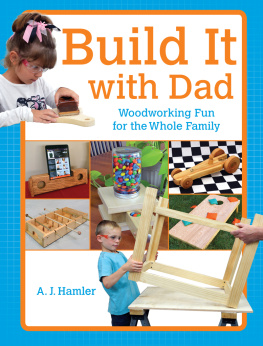
A.J. HAMLER
Thank you for purchasing this Popular Woodworking eBook.
Sign up for our newsletter and receive special offers, access to free content, and information on the latest new releases and must-have woodworking resources! Plus, receive a coupon code to use on your first purchase from ShopWoodworking.com for signing up.
or visit us online to sign up at
http://popularwoodworking.com/ebook-promo
CONTENTS
INTRODUCTION
MOST WOODWORKERS WILL tell you that their shop is their favorite place in the world, and rightly so. But imagine a woodworker with two shops. Say what? Two shops? What woodworker has two shops?
Well, I do.
My first shop is a converted extra-large two-car garage attached to my house, and it has just about everything I need to build just about anything I want. But the best part is that because the shop is attached to the house, all I have to do is walk through a door and Im in my second workshop: my kitchen.
Ive been cooking almost as long as Ive been woodworking or is that the other way around? Theres nothing I like better than wrapping up a great project my first workshop, and then capping off a perfect day by spending time in my second.
As woodworkers, we love making things for our homes. And, while all the woodworking magazines run projects for the kitchen from time to time, it occurred to me that a collection of these projects would appeal to those of us who enjoy creating things at both the table saw and the stove.

PROJECTS
Coming up with projects was easy I think my initial list had about a hundred possibilities but selecting two dozen proved a bit more difficult. So I looked at what we do and use in the kitchen, and decided to break it down into four categories.
The first three fall in a logical order. Before cooking everything we need is put away, so the first section of the book covers kitchen items related to storage. After that are projects relating to the actual preparation and cooking process, followed by a section devoted to serving a meal.
Throughout this process, though, are a number of kitchen and cooking items that could fall into more than one section the Kitchen Island and Paper Towel Holder would be at home in all of them so I thought a category for general accessories was a good match for those in the fourth section.
The one thing that ties every project together is that theyre all intended to complement and work with things you already have in your own kitchen. Others are designed around specific types of hardware or other non-wood materials youll need to purchase.
As such, every one of the projects is intended to be customized for your space, how you work, and with availability of hardware and other items in mind. So even though I give exact measurements for everything, these dimensions are intended to be fluid.
Sometimes the included measurements are optimal for best usage, such as the Silverware Organizer being sized to fit a standard kitchen drawer. Other times, though, hardware or other items determined the size. For example, the Spice Rack accommodates the particular bottles I got for it, while the slots in the Knife Block were positioned and sized to accept the knives I already own.

For that reason, begin every project with your tape measure or rule.
Ive sized the projects to match my needs and space, as well as the objects being used with them, but yours may be different. Cabinet clearances, countertop shapes and areas, drawer sizes and locations, sink and even utensil dimensions could all make a difference, so measure first then tweak project dimensions and details for a perfect fit.
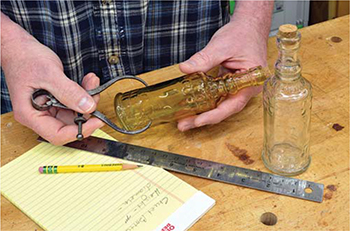
Before starting any project you plan to use with something you own or buy specifically for the project, always get accurate measurements and adjust project dimensions accordingly.
SAFETY
Woodworking has inherent dangers, and although being safe has a lot to do with common sense and simply paying attention, there are a number of specific safety practices that should never be violated. I mention safety a number of times for specific processes throughout this book, but here are a few things to keep in mind right from the beginning.
Follow all general safety rules, such as providing adequate lighting in your work area at all times, as well as sufficient ventilation when working with glue, paint and finishes. Above all, be sure to protect your eyes and ears.
Youll notice on many of the projects where Ive used a band saw to cut workpieces, that Ive raised the guide post pretty high. This is for photographic reasons only so you can see whats going on in the process being shown. However, for both safety and adequate control of the cut, always set your guide just above the surface of the wood when working with the band saw.
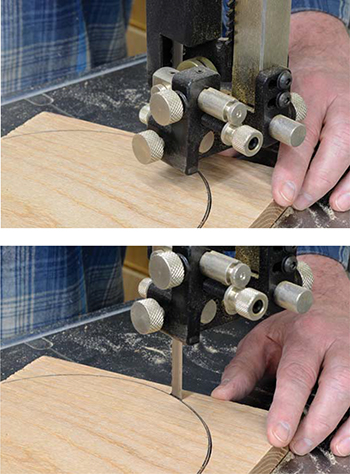
In proper use, a band saws guide post rides close to the workpiece, but Ive raised it to give a better look at the procedure being performed.
Likewise, youll notice Ive removed the guard on my table saw for photographic clarity. In your own shop, you should always use guards and other safety devices whenever working with power tools.
There are a lot of sharp edges involved in woodworking, but a new one has become a personal pet peeve of mine: staples. Stickers can fall off, so home centers now staple price tags on the ends of lumber. Be sure to remove these before working with the lumber, as they can ruin blades if you inadvertently cut through them. If whoever put the staple there wasnt careful, one end of the staple may have missed the wood and be sticking out just waiting to skewer an unsuspecting finger.
Even more distressing is the practice of driving multiple staples along wood edges, bridging boards to keep them from sliding when shipped and stacked. When boards are separated staples pull free on one end, leaving sometimes dozens sticking out. Be aware of these when grabbing lumber out of the racks and remove before working the lumber. (Tip: Slip a pair of pliers into your pocket before you go shopping, and pull those nasty things out even before you buy the wood.)
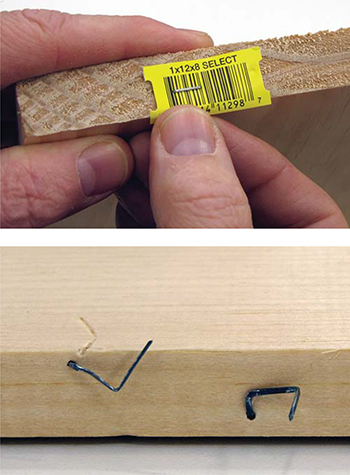
Be extremely careful with home center lumber, as youll frequently find lots of staples on the woods edges.

