Ken Horner - Kitchen projects for the woodworker : plans and instructions for 50 useful kitchen items
Here you can read online Ken Horner - Kitchen projects for the woodworker : plans and instructions for 50 useful kitchen items full text of the book (entire story) in english for free. Download pdf and epub, get meaning, cover and reviews about this ebook. year: 2019, publisher: Linden Publishing, genre: Children. Description of the work, (preface) as well as reviews are available. Best literature library LitArk.com created for fans of good reading and offers a wide selection of genres:
Romance novel
Science fiction
Adventure
Detective
Science
History
Home and family
Prose
Art
Politics
Computer
Non-fiction
Religion
Business
Children
Humor
Choose a favorite category and find really read worthwhile books. Enjoy immersion in the world of imagination, feel the emotions of the characters or learn something new for yourself, make an fascinating discovery.
- Book:Kitchen projects for the woodworker : plans and instructions for 50 useful kitchen items
- Author:
- Publisher:Linden Publishing
- Genre:
- Year:2019
- Rating:4 / 5
- Favourites:Add to favourites
- Your mark:
Kitchen projects for the woodworker : plans and instructions for 50 useful kitchen items: summary, description and annotation
We offer to read an annotation, description, summary or preface (depends on what the author of the book "Kitchen projects for the woodworker : plans and instructions for 50 useful kitchen items" wrote himself). If you haven't found the necessary information about the book — write in the comments, we will try to find it.
Ken Horner: author's other books
Who wrote Kitchen projects for the woodworker : plans and instructions for 50 useful kitchen items? Find out the surname, the name of the author of the book and a list of all author's works by series.


Kitchen projects for the woodworker : plans and instructions for 50 useful kitchen items — read online for free the complete book (whole text) full work
Below is the text of the book, divided by pages. System saving the place of the last page read, allows you to conveniently read the book "Kitchen projects for the woodworker : plans and instructions for 50 useful kitchen items" online for free, without having to search again every time where you left off. Put a bookmark, and you can go to the page where you finished reading at any time.
Font size:
Interval:
Bookmark:

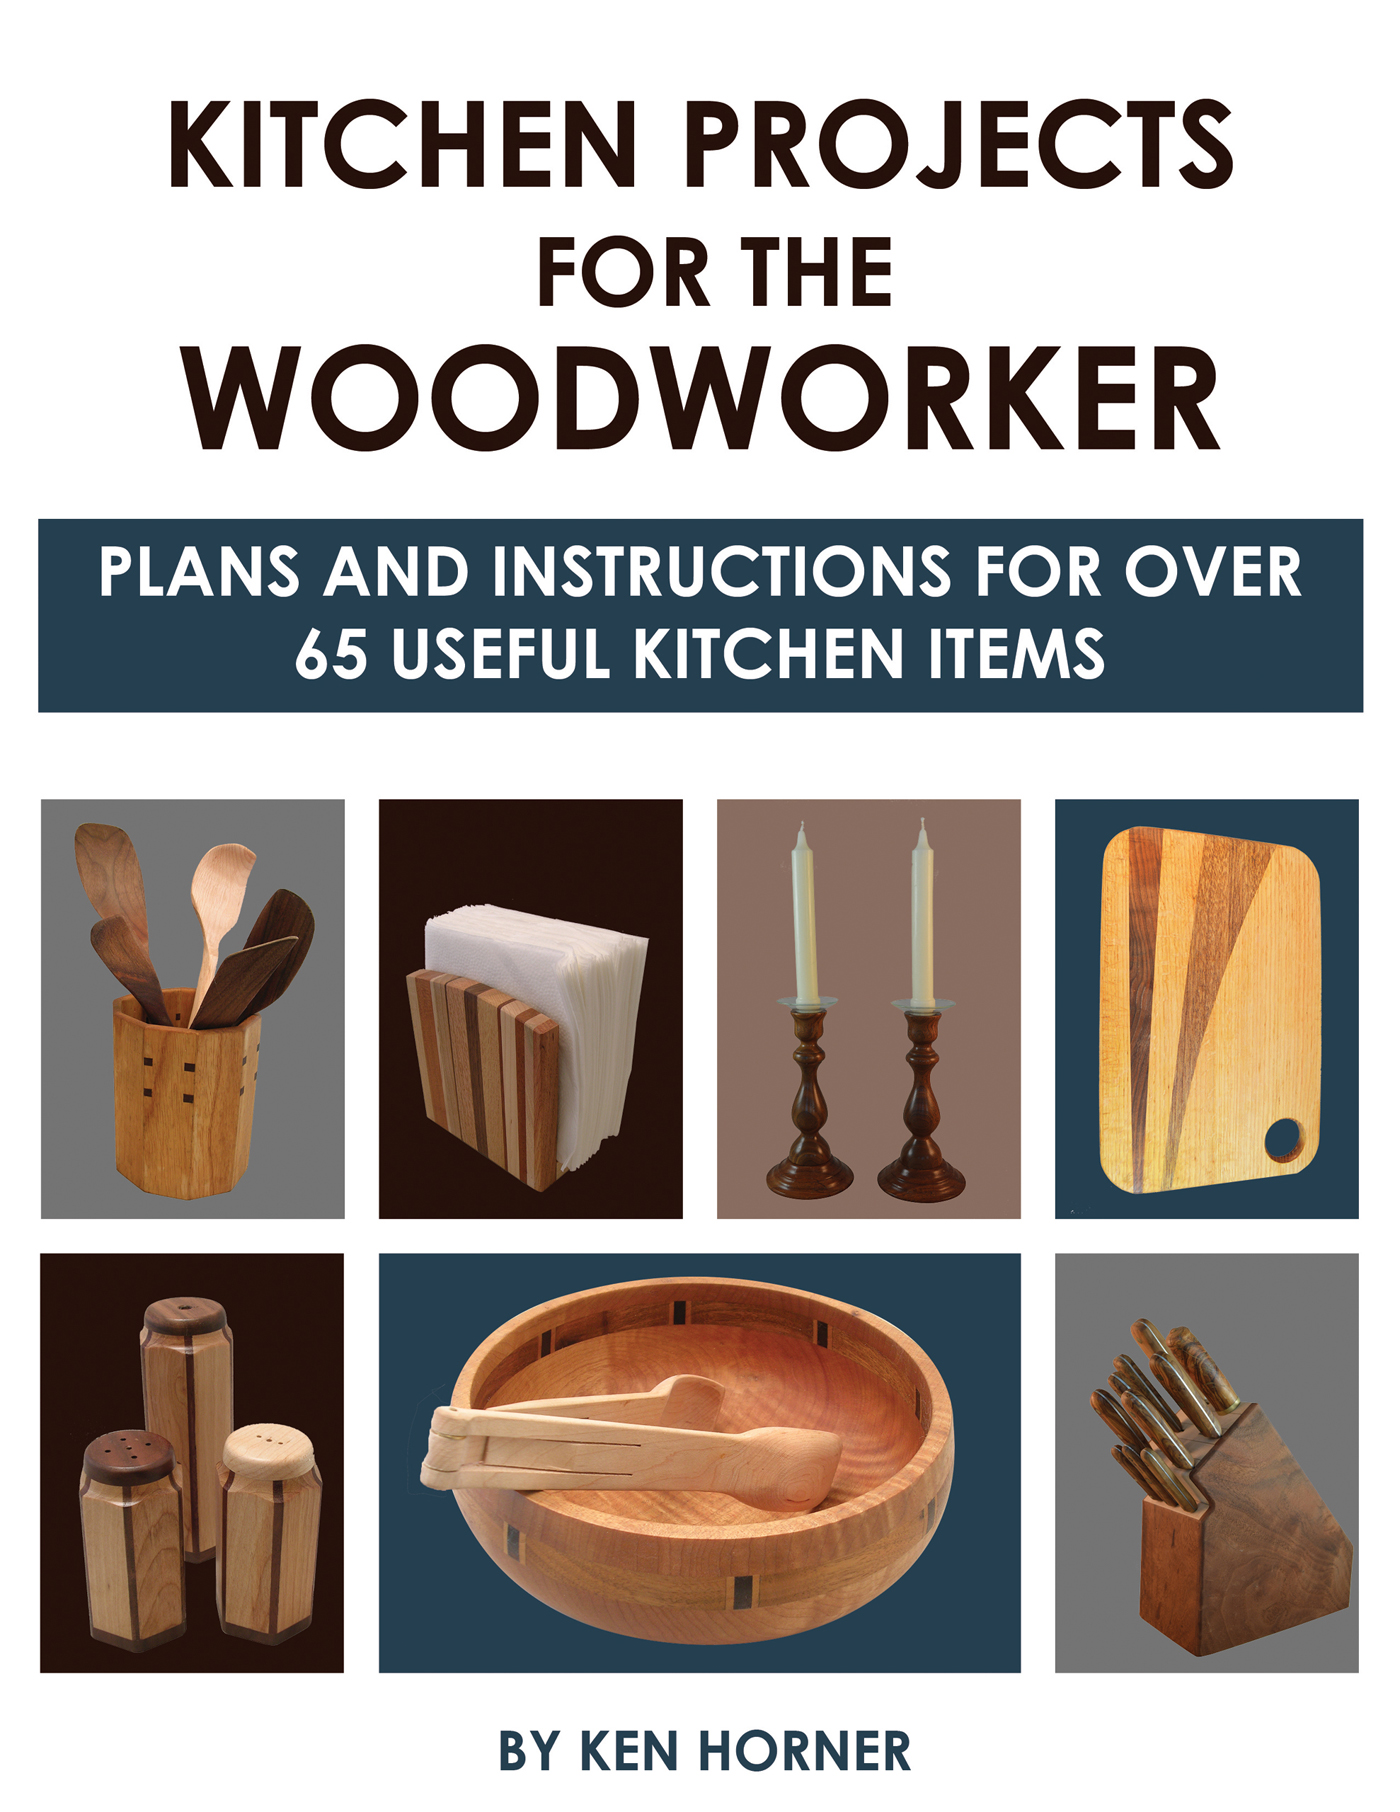
KITCHEN PROJECTS
FOR THE
WOODWORKER
KITCHEN PROJECTS
FOR THE
WOODWORKER
PLANS AND INSTRUCTIONS FOR OVER 65 USEFUL KITCHEN ITEMS
KEN HORNER

Kitchen Projects for the Woodworker
by Ken Horner
All rights reserved. No part of this book may be reproduced or transmitted in any form or by any means, electronic or mechanical, including photocopying, recording, or by an information storage and retrieval system, without written permission from the publisher.
Ken Horner 2019
Cover design by AE Media
Interior layout by Carla Green
ISBN: 978-1-61035-339-7
135798642
Linden Publishing titles may be purchased in quantity at special discounts for educational, business, or promotional use. To inquire about discount pricing, please refer to the contact information below. For permission to use any portion of this book for academic purposes, please contact the Copyright Clearance Center at www.copyright.com
Printed in the United States of America
Library of Congress Cataloging-in-Publication data on file
Linden Publishing, Inc.
2006 S. Mary
Fresno, CA 93721
www.lindenpub.com
CONTENTS
ACKNOWLEDGEMENTS
I want to express immense gratitude to my wife, Linda Horner, for all her help in moving this book from our workshop out into the big wide world. Linda converted my rough drawings and sketches into detailed figures allowing the reader to easily follow my thoughts from concept to finished project. She helped me choose which projects to include and made one herself; the Tall Salt and Pepper Shakers. Linda read the chapters as I was churning them out and pointed out errors and made many suggestions. She also was my most severe critic, something an author needs as he labors along, sometimes floating off into an intellectual stratosphere. Linda brought me back to earth.
Dave Peck and Jim DAnjou, wood-working colleagues of mine, read the chapters and made valuable comments on the projects, on the methods of construction and whether I was clear or dotty in my prose. Thank you both.
Tom Dotta of Hollister, Ca. showed me his Checkered-Type Cutting Board and his Double Spiral Trivet, both of which I altered slightly and included in this book. Marcus Moody of San Jose, Ca. made the Sugar Bowl and Spoon shown here in the Bowl section of the book. Jim DAnjou showed me his Sushi Board and John Wilson shared his Toaster Tongs with me. Lindas granddaughter, Emma, took a lot of fine photos.
Thanks to all of you,
Ken Horner
CHAPTER 1
CUTTING BOARDS
C utting Boards are the simplest and possibly the most useful of the wooden items we will make. They make great gifts because everyone uses them and often they can be constructed from scrap woods. There are six boards here: (A) Three-in-One Cutting Board (see ). With all the boards, make sure the wood is dry to about 6-8% moisture content; otherwise the finished boards might warp, twist and separate.
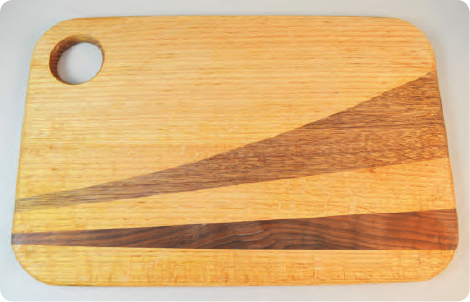
Photo 1A
Care of Cutting Boards: For wooden boards that will be used to cut meat, veggies and other wet materials, seal the wood with mineral oil. Do not use vegetable oils as they will spoil. Wash these boards in warm water and dry immediately. For boards that will be used for cutting bread and other dry foods, use polyurethane to seal the pores. To clean, merely brush them off.
A. Three-in-One Cutting Board. This is an easy project and you will make three beautiful boards. Each will have the same three types of wood but every board will be different depending on which wood is dominant. See where mahogany, walnut and red oak were used.
Tools and Materials Needed: Three pieces of wood each about 10" wide 15" long, band saw, blue tape (See ), drill press, 1-" Forstner bit and mineral oil.
Make the Board: Make sure all the pieces are the same size and thickness. The boards can be one piece or glued-up.
Cut the three boards to the same size; about " thick and 9" wide 13" long.
1A-D1. Three-in-One Cutting Boards. The boards are made of " material and are 9" wide 13" long.
Use blue tape and/or double-sided tape and fasten the three boards together in a stack.
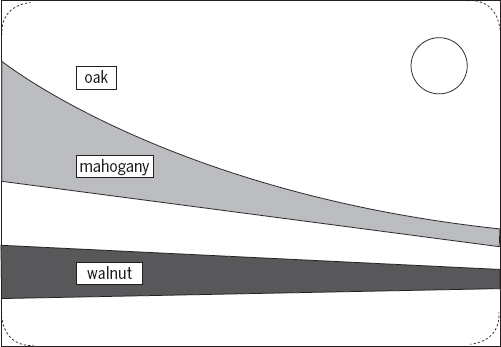
Draw the pattern as shown in on the top board. Draw the lines lightly so the marks can be sanded away later.
Use a 1-" Forstner bit and drill the hand hold through the stack. Also round off the four corners.
Now use a band saw and cut out the pieces as in .
Mix and match and glue the three different boards together as in .
Sand each board and ease the edges; use a rasp or a router with a round-over bit.
Finish with liberal coats of mineral oil. See .

Dont let your cutting boards lay in the sink. Water will warp them.
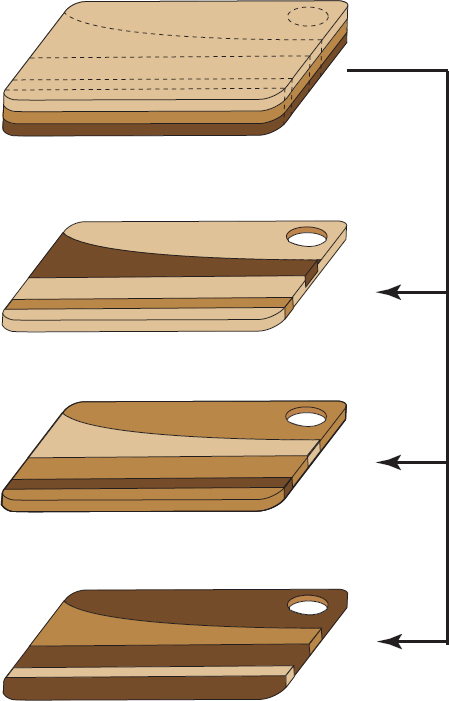
1A-D2. Stack-Cut the Three Boards. Drill a 1-" diameter hole as shown. Mix-and-match the pieces after cutting the stack with a band saw.
shows maple and walnut
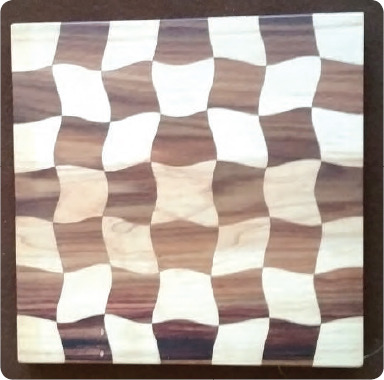
Photo 1B
Tools and Materials Needed: Two 9" square boards, band saw, blue tape, double sided tape, PVA glue, clamps and mineral oil.
Make the board: Make sure the two pieces are exactly the same size and the same thickness. You will cut seven strips, tape these strips back together again, rotate the board 90 and cut seven strips again. This will give you 49 little pieces to separate and glue back together to make two boards.
Align the two boards so their grain is parallel, i.e. the grain in both pieces run in the same direction.
Use double-sided tape and blue tape to fasten the two pieces together.
Put app tape on the top and trace the pattern, see .
Use a band saw and make the first cut as in . Set this strip aside.
Continue cutting until you have all of the seven strips. Keep the cut strips in order.
Use blue tape again and fasten the seven strips back together in the same fashion as they were before cutting as in .
Rotate the piece 90 and again draw the pattern matrix on the top, .
Use the band saw and cut off one strip.
Now take this first cut-strip apart and mix-and-match the pieces, starting to make the two cutting boards. See .
Tape the pieces in place and cut another strip.

1B-D1. Checker Board. Use this pattern to lay out the cut lines. Full size is 9 square.
Continue to cut only one strip, separate the pieces and then put each piece in its proper place in the new board. Do this before you cut the next strip and you wont get a lot of pieces lying around; with you wondering where they all go.
Font size:
Interval:
Bookmark:
Similar books «Kitchen projects for the woodworker : plans and instructions for 50 useful kitchen items»
Look at similar books to Kitchen projects for the woodworker : plans and instructions for 50 useful kitchen items. We have selected literature similar in name and meaning in the hope of providing readers with more options to find new, interesting, not yet read works.
Discussion, reviews of the book Kitchen projects for the woodworker : plans and instructions for 50 useful kitchen items and just readers' own opinions. Leave your comments, write what you think about the work, its meaning or the main characters. Specify what exactly you liked and what you didn't like, and why you think so.