Contents
Landmarks

CONTENTS
INTRODUCTION
This book is about developing a thoughtful, creative approach to drawing that will bring you not only pleasure but also the ability to produce distinctive artworks. There is a lot more to drawing than simply creating an accurate likeness of what is in front of you; it is also about selecting subject matter that appeals to you, familiarizing yourself with it and deciding how you can interpret it to make an attractive piece of work.
We shall look first at the building blocks of drawing, making simple marks and then developing these into shapes that appear three-dimensional on the page. You will see how even basic geometric shapes can be used to create interesting compositions with a sense of fun. In the second chapter we shall explore the natural world as a source of inspiration for creating decorative images. The forms and patterns to be found in nature are astounding in their variety, and you dont need to venture far to find them often no further than your back garden. Drawing plants, stones or shells is a great way to build up your skills until you feel sufficiently confident to tackle larger subjects.
In the final chapter, Ive chosen various subjects that appealed to me, either for their meaning or for their visual qualities, and shown how you can develop these from a sketch to a finished drawing and then distil the forms into a more decorative and stylized piece.
Throughout the book, I have tried to emphasize the process of drawing itself rather than fixating on results, as this will help you to focus and relax. You may be tempted to stick with the first rendition you make, but I encourage you to redraw and reinterpret subjects to see if you can take them a step further. This is never a futile exercise as you will learn something new every time you put pencil to paper.
I hope that you will find some new experiences in the drawing process with this way of approaching the craft of image-making. Good luck, and have fun!
Barrington Barber
Materials and equipment
You dont need much by way of materials and equipment to get started with drawing and in this book Ive deliberately kept things simple, so as to concentrate on the process of drawing itself.
Graphite pencils
The most basic tool is an ordinary pencil. They are available in different grades, those marked H being in the harder, paler range, not suited to our purposes here. HB is the middle of the scale then the grades run through B, 2B, 4B, 6B, 7B, 8B, each one darker and softer than the lower grade. If you want to buy just one, a B will do very well, but you may want to explore the B range further.

Graphite pencil
Propelling pencil
You will find a propelling pencil with a choice of leads very useful. The advantage of this type of pencil is that the leads are thin and produce a consistently fine line.

Propelling pencil
Blending stump
A paper stump is an artists tool for smudging pencil marks in order to achieve a smoothly blended tone.

Blending stump
Eraser
Of course you will need an eraser for removing guidelines and picking out highlights. Many artists favour what is known as a putty rubber, a very soft type of eraser which absorbs the graphite and doesnt leave any debris on the paper. You can mould it into a point for tackling small areas. A hard plastic eraser is more efficient for completely removing an area of graphite but should be used with care to avoid damaging the paper. For a large area, using the putty rubber first to remove most of the graphite and then finishing with a plastic eraser takes advantage of what each has to offer.
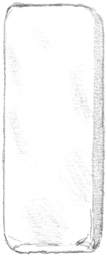
Eraser
Sharpener
You will need a good sharpener to hand, especially if, like me, you prefer drawing with softer graphite pencils in the B range; these wear down very quickly.
Graphic pen
Many of the final compositions in this book are done in graphic pen, which I find very useful in achieving a clear, formal result. Graphic pens are graded in thickness from 0.05mm to 0.8mm. I find the most useful size is 0.1mm because it gives a strong, thin line.

Graphic pen

