CHRISTMAS CRAFTS

CHRISTMAS CRAFTS
150 decorations, gifts, cards and treats to make for a perfect Christmas

ALAN D. GEAR AND BARRY L. FREESTONE

Contents
Introduction

O ne of the most fabulous things about Christmas is that it offers a wonderful opportunity for using all your craft skills to the full as well as a being a great time to try out something a little bit different. During our 25 years of working in the crafts arena we have met hundreds of interesting and enthusiastic crafters and in this book we have collected together some of our very favourite ideas for the Christmas season. Here you will find the very best projects to decorate the tree, table and home, delicious biscuits and treats to welcome your guests, as well as a range of desirable items as gifts for relatives and friends. As you plan and prepare for the festive season, consult this book for exciting ideas and information to guide you on your way and make this important holiday time really special for everyone.
In the first chapter we cover different ways to make your home look really festive and welcoming. Here we have some traditional projects, such as the Hanging Evergreen Wreath, but also some contemporary projects; the enigmatic miniature metal picture frames will look stylish and modern wherever you hang them. Chapter Two looks at projects to decorate the tree so why not try out the sumptuous braided baubles, or the pretty felt birds while Chapter Three looks at projects to decorate the table. Of course, one of the central parts of Christmas is giving gifts to our relatives and friends to let them know how much we have appreciated them over the year. Chapter Four shows you how to make really personal gift tags and cards and Chapter Five has a selection of gift ideas, including mouthwatering seasonal treats and a classically beautiful Fern-patterned vase. 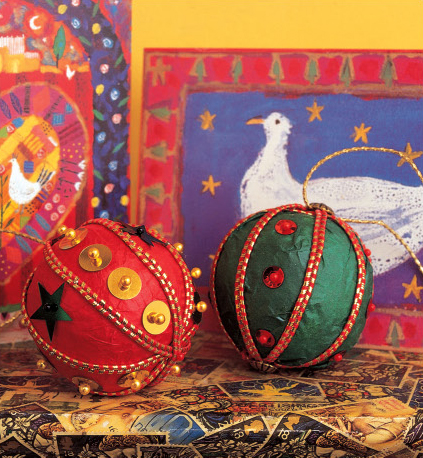
 Most of the projects featured in the book use seasonal materials and simple techniques, so no matter if you are a novice at craft or a seasoned professional, you will find something inside to try.
Everything is clearly explained, with a list of the materials you will need, detailed instructions and step-by-step photographs, as well as lavish photography of the finished item.  Packed with festive and creative ideas, Christmas Crafts is the definitive guide to creating the perfect Christmas. Let us show you how to make yours really special this year. Alan D. Gear and Barry L. Freestone

Decorating
the
Home

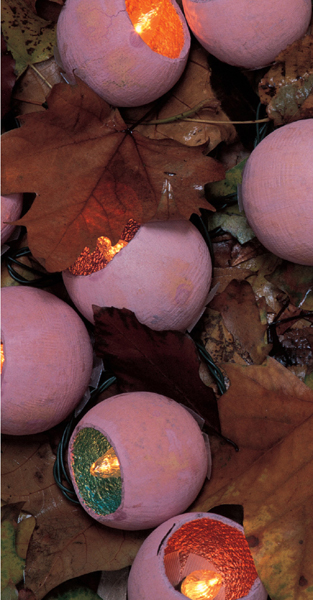
Gourd Fairy Lights
Outdoor fairy lights really do create an enchanting atmosphere for Halloween parties or to decorate a tree close to the house.
Bell cups are small dried gourds that are sold for use in dried flower arrangements, usually fixed to sticks which are easily removed. They can be found in either a pale natural wood colour or sometimes dyed in bright or deep colours. As well as being useful for floral displays, they make colourful covers for fairy lights. Painting the insides of the cups in bright metallic colours will add an iridescent shimmer when the lights are switched on. 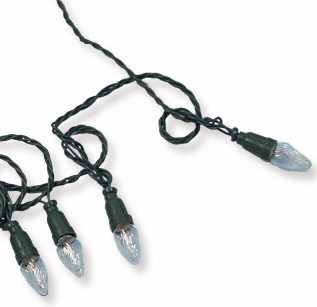
YOU WILL NEED
Dried gourds (1 for each fairy light)Metallic paintsPaintbrushesScrap piece of cardBradawlPlastic cardScissorsA string of outdoor fairy lightsEpoxy resin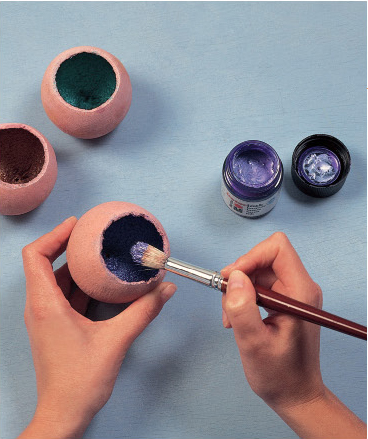
Make sure that the insides of the gourds are clean and dust-free.
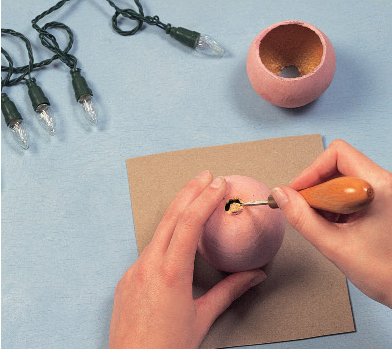
Place the gourd on a piece of card to protect the work surface and make a hole in the base of each gourd with a bradawl.

Place the gourd on a piece of card to protect the work surface and make a hole in the base of each gourd with a bradawl.
Start by piercing the woody base from the right side and enlarge the hole bit by bit. The hole needs to be just big enough for the light bulb to go through. 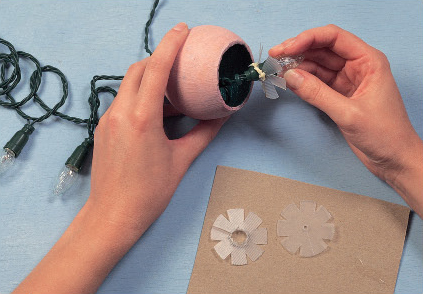 Cut a pair of 4.5cm (1in) circles out of plastic card for every light. Make a hole in the centre of one card circle just big enough for the wire flex to go through. Make a larger hole in the second circle, big enough to fit around the base of a light. Cut through each circle from the outside edge to the central hole and snip out small V shapes around the outside.
Pull a light bulb through the hole in the gourd base and place the circle with the larger hole around the base of the light. Apply glue to the underside of the circle and stick in place inside the gourd, pulling the light and flex back into the cup. 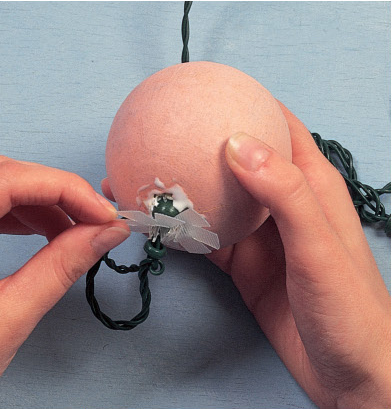 Place the second circle with the smaller hole around the flex at the outer base of the gourd and glue in place to secure the light inside. Fix the other lights in place inside the gourds in the same way.
Gilded Candlestick
This elegant , tall wooden candlestick has been decorated using a different gilding technique to the one shown on . Instead of using gold leaf, the metal (in this instance, copper) has been mixed into a wax base to produce a fine powder.









 ALAN D. GEAR AND BARRY L. FREESTONE
 O ne of the most fabulous things about Christmas is that it offers a wonderful opportunity for using all your craft skills to the full as well as a being a great time to try out something a little bit different. During our 25 years of working in the crafts arena we have met hundreds of interesting and enthusiastic crafters and in this book we have collected together some of our very favourite ideas for the Christmas season. Here you will find the very best projects to decorate the tree, table and home, delicious biscuits and treats to welcome your guests, as well as a range of desirable items as gifts for relatives and friends. As you plan and prepare for the festive season, consult this book for exciting ideas and information to guide you on your way and make this important holiday time really special for everyone.
 Most of the projects featured in the book use seasonal materials and simple techniques, so no matter if you are a novice at craft or a seasoned professional, you will find something inside to try.
 Packed with festive and creative ideas, Christmas Crafts is the definitive guide to creating the perfect Christmas. Let us show you how to make yours really special this year. Alan D. Gear and Barry L. Freestone


 Make sure that the insides of the gourds are clean and dust-free.
  Place the gourd on a piece of card to protect the work surface and make a hole in the base of each gourd with a bradawl.
  Cut a pair of 4.5cm (1in) circles out of plastic card for every light. Make a hole in the centre of one card circle just big enough for the wire flex to go through. Make a larger hole in the second circle, big enough to fit around the base of a light. Cut through each circle from the outside edge to the central hole and snip out small V shapes around the outside.
 Place the second circle with the smaller hole around the flex at the outer base of the gourd and glue in place to secure the light inside. Fix the other lights in place inside the gourds in the same way.