A step-by-step guide


The Crowood Press
First published in 2010 by
The Crowood Press Ltd
Ramsbury, Marlborough
Wiltshire SN8 2HR
www.crowood.com
This e-book first published in 2014
Kathy Abbott 2010
All rights reserved. No part of this publication may be reproduced or transmitted in any form or by any means, electronic or mechanical, including photocopy, recording, or any information storage and retrieval system, without permission in writing from the publishers.
British Library Cataloguing-in-Publication Data
A catalogue record for this book is available from the British Library.
ISBN 978 1 84797 784 7
Photography by Jon Cefai
www.kentlyons.com
Designed by Purpose
14a Shouldham St.
London W1H 5FG
www.purpose.co.uk
Contents
How to use this book
This book has been written and designed to be easily understood and followed. The reader is guided through the projects by following numbered step-by-step instructions. Some of the instructions are accompanied by an illustration, these are marked by a red number.
Acknowledgements
This book would not have been possible without the help of the following people: Rob Howsam, Tracey Rowledge, Jon Cefai, Kate Edmondson, Adam Browne, Felix Ackermann, Paul Felton , Louisa Phillips and Matt Welch. I am incredibly grateful to Tracey for proof reading the typescript, for her many suggestions and for being such a wonderful friend. Huge thanks go to Jon for all his hard work on the photography and for his endless patience. I thank Kate for her help with proof reading in the early stages and for her constant support. Grateful thanks go to Adam, Felix, Paul , Louisa and Matt of Purpose for working so hard on the design of this book. I am indebted to all of my bookbinding tutors but particularly Jen Lindsay for teaching me not only how to refine my skills, but a philosophy. I am grateful to all of my students, past and present and to my work colleagues for sharing their ideas and knowledge. Lastly, I would like to thank my husband Rob for his illustration and design skills, for proof reading, and for always supporting me. I couldnt have done it without you.
Preface
Bookbinding is a wonderful subject, and to me it is like magic: you start with a few sheets of paper and some thread and before you know it, hey presto! You have made a book! I have been teaching bookbinding for over ten years and I never tire of seeing the excitement on a students face after creating their first book or first born, as I call it. Bookbinding is enjoying a renaissance, and it is a joy to see my classes full of passionate, committed individuals who cant wait for the next session. It is from my teaching that this book evolved: I wanted to offer a solid foundation in basic bookbinding for those who are unable to attend a bookbinding class.
This is a book that people can work from at home, following clear, step-by-step instructions. It is aimed at complete beginners, but I hope it will also be useful to those of you who wish to improve your knowledge or to refresh your memory. You can work through each project in turn, or dip in and out as you wish. If possible, try to make more than one of each of the projects: you will be amazed at how much you improve if you do.
I have had many years of pleasure while bookbinding, and I only hope that I can pass on some of that enjoyment to you. And bookbinding is completely addictive, so be prepared to get hooked!
The Elements of a Book
Each of the projects in this book is taught to a professional level, using good quality, acid-free materials. My hope is that your bindings will last for a very long time and so it is important that you use the best materials you possibly can, right from the start. To my mind,your first bindings are as important as your last, and if you use inferior materials, the longevity of your books will be compromised.
The Elements of a Book
It is important that you are familiar with the names of each part of a book:
The book itself (omitting the covers) is called the book-block. |
The top part of the book (when it is standing upright) is called the head. |
The bottom part of the book (when it is standing upright) is called the tail. |
The back part of the book is called the spine. |
The open part at the front of the book is called the fore edge (or front edge). |
The point where the front board and the back board hinge from is called the joint (there is an inner and outer joint). |
The protrusions of board around the book-block are called the squares. |
There are many more book words, and these are explained throughout the book and are also listed in the glossary at the back of the book; these words are indicated in bold type in the text.
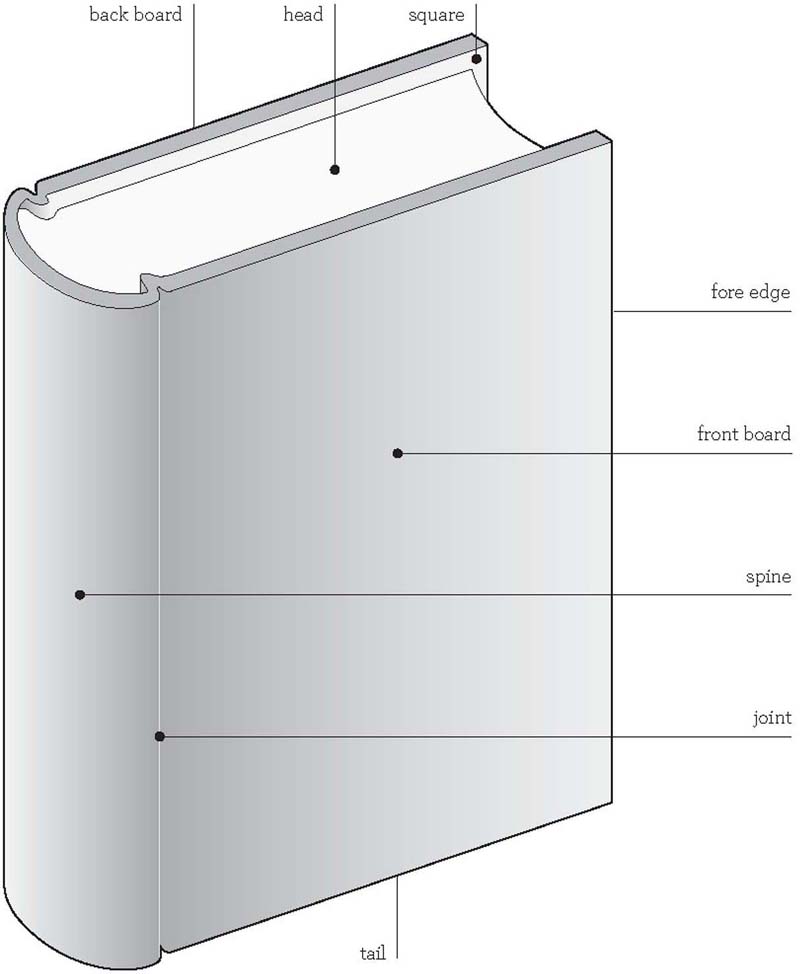
The elements of a book
Materials
Paper and Board
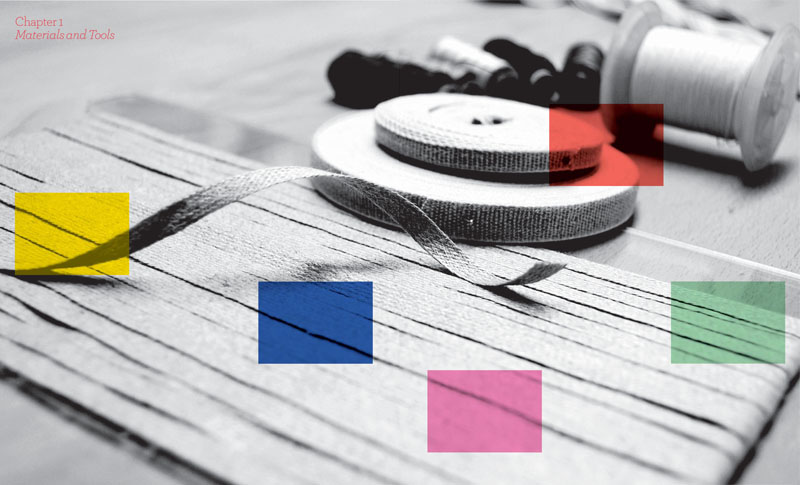
Archival kraft paper
Calcium carbide buffered paper of 120gsm, used to line the spine and boards of books. Never use brown wrapping paper, which is also called kraft paper, as it is acidic. Bearing in mind that the kraft paper will always be in very close contact with the book-block, it is foolish to use an acidic variety. Archival kraft comes in three colours: brown, blue-grey and sand.
Archival manilla
Calcium carbide buffered paper of 225gsm; it is used as a spine stiffener in case-bindings, and can also be used when you need card. It looks exactly the same as archival kraft, but is thicker. It too comes in brown, blue-grey and sand.
Card
Use any acid-free card for the pages of photo albums/memory books/scrapbooks; the weight of the card should not exceed 350gsm. Card is also useful for making pricking templates and for filling in.
Decorative paper (see also Paper, below) Any decorative paper can be used for covers or endpapers printed, marbled, paste papers and so on but bear in mind that these should not be too thin (the adhesive will strike right the way through) or too thick (it will be difficult to turn in without fracturing the paper). Try to use acid-free papers (if possible) of between 60 and 130gsm.
Japanese tissue
Very fine, strong tissue, used for paper repair and to guard the spine folds of the sections of a book. There are hundreds to choose from. See the Japanese Tissue section in the Quarter Leather Binding project (see ) for more information.
Millboard
A strong, hard-rolled board, used to make the covers of books. If possible, only acidfree or archival board should be used, for the longevity of your books. Greyboard should not be used, as it has poor strength and is not acid-free. Millboard is available in 13mm thicknesses, the most useful being 2mm.

