Introduction
Felt is awesome!
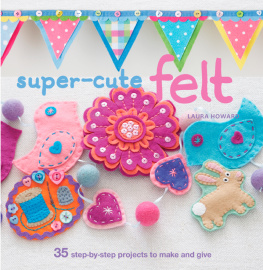
Ive been sewing things with felt for as long as I can remembermy mom still has the felt apple I stitched for her in my first year of school. Felt crafting used to be thought of as just a simple hobb y for kids learning to sew, but in recent years its become hugely popular with crafters of all ages.
Felt is a really easy material to work with because it doesnt fray when cut. Its also perfect for making small projects that are quick to sew and dont require a huge outlay in materials. Most of the designs in this book can be made with the sheets or squares of felt that you can find in any craft store. If you dont have a craft or notions store near you, you can find an amazing range of colors and types of felt online, including 100 percent wool felt, eco-friendly felt, patterned felt, and fun supplies such as felt beads. Theres more information on the different types of felt included in the materials section (page 6), and a list of suppliers is at the back of the book (page 128).
All the projects are hand-stitchedno sewing machine required! You also dont need any advanced sewing skills; the patterns use just a handful of basic stitches and all of these are explained in the techniques section (page 8), along with tips on working with felt.
If youre just learning to sew, or want a quick project for a rainy afternoon, try something small lik e one of the brooches (pages 14 and 30), the napkin rings (page 72), or an ornament (pages 100 and 104). The large designs like the tea cozy (page 76) and the cushion (page 82) are more time-consuming, but theyre perfect for sewing gradually in the evenings in front of the television, and the finished result will be something you can be really proud of.
You can also adapt the designs in this book to suit youuse your favorite colors, resize the patterns to make them in custom sizes, or add more beads and sequins. Lots of the designs can also be personalized to make extra-special gifts.
If youre a confident crafter you can even mix-and-match motifs and projects to create new designs. For example, you could make brooches using a bumblebee, a cupcake, or the small toadstool; sew three pansies onto a lavender sachet; sew one peacock feather onto a headband; stitch clusters of forget-me-nots onto small backing pieces of felt to make pretty hair clips or barrettes; use the apple and pear motifs to make a pair of coasters; or use the cake stand design to decorate a cushion.
I hope this book gives you many happy hours of sewing!
Laura Howard

dachshund cuff
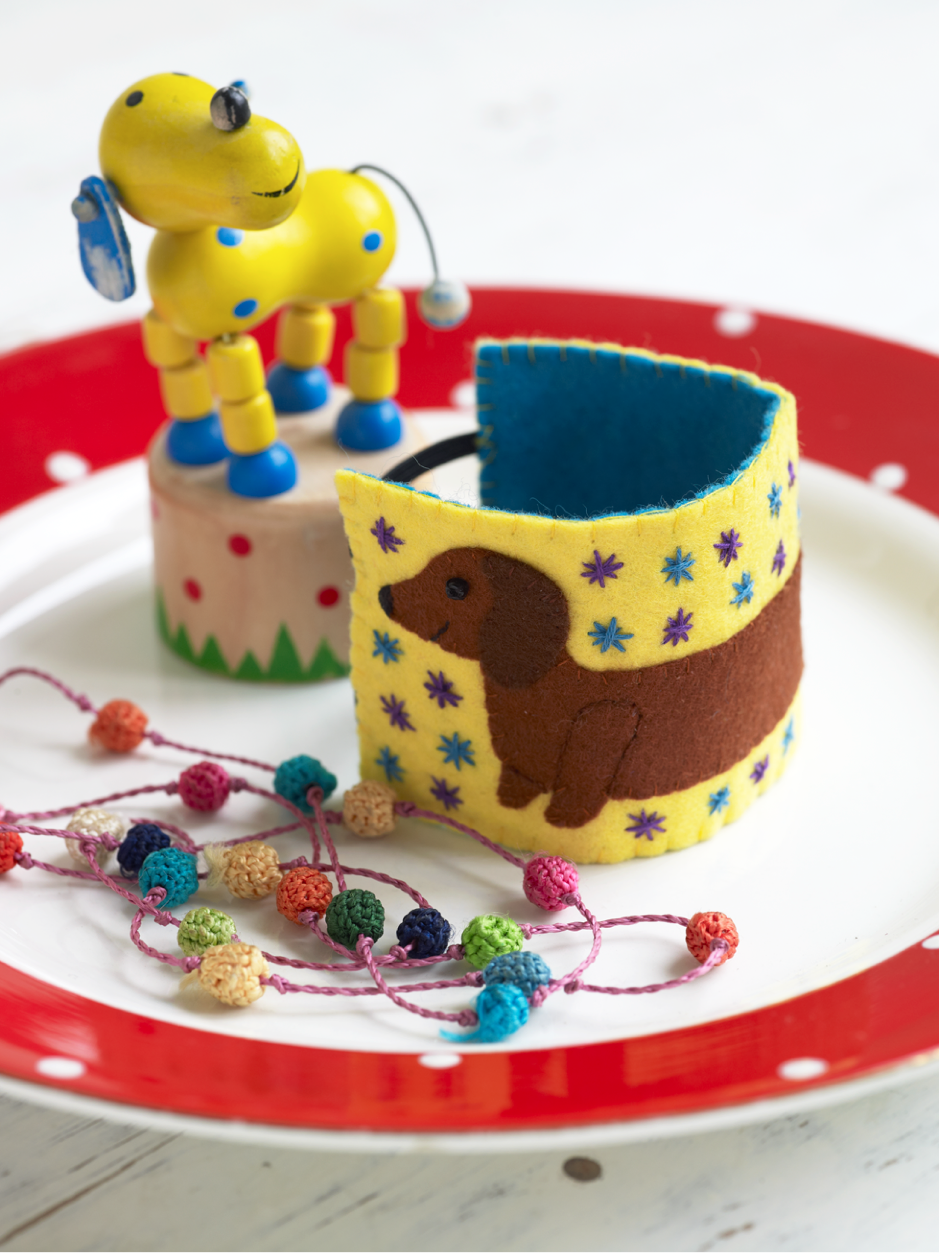
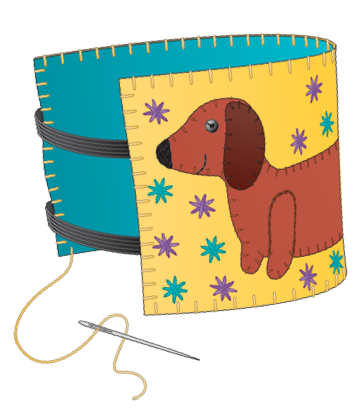
Is there a cuter dog than the dachshund? This extra-long sausage dog will spend many happy hours chasing its own tail round your wrist. I love the yellow and turquoise color combination, and the darker turquoise prevents the workings of the embroidery flosses showing through the yellow felt.
Y o u will need:
Templates on page 111
Brown felt, approx. 2 6in (6 15cm)
Small piece of dark brown felt
Yellow felt, approx. 2 6in (7 17cm)
Turquoise felt, approx. 2 6in (7 17cm)
Brown, dark brown, black, turquoise, and yellow sewing threads
Purple, turquoise, and black stranded embroidery flosses (threads)
Black seed bead
Black elastic, in (5mm) wide, approx. 4in (10cm) long
Needles, scissors, pins
Using the templates, cut out a brown dog and a dark brown ear. For the background, cut one yellow and one turquoise rectangle, each measuring 2 x 6in (5 x 15cm).
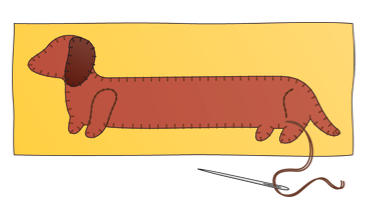
Pin the dachshund to the center of the yellow cuff piece, and sew around the edge with straight stitch in brown sewing thread. Sew the ear in place with straight stitch in dark brown sewing thread. Then use doubled dark brown thread to backstitch lines marking the shapes of the legs on the dogs body, using the dotted lines on the template as a guide.
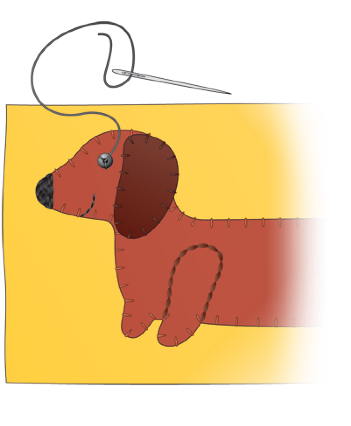
Cut a length of black embroidery floss and separate half the strands (so for six-stranded floss, use three strands). Switch to a larger needle if necessary and sew a few stitches close together to form the dogs nose. Use black sewing thread to backstitch a curved line to form the smile, and sew on a black seed bead for the eye. Sew the bead in place with three or four stitches, sewing it flat like an O.
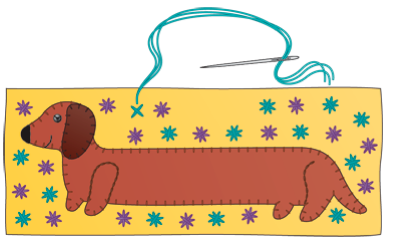
Fill in the empty space around the dachshund with small embroidered turquoise and purple stars. Use half the strands of embroidery floss (as before), and sew four overlapping stitches to create each eight-pointed sta r.
Cut two lengths of black elastic, each approximately 2in (5cm) long. To make a larger or smaller cuff, cut enough elastic to make the cuff fit your wrist, plus an extra in (2cm) to allow for the elastic to be sewn to the felt. Sew the elastic to the turquoise cuff piece, positionin g it so it overlaps the felt by about i n (1cm) at each end and whip stitching it in place with turquoise sewing thread. Sew both lengths of elastic to one end of the cuff and then fold the cuff around to make a circle so you can sew the elastic to the other end.
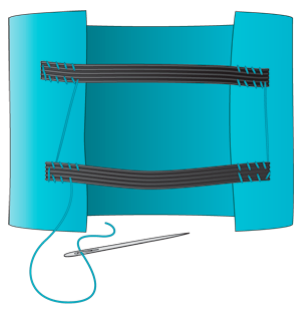
S ew the decorated yellow cuff piece onto the turquoise cuff piece, sandwiching the ends of the elastic between them. Pin the layers together with the turquoise felt on the insid e and sew the edges together with blanket stitch in yellow sewing thread. Finish the stitching neatly on the inside of the cuff.
retro corsage
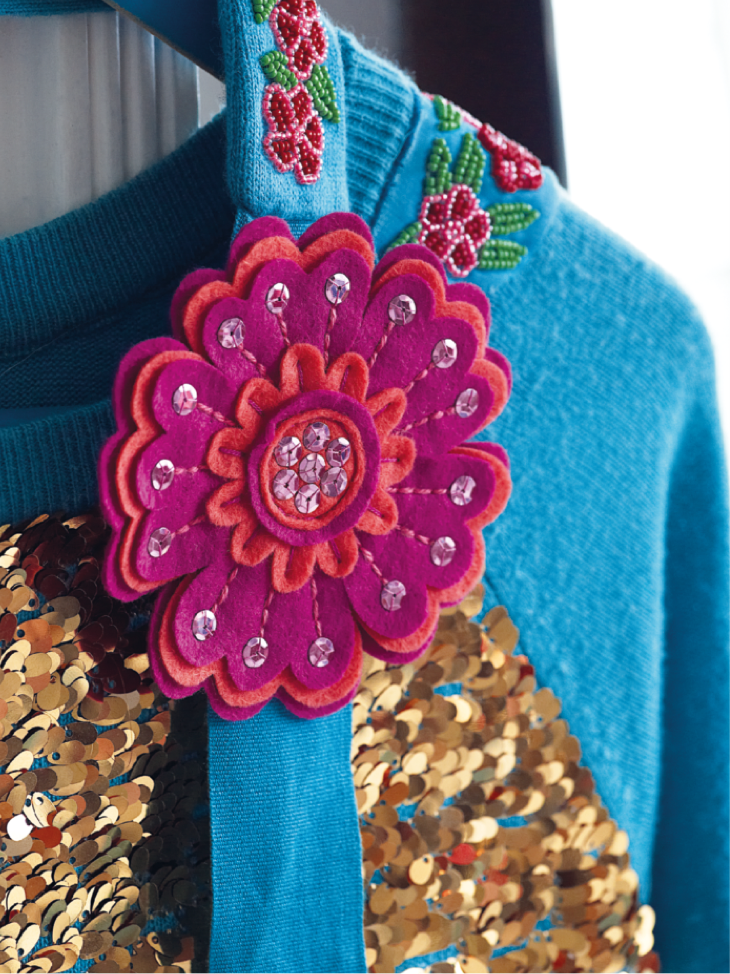
This large flower brooch was inspired by the floral patterns found on vintage fabrics and wallpapers. Wear it on your coat to chase the winter blues away, or sew a barrette or an elastic headband onto the back instead of a brooch and we ar it in your hair for parties.
Y o u will need:
Templates on page 112
Magenta felt, approx. 8 9in (20 23cm)
Coral or orange felt, approx. 4 7in (12 19cm)
22 pink sequins, approx. in (6mm) diameter
Pink and purple sewing threads
Pink and magenta stranded embroidery flosses (threads)
Brooch finding
Needles, scissors, pins
Use the templates to cut out all the pieces. From magenta felt cut out corsage 1, corsage 3, center 2, and two corsage back pieces. From coral felt cut out corsage 2, center 1, and center 3. Youll end up with pieces that, when sewn together, alternate between the two colors.
Next page
