The VW
Air-Cooled Engine
Repair and Maintenance
The VW
Air-Cooled Engine
Repair and Maintenance
Ken Cservenka

THE CROWOOD PRESS
First published in 2018 by
The Crowood Press Ltd
Ramsbury, Marlborough
Wiltshire SN8 2HR
www.crowood.com
This e-book first published in 2018
Ken Cservenka 2018
All rights reserved. This e-book is copyright material and must not be copied, reproduced, transferred, distributed, leased, licensed or publicly performed or used in any way except as specifically permitted in writing by the publishers, as allowed under the terms and conditions under which it was purchased or as strictly permitted by applicable copyright law. Any unauthorised distribution or use of thistext may be a direct infringement of the authors and publishers rights, and those responsible may be liable in law accordingly.
British Library Cataloguing-in-Publication Data
A catalogue record for this book is available from the British Library.
ISBN 978 1 78500 376 9
CONTENTS


PREFACE
I was first introduced to the Volkswagen marque by a family friend of one of my school friends; from memory, it was an oval-windowed 1955 model and I was fascinated by the engine note, the fact that it always started within seconds and the glowing reports from the owner. I then thought nothing more about Volkswagens until I visited a friend down in Devon who owned a 1967 1500 Beetle. We went out in the Beetle and on the way to his home I was asked if I wanted to drive it, a chance I jumped at. As we were travelling at 40mph in top gear my friend told me to press the clutch pedal, which I did. My friend then slammed the gear lever into second and told me to release the clutch pedal. The car screamed in protest but my friend stated that in any other car the gearbox would have exploded. I was already hooked before this amazing demonstration and on Guy Fawkes night 1969 I bought my first Beetle a 1963 1200 Deluxe. I drove that car until 1983 and covered over 160,000 miles, including camping trips with my wife and three children with all the gear. I then bought a 1968 auto stick-shift Beetle; and in 1989 a 1974 Bay Window camper, a Devon Eurovette conversion, joined the fleet. I also own a 1967 1500 Beetle and it is this car that is featured in the Type 1 engine rebuild in this book. I moved to the Cirencester area in 1972 and as well as repairing my own Beetle I repaired and serviced many air-cooled Beetles and Type 2 vehicles from the local area. In writing this book my aim was to produce a no-nonsense engine manual that any practical-minded person can understand, with a step-by-step guide to building a Type 1 engine. Most operations described can be applied to the Type 4 unit used in 1700, 1800 and 2-litre Transporter models as well. I have deliberately not gone into such technicalities as blueprinting as it is unnecessary on an engine built for everyday usage.
ACKNOWLEDGEMENTS
I would like to thank the following for their help in producing this book: Richard Copping for encouraging me to write this book; Neil Birkitt for looking over my words and helpful advice; the guys at the Engine Shop, especially Jim Gray, for the machine work on the crankcase and crankshaft; Richard Hulin for further machine work and for allowing me the run of his workshop to take photographs of a Type 4 engine; and finally my wife, Mary, for her patience and understanding.
CHAPTER 1
WORKSHOP ESSENTIALS
The Volkswagen air-cooled engine is relatively simple to maintain and repair and, although the flat-four layout is fairly unconventional today, a few well-chosen garage essentials and tools are all that is needed for the home mechanic to be able to tackle most jobs.
A good start is the tool kit that was supplied with the car, consisting of a body jack, a few useful spanners, hub cap-removal tool and a double-ended box spanner. One end of the box spanner is for removal of the wheel bolts while the other end doubles as a spark plug removal tool and is the correct size to remove or tighten the nut on the generator especially useful for replacing a broken fan belt out on the highway.
However, the body jack should only be used to change a wheel in the event of a puncture out on the road, as it isnt suitable for any major repairs. The tool kit supplied with the car should be kept in the car with a few additions for problems encountered when away from home. I personally carry the tools shown in .
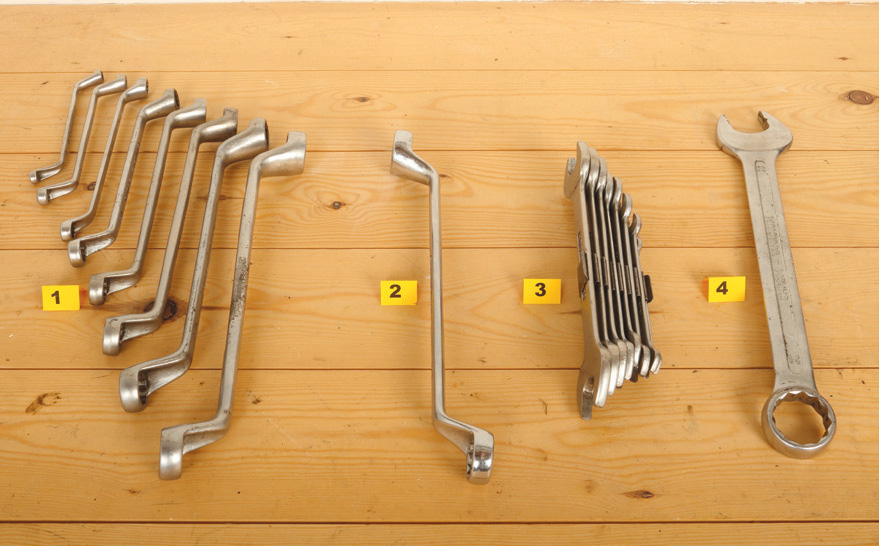
Fig 1.2 Spanners for maintenance of air-cooled Volkswagen engines: 1) ring spanners, 622mm; 2) additional 21mm spanner for generator pulley nut, Type 1 engine; 3) open-ended spanners, 622mm; 4) additional 30mm combination spanner for the crankshaft pulley nut, Type 1 engine.
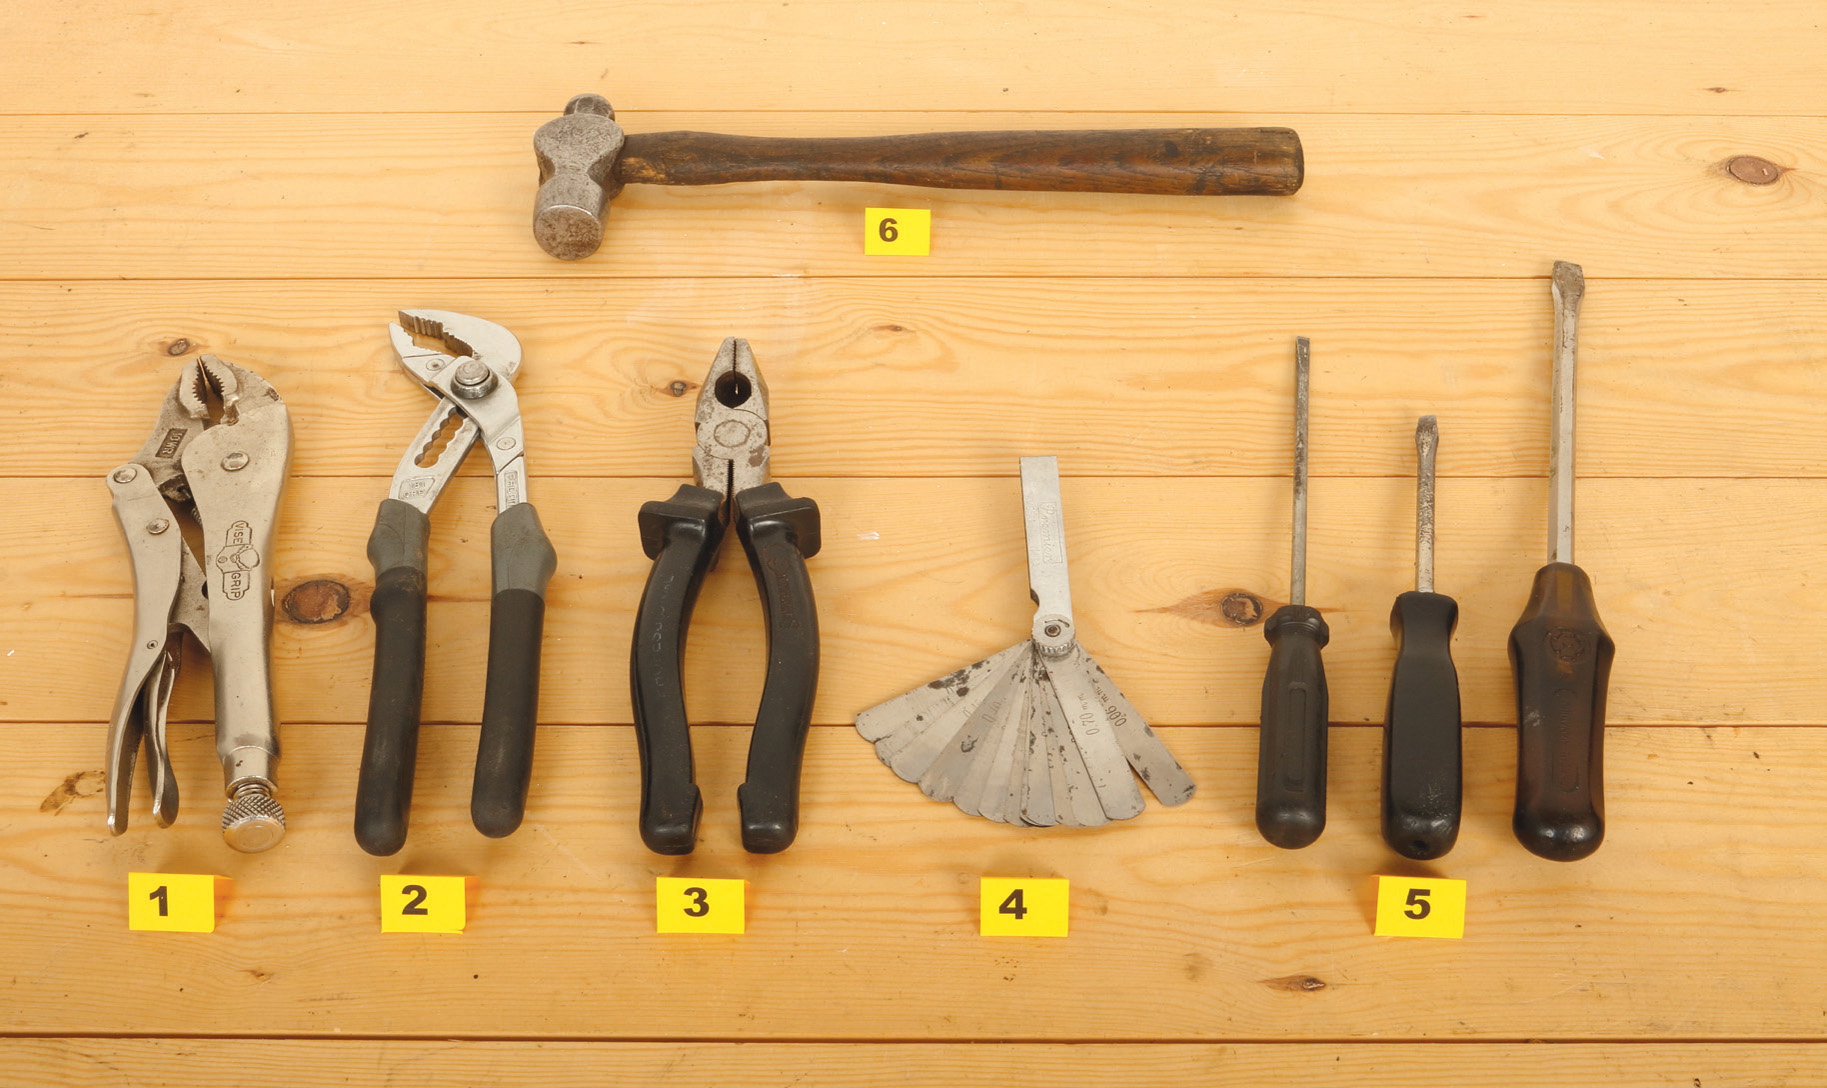
Fig 1.3 Other basic tools for working on the air-cooled engines: 1) locking pliers; 2) expanding pliers; 3) pliers; 4) metric feeler gauges; 5) assortment of screwdrivers; 6) hammer.
Some of the repair procedures described in this book involve using heat, either a blowlamp or boiling water, so for safety wear leather welding gloves, as the components are very hot to handle. When using a blowlamp or in any situation where metal fragments may become airborne, always protect your eyes with safety glasses or goggles. ()
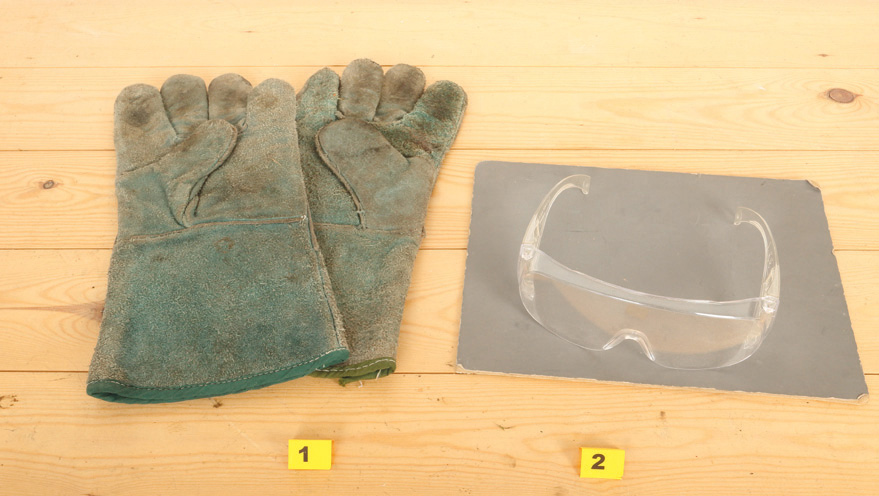
Fig 1.1 Safety equipment includes leather welding gloves for handling hot components and safety glasses.
Good-quality spanners are a must for a well-equipped workshop, with both ring and open-ended ones having their uses. When buying ring spanners, look for ones where the effort is exerted on the flat of the nut, not the corners. Buy sets that include the range of sizes from 6mm to 22mm. Additional sizes that are useful are 30mm for the crankshaft pulley nut, and 21mm for the generator pulley nut, though the VW box spanner will do for the latter.
Other useful tools to carry in the vehicle or at your workshop include locking pliers, often referred to by the trade names of mole grips or vice grips. The expandable pliers (gas pliers) used by the plumbing trade are another valuable addition, as are regular pliers. Feeler gauges and various sizes of screwdriver are used for valve clearances and adjusting the contact breaker points or spark plug gaps. Finally, no toolbox should be without a hammer though not to be used on the crankcase or cylinder heads.
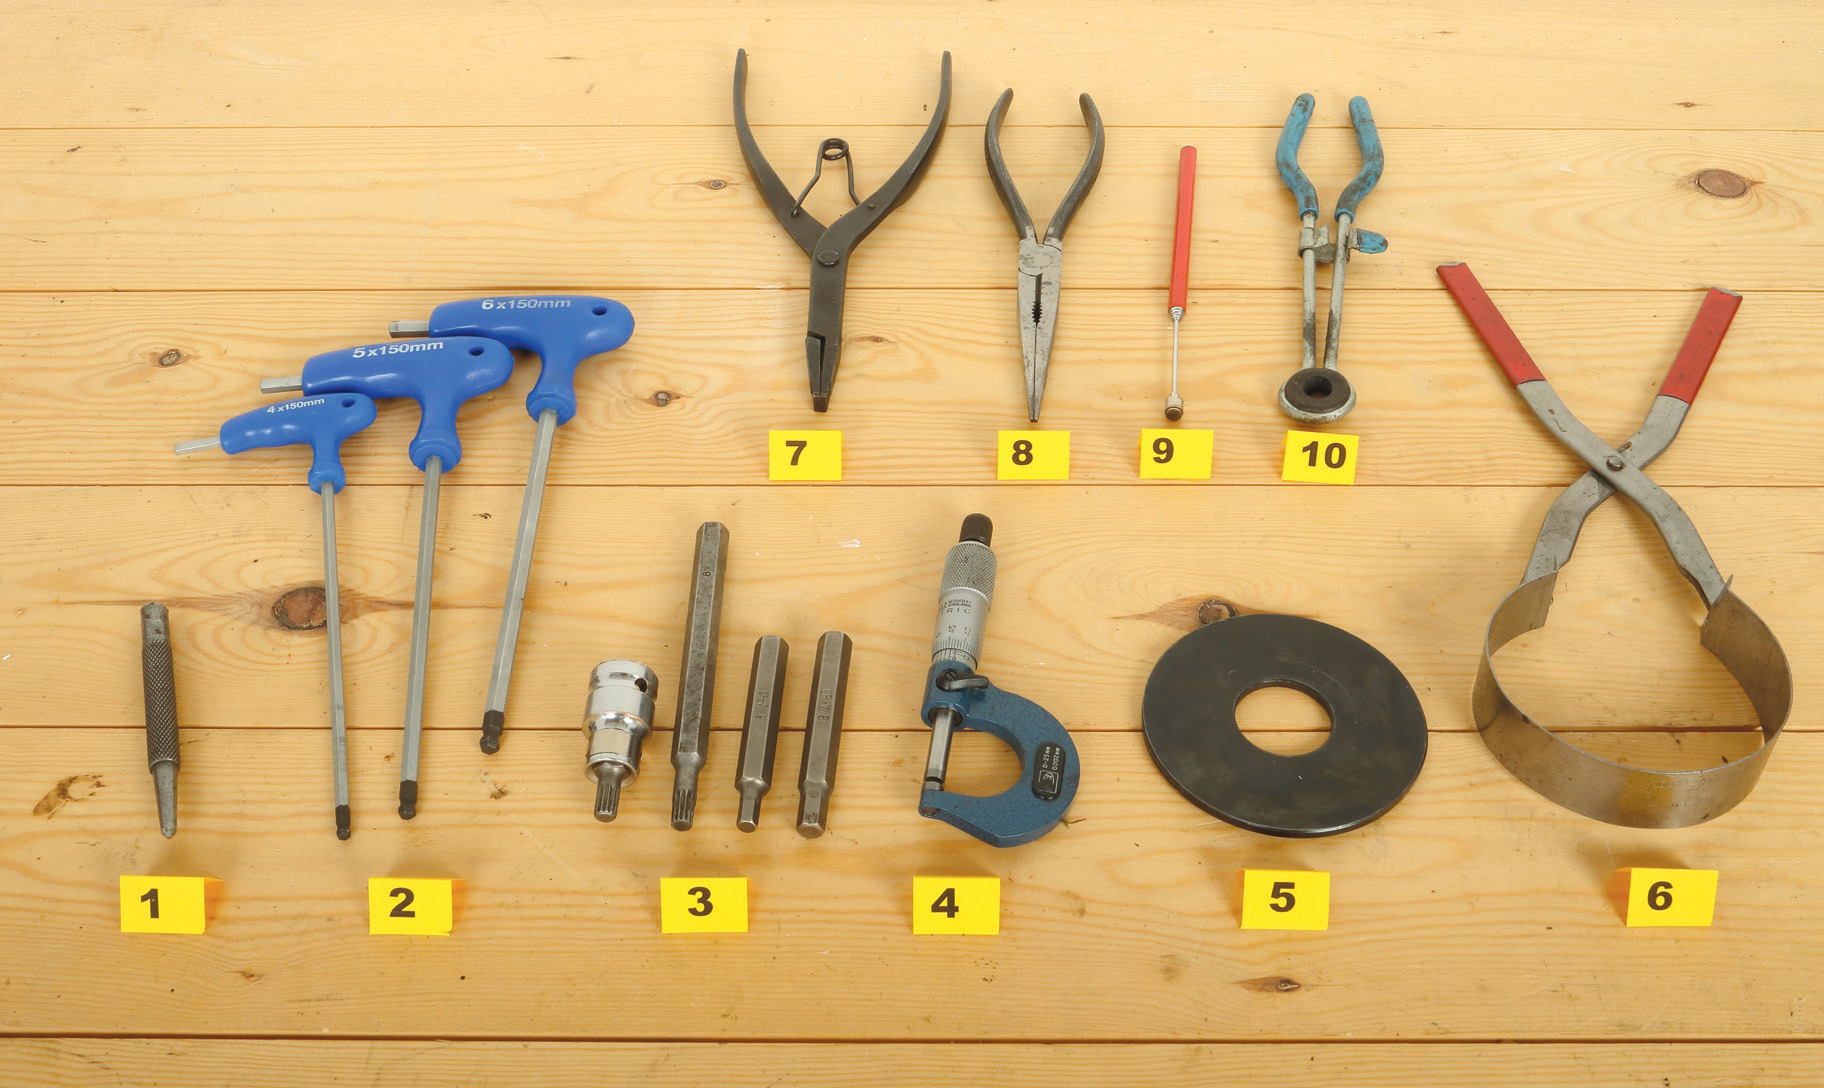
Fig 1.4 Specialist tools for more advanced engine work: 1) centre punch; 2) Allen keys; 3) twelve-point, 8mm socket and Allen key inserts; 4) micrometer; 5) tool to press in crankshaft oil seal; 6) piston-ring clamp; 7) flat-ended circlip pliers; 8) long-nosed pliers; 9) extendable magnet; 10) pipe clamp
Next page
