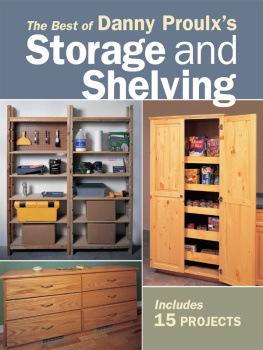
Editors - 100 Weekend Projects Anyone Can Do: Easy, Practical Projects Using Basic Tools and Standard Materials
Here you can read online Editors - 100 Weekend Projects Anyone Can Do: Easy, Practical Projects Using Basic Tools and Standard Materials full text of the book (entire story) in english for free. Download pdf and epub, get meaning, cover and reviews about this ebook. City: Pleasantville, year: 2016, publisher: Readers Digest;Studio Fun International, genre: Home and family. Description of the work, (preface) as well as reviews are available. Best literature library LitArk.com created for fans of good reading and offers a wide selection of genres:
Romance novel
Science fiction
Adventure
Detective
Science
History
Home and family
Prose
Art
Politics
Computer
Non-fiction
Religion
Business
Children
Humor
Choose a favorite category and find really read worthwhile books. Enjoy immersion in the world of imagination, feel the emotions of the characters or learn something new for yourself, make an fascinating discovery.

- Book:100 Weekend Projects Anyone Can Do: Easy, Practical Projects Using Basic Tools and Standard Materials
- Author:
- Publisher:Readers Digest;Studio Fun International
- Genre:
- Year:2016
- City:Pleasantville
- Rating:4 / 5
- Favourites:Add to favourites
- Your mark:
100 Weekend Projects Anyone Can Do: Easy, Practical Projects Using Basic Tools and Standard Materials: summary, description and annotation
We offer to read an annotation, description, summary or preface (depends on what the author of the book "100 Weekend Projects Anyone Can Do: Easy, Practical Projects Using Basic Tools and Standard Materials" wrote himself). If you haven't found the necessary information about the book — write in the comments, we will try to find it.
Editors: author's other books
Who wrote 100 Weekend Projects Anyone Can Do: Easy, Practical Projects Using Basic Tools and Standard Materials? Find out the surname, the name of the author of the book and a list of all author's works by series.


100 Weekend Projects Anyone Can Do: Easy, Practical Projects Using Basic Tools and Standard Materials — read online for free the complete book (whole text) full work
Below is the text of the book, divided by pages. System saving the place of the last page read, allows you to conveniently read the book "100 Weekend Projects Anyone Can Do: Easy, Practical Projects Using Basic Tools and Standard Materials" online for free, without having to search again every time where you left off. Put a bookmark, and you can go to the page where you finished reading at any time.
Font size:
Interval:
Bookmark:
Editorial and Production Team
Vern Johnson, Peggy McDermott, Rick Muscoplat, Marcia Roepke, Mary Schwender
Photography and Illustrations
Ron Chamberlain, Tom Fenenga, Bruce Kieffer, Mike Krivit, Don Mannes, Ramon Moreno, Shawn Nielsen, Doug Oudekerk, Frank Rohrbach III, Eugene Thompson, Bill Zuehlke
Text, photography and illustrations for 100 Weekend Projects Anyone Can Do are based on articles previously published in The Family Handyman magazine (2915 Commers Dr., Suite 700, Eagan, MN 55121, familyhandyman.com). For information on advertising in The Family Handyman magazine, call (646) 293-6150.
100 Weekend Projects Anyone Can Do is published by Home Service Publications, Inc. 2016 Trusted Media Brands, Inc. All rights reserved. This volume may not be reproduced in whole or in part without written permission from the publisher. The Family Handyman is a registered trademark of RD Publications, Inc.
ISBN: 978-1-62145-329-1
eISBN 978-1-6214-5330-7 (eBook)
The Family Handyman
Editor in ChiefGary Wentz
Project EditorEric Smith
Design & LayoutDiana Boger, Teresa Marrone
Project ManagerMary Flanagan
Senior EditorTravis Larson
Associate EditorsJeff Gorton, Mark Petersen, Jason White
Office Administrative ManagerAlice Garrett
Set BuilderJosh Risberg
Senior Copy EditorDonna Bierbach
VP, Group PublisherRussell S. Ellis
Published by Home Service Publications, Inc.,
a subsidiary of Trusted Media Brands, Inc.
A Note to Our Readers
All do-it-yourself activities involve a degree of risk. Skills, materials, tools and site conditions vary widely. Although the editors have made every effort to ensure accuracy, the reader remains responsible for the selection and use of tools, materials and methods. Always obey local codes and laws, follow manufacturer instructions and observe safety precautions.
WHAT IT TAKES
TIME : 1 hour
SKILL LEVEL : Beginner
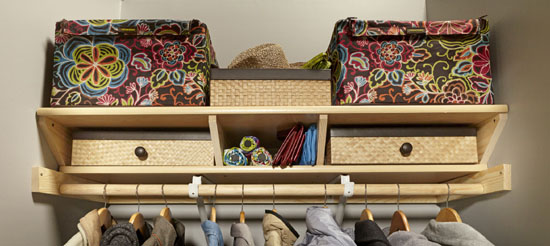
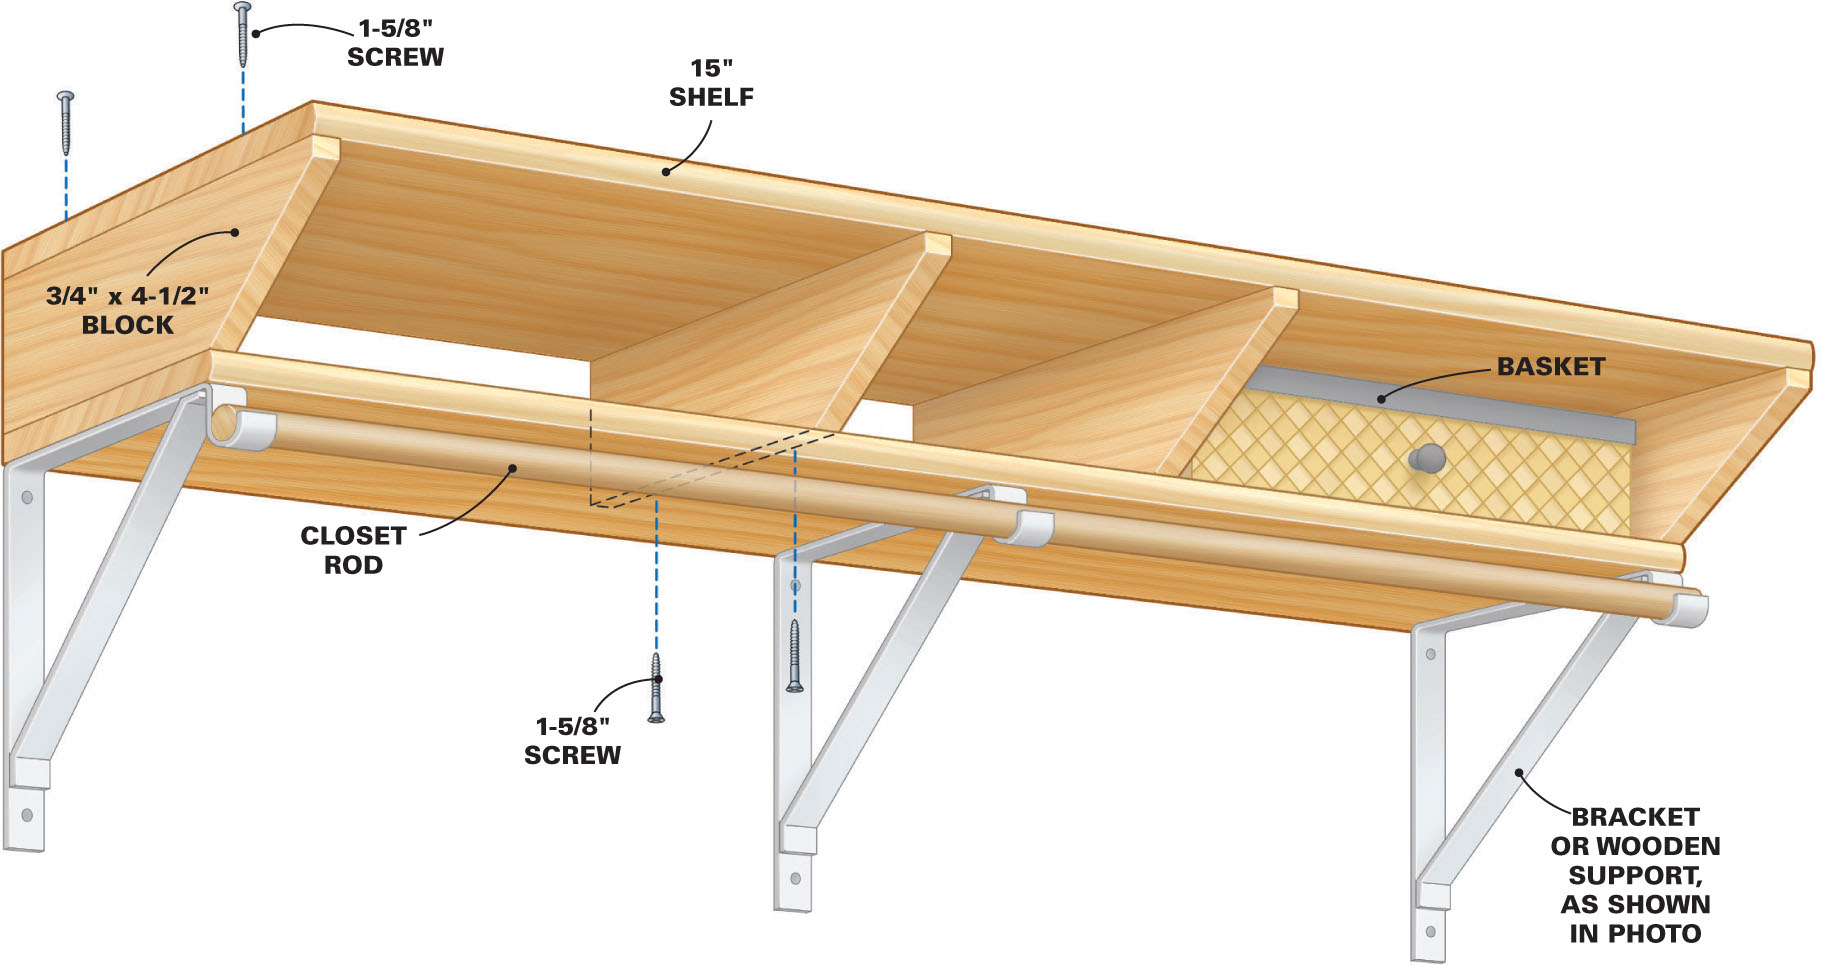
T heres a whole lot of unused real estate above most closet shelves. It seems logical that if one shelf is good, two would be better. And that upper shelf could be 15 in. deep instead of 12 in. because theres no closet rod hanging out below. The deep baskets help with the organization; cabinet knobs make for easier access. We show a two-tier shelf; you can install three if your closets (and you) are tall enough.
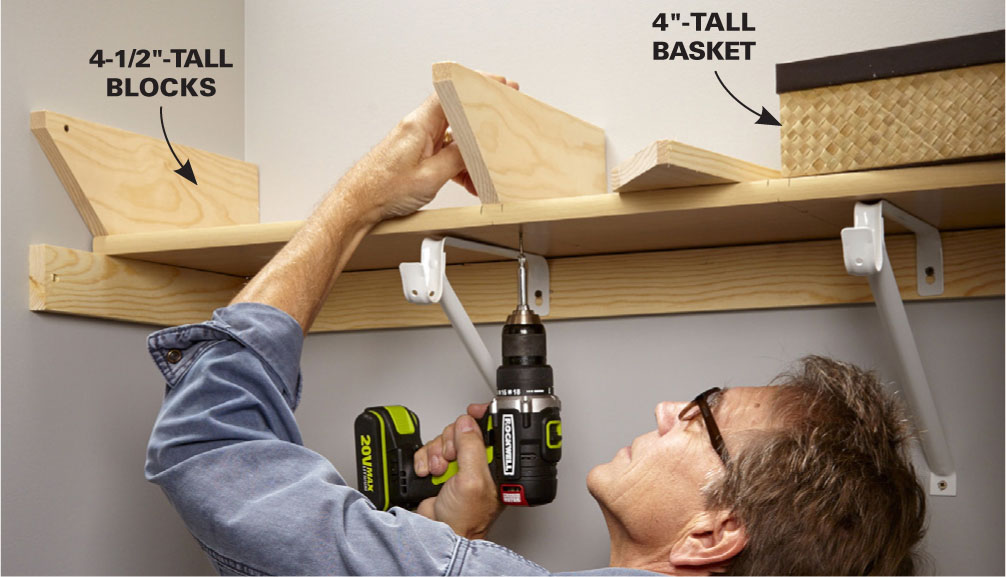
Secure blocking to the existing shelf. Buy your baskets, then cut spacer blocks 1/2 in. wider than the baskets are tall. Cut the ends of the blocks at an angle to accommodate the wider top shelf. Screw blocks to the bottom shelf, spacing them 1/2 in. farther apart than the baskets are wide. Then install and secure the top shelf.
Figure A
Closet shelf
WHAT IT TAKES
TIME : One day to build, plus painting
SKILL LEVEL : Beginner to intermediate
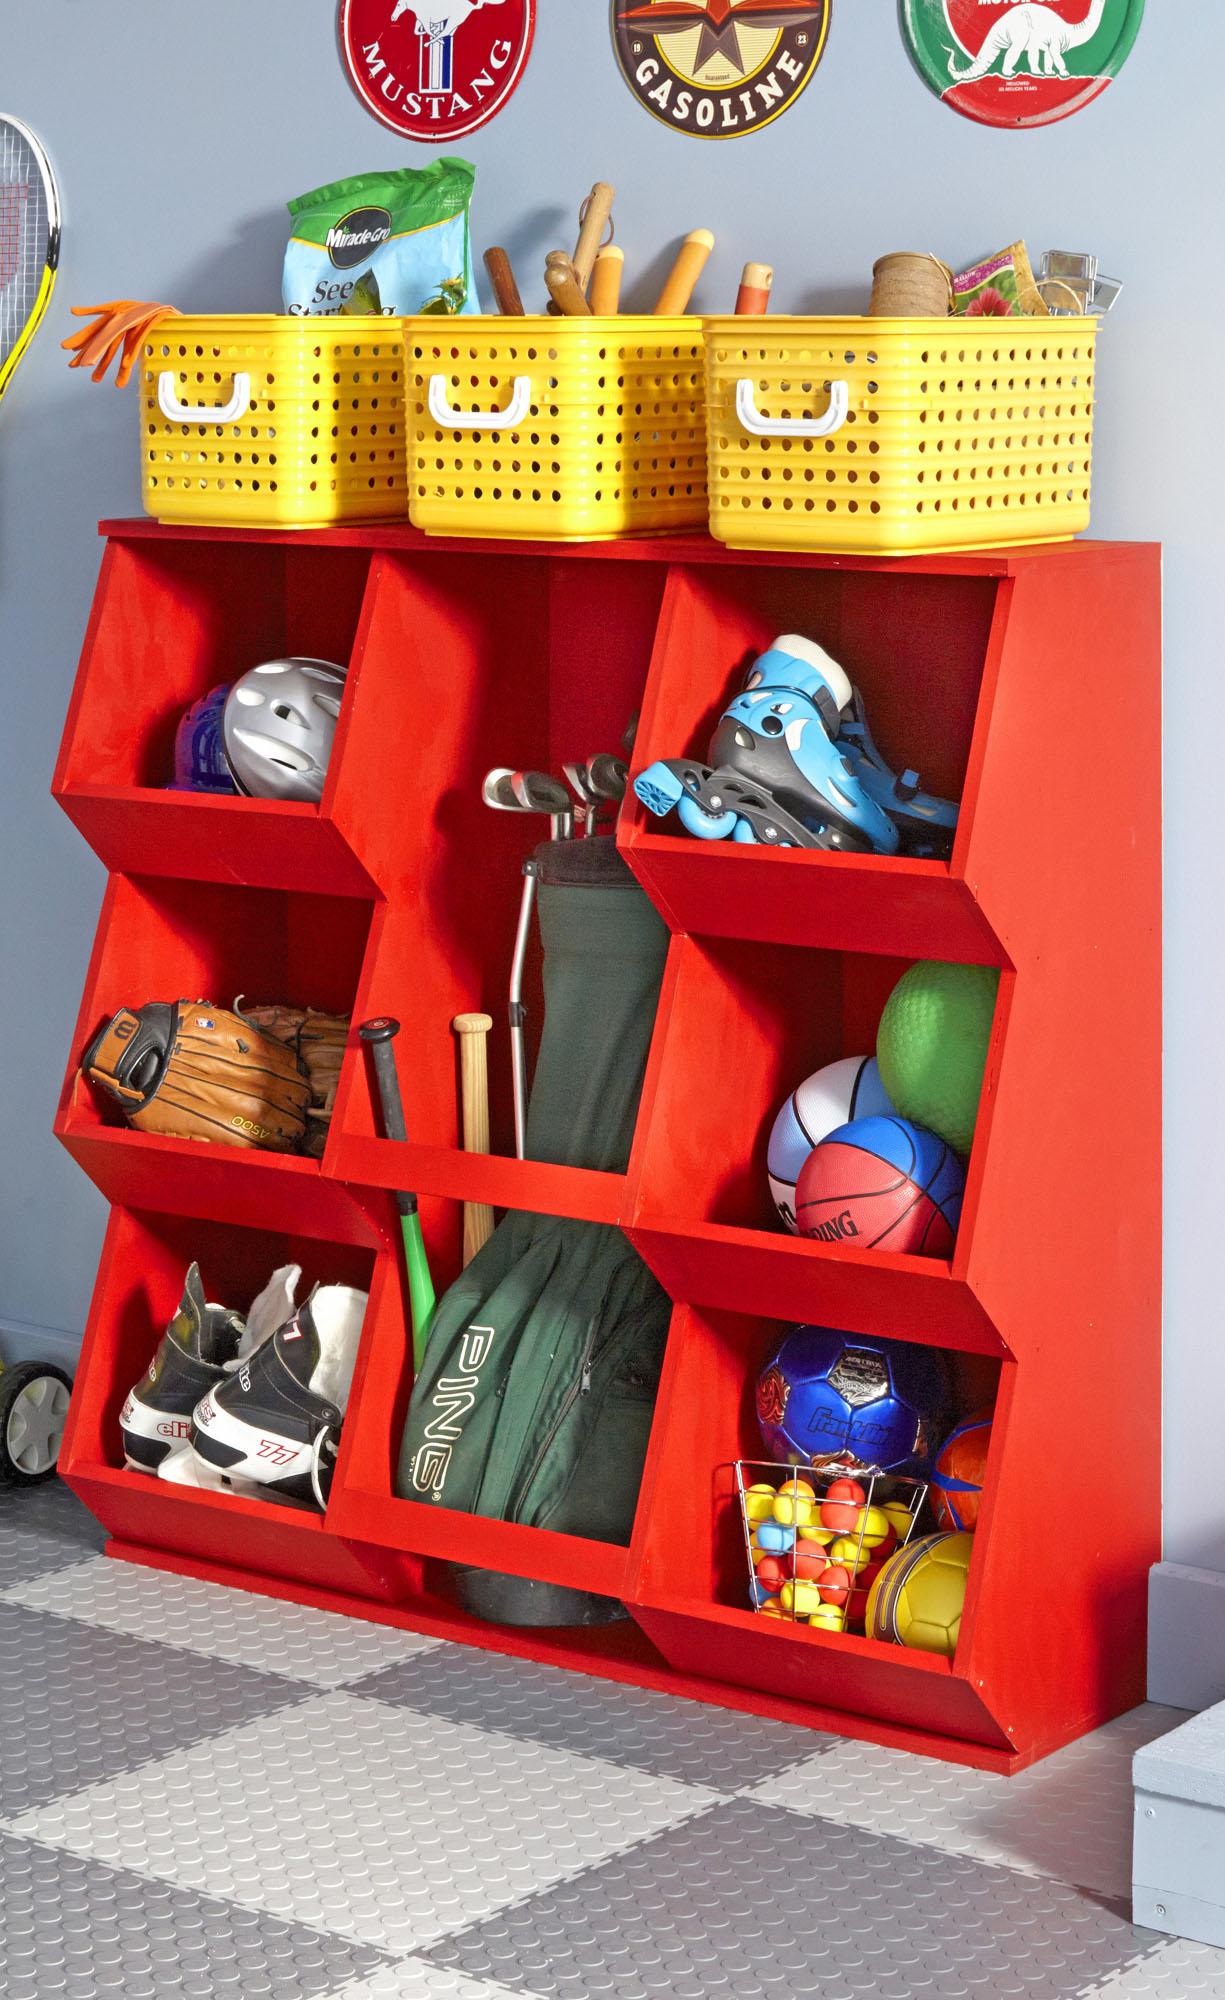
S helves and cabinets are great places to store kid stuff, but when youre in a hurry (and kids always are), its nice to just throw and go. Thats why we built these bins. Theyre great for sports gear but handle all kinds of miscellaneous garage clutter.
We wanted something with a little character, so we loosely based the design on a row of bins at an old-fashioned country store. It was worth the little bit of extra effort to build something that brings back good memories yet serves a practical purpose in the present.
Cut the sides, top and bottom from 3/4-in. plywood using a table saw or circular saw. We used BC plywood, which is good enough for paint, but you may want to buy birch veneer plywood if you plan to use stain.
This project requires a full sheet of plywood plus a 2 x 4-ft. section. Many home centers carry 4 x 4-ft., and some even stock 2 x 4-ft., so you dont have to buy two full sheets. However, they charge a premium for smaller sheets, and you wont save more than a few bucks. We bought two full sheets and used the leftover on other projects. The same goes for the 1/4-in. plywoodyou only need a 4 x 4-ft. sheet, but a 4 x 8-ft. is a better value.
The fronts of the bins get the most abuse, so we built them from a solid 1x6 pine board. Solid wood holds up better than a plywood edge. You can rip down the two center boards when youre cutting up the other parts, but hold off on cutting them to length until the top and bottom boards are in place. That way you can cut them exactly to size.
This part of the process seems a little tricky, but its really quite simple if you follow these directions. Hook a tape measure on the bottom front of one of the side boards. Measure up and mark the edge of the board at: 0, 4 in., 15-1/2 in., 19-1/2 in., 31 in. and 35 in. Now go back and measure over 4 in. at the following locations: the bottom, 15-1/2 in., 31 in. and the top (). Its just that easy.
Clamp two side boards down to your work surface. Arrange them so the best sides of the plywood will be on the outside of the bins. Use a circular saw to make most of each cut. (Sometimes its necessary to hold the blade guard up when you start a cut at an angle.) Finish the cuts with a jigsaw (). A handsaw will work fine if you dont own a jigsaw.
Sand the edges with 80-grit sandpaper while the sides are still clamped together (). Use one of the two cut side boards to mark one of the other uncut side boards, and repeat the process.
If youve already chosen a color for your project, now would be a good time to sand and finish all the parts. That way, youll only have to touch up the fastener holes after assembly. Some of the plywood edges may have voids, which can be filled with wood putty or patching compound.
Lay out two of the sides back to back with the good side of the plywood facing down. Using a straightedge, mark lines between the notches to serve as a reference line for the bottoms of the bins. The bottom of the whole unit will serve as the bottom of the lowest bins, so fasten the bottom on the second lowest bin first. Align the board above the reference line.
Fasten the bottoms and the fronts with three 1-1/2-in. brads. Once its all put together, go back and reinforce it all with two 2-in. trim head screws in each side of every board.
Once the bottoms are in place, come back and install the 1x6 fronts (). Align them flush with the outside edge of the plywood. Youll notice a small gap between the bin bottom and the front. This makes assembly easier, especially if your side cuts werent perfect. It wont be noticeable when its up against the wall. Once the first bank of bins is done, assemble the second one.
Font size:
Interval:
Bookmark:
Similar books «100 Weekend Projects Anyone Can Do: Easy, Practical Projects Using Basic Tools and Standard Materials»
Look at similar books to 100 Weekend Projects Anyone Can Do: Easy, Practical Projects Using Basic Tools and Standard Materials. We have selected literature similar in name and meaning in the hope of providing readers with more options to find new, interesting, not yet read works.
Discussion, reviews of the book 100 Weekend Projects Anyone Can Do: Easy, Practical Projects Using Basic Tools and Standard Materials and just readers' own opinions. Leave your comments, write what you think about the work, its meaning or the main characters. Specify what exactly you liked and what you didn't like, and why you think so.