Contents
Guide
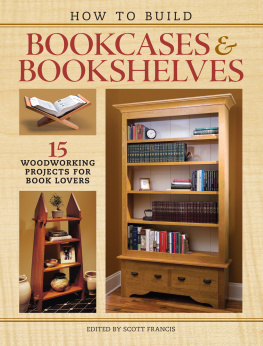
HOW TO BUILD
BOOKCASES & BOOKSHELVES
15 Woodworking Projects for Book Lovers
Edited by Scott Francis

CINCINNATI, OHIO
popularwoodworking.com
CONTENTS
INTRODUCTION
Who invented the bookcase? Its a question that countless furniture designers, carpenters and bibliophiles would love to know the answer to. Unfortunately the answer is a mystery likely because like books themselves, the method of storing them has evolved slowly over time.
The history of bookcases is intertwined with the evolution of the written word, the invention of the printing press and the development of books with spines. Books, of course, werent always books as we know them. Texts were rolled up as scrolls or sheaves of paper bound up with bands of leather. They were kept in trunks, chained to desks, stacked in piles on the floor and stored using a variety of methods throughout history. Books were even shelved with their spines facing the back of shelves titles or identifying marks appeared on the outward facing pages.
Most of these early book collections were kept by the clergy, administrative bodies or the wealthy. As these libraries amassed various storage solutions were explored. Early bookshelves evolved from cupboards. Texts were typically stacked flat on the shelves. French cabinetmaker Andr-Charles Boulle is often credited with designing the first low bookcase. With a marble top and doors with silk curtains, the bookcase was approximately 4 feet high by 5 feet. As the evolution of books progressed, spines faced out and books were displayed instead of simply kept. Doors became used less frequently and the bookcase as we know it began to come into focus.
The introduction of the printing press to the western world by Johannes Guttenberg around 1440 gave rise to more personal book collections and private libraries. Built in shelving as well as standing pieces of furniture dedicated to storing books became popular around the 1700s. English diarist Samuel Pepys is credited with commissioning the earliest tall bookcases in the 1660s as he sought a solution for his growing library, which included more than 3,000 books.
Today, unless you have no soul, it is difficult to look at a bookcase filled with volumes and not feel a deep connection to history and scholarly pursuits. Who doesnt love opening a volume and smelling that old book smell? Theres something tactile in that experience that can never be replaced by reading something on screen. For those who crave that tangible relationship with their books, what better way to honor that connection than to build your own bookcases to house them? Your personal library will be all the more special when you can look at the shelving youve created for it and know you made it yourself.
This book which will hopefully one day rest on a shelf youve built discusses 13 bookcases based on various designs seen throughout the history of furniture making as well as a couple of smaller book displays for your desk.
Enjoy.
TECHNIQUES
CHAPTER ONE
Build Better Bookcases
by Robert W. Lang
Everyone needs a bookcase, and if youre a beginning woodworker, its a great project to develop skills without breaking the bank. So what makes the ideal bookcase? It should fit in the average home, look good and be made to last. Here we also wanted to show that the same basic construction could be dressed up in different ways to suit anyones sense of style. What follows is a plan that makes good use of materials, and is relatively quick and easy to put together and finish.
Basic Bookcase Construction
The basic cabinet is built from one 4' by 8' sheet of 34"-thick hardwood plywood plus a few board feet of solid wood. This keeps the cost reasonable, but introduces some constraints on the size of the finished bookcase. Our final design is 5' high and a little less than 212'-wide. Its not quite as deep as many bookcases, but it is a useful size for all but the largest books. It does its job without taking over the room, will hold a lot of books and the shelves wont sag. You can make the basic design any size you want, but if you make it larger you wont be able to get all of the parts from one sheet of plywood. If you make it wider, keep the shelves less than 36". If the shelves are longer than that, they will likely sag when loaded with books.
Using 34" plywood for the back as well as the other cabinet parts produces a box that is very strong. The edges of the plywood are all covered with solid wood. In three of the four designs this is a face frame applied to the front of the box. The other design uses 14"-thick hardwood as an edge band.
I used biscuit joints to hold the case together and pocket screws to join the face frames. The assembled face frame is glued to the front of the cabinet. There is enough surface area for a good joint, without nail holes showing in the completed cabinet.
Using plywood solves many problems you would have if you made the bookcase from solid wood; the grain and color of all the parts will be similar, you wont have to glue any parts together for width and seasonal wood movement wont be an issue.
The Trouble with Plywood
Plywood however, does introduce some problems that you need to be aware of. The veneer face is very thin. You need to handle it carefully to avoid scratching it, and when you sand you need to be careful that you dont sand through the veneer. Despite what some people might tell you, the factory edges are not straight, and you should never assume that the corners of the sheet are square.
The other problem with plywood is its thickness. It will be between 132" and 116" less than 34", and the thickness can vary throughout the sheet. If you cut the horizontal parts to the dimensions in the cutting list, your cabinet will finish slightly smaller in width. If you then cut the top and make the face frame to the listed size, they wont quite fit. The first thing you need to do is determine the actual thickness. Then develop a strategy for working around this discrepancy.
I began by crosscutting the plywood at 60", as shown in the cutting diagram. This large piece will yield the two long sides of the bookcase and the back. The smaller piece will provide the top and bottom of the cabinet, as well as the fixed and adjustable shelves. There is a little extra room to allow for squaring the ends of the finished parts and cutting clean long edges. You can make this crosscut on the table saw, but its easier to cut the full sheet with a circular saw and a straightedge. You could also make this first cut with a jigsaw, and then clean up the edge with a router. If you go this route, clamp a straightedge to the sheet, make sure its square and run a flush trimming bit against it to clean up the cut.
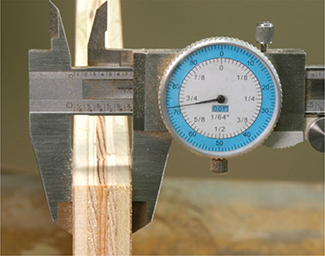
One of the most important facts about plywood is that it is almost always thinner than the stated dimension. This (one of four types) 34" plywood was 132" undersized.
