Editors Of Family Handyman - Family Handyman Ultimate Organizing Solutions
Here you can read online Editors Of Family Handyman - Family Handyman Ultimate Organizing Solutions full text of the book (entire story) in english for free. Download pdf and epub, get meaning, cover and reviews about this ebook. City: Pleasantville, year: 2015, publisher: Readers Digest;Studio Fun International, genre: Home and family. Description of the work, (preface) as well as reviews are available. Best literature library LitArk.com created for fans of good reading and offers a wide selection of genres:
Romance novel
Science fiction
Adventure
Detective
Science
History
Home and family
Prose
Art
Politics
Computer
Non-fiction
Religion
Business
Children
Humor
Choose a favorite category and find really read worthwhile books. Enjoy immersion in the world of imagination, feel the emotions of the characters or learn something new for yourself, make an fascinating discovery.

- Book:Family Handyman Ultimate Organizing Solutions
- Author:
- Publisher:Readers Digest;Studio Fun International
- Genre:
- Year:2015
- City:Pleasantville
- Rating:5 / 5
- Favourites:Add to favourites
- Your mark:
Family Handyman Ultimate Organizing Solutions: summary, description and annotation
We offer to read an annotation, description, summary or preface (depends on what the author of the book "Family Handyman Ultimate Organizing Solutions" wrote himself). If you haven't found the necessary information about the book — write in the comments, we will try to find it.
Editors Of Family Handyman: author's other books
Who wrote Family Handyman Ultimate Organizing Solutions? Find out the surname, the name of the author of the book and a list of all author's works by series.


Family Handyman Ultimate Organizing Solutions — read online for free the complete book (whole text) full work
Below is the text of the book, divided by pages. System saving the place of the last page read, allows you to conveniently read the book "Family Handyman Ultimate Organizing Solutions" online for free, without having to search again every time where you left off. Put a bookmark, and you can go to the page where you finished reading at any time.
Font size:
Interval:
Bookmark:
Editorial and Production Team
Vern Johnson, Peggy McDermott, Rick Muscoplat, Mary Schwender, Marcia Roepke
Photography and Illustrations
Ron Chamberlain, Tom Fenenga, Bruce Kieffer, Mike Krivit, Don Mannes, Ramon Moreno, Shawn Nielsen, Doug Oudekerk, Frank Rohrbach III, Eugene Thompson, Bill Zuehlke
Text, photography and illustrations for Ultimate Organizing Solutions are based on articles previously published in The Family Handyman magazine (2915 Commers Dr., Suite 700, Eagan, MN 55121, familyhandyman.com). For information on advertising in The Family Handyman magazine, call (646) 293-6150.
Ultimate Organizing Solutions is published by The Readers Digest Association, Inc. 2015 The Readers Digest Association, Inc. All rights reserved. This volume may not be reproduced in whole or in part without written permission from the Publisher. Readers Digest and the Pegasus logo are registered trademarks of The Readers Digest Association, Inc. The Family Handyman is a registered trademark of RD Publications, Inc.
ISBN: 978-1-62145-240-9
eISBN 978-1-62145-262-1
THE FAMILY HANDYMAN
Editor in Chief Ken Collier
Project Editor Eric Smith
Design & Layout Diana Boger, Teresa Marrone, Bruce Bohnenstingl
Senior Editors Travis Larson, Gary Wentz
Associate Editor Jeff Gorton
Administrative Manager Alice Garrett
Senior Copy Editor Donna Bierbach
VP, Group Publisher Russell S. Ellis
Published by Home Service Publications, Inc.,
a subsidiary of The Readers Digest Association, Inc.
A NOTE TO OUR READERS: All do-it-yourself activities involve a degree of risk. Skills, materials, tools and site conditions vary widely. Although the editors have made every effort to ensure accuracy, the reader remains responsible for the selection and use of tools, materials and methods. Always obey local codes and laws, follow manufacturer instructions and observe safety precautions.
CHAPTER
CHAPTER
CHAPTER
CHAPTER
CHAPTER
CHAPTER
CHAPTER
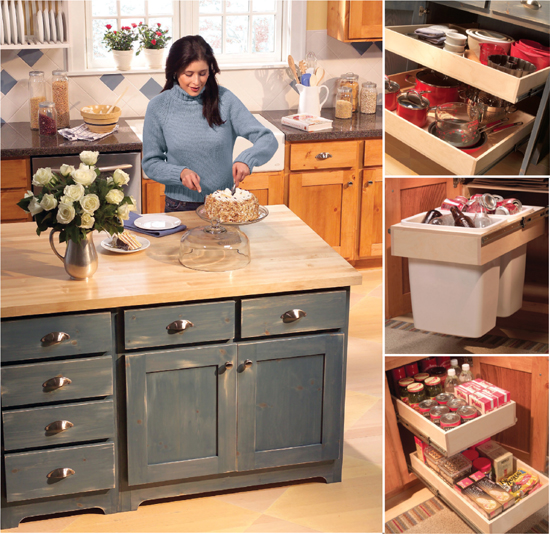

WHAT IT TAKES
Time: 4 hours
Skill level: Intermediate
B ase cabinets have the least convenient storage space in the entire kitchen. Rollouts solve that problem. They make organizing and accessing your cabinet contents back-friendly and frustration-free.
If youre stuck with cabinets without rollouts, dont despair. Here youll learn how to retrofit nearly any base cabinet with rollouts thatll work as well as or better than any factory-built units.
Its really very easy. Once you take measurements, you can build the rollout drawer (15).
The project will go faster if you have a table saw and miter saw to cut out all the pieces. A circular saw and cutting guide will work too; itll just take a little longer. You can build a pair of rollouts in a Saturday morning.
These rollout drawers are made entirely of 1/2-in. Baltic birch plywood. Baltic birch is favored by cabinetmakers because its void free, meaning that the thin veneers of the plywood core are solid wood. Therefore sanded edges will look smooth and attractive. If your local home center doesnt stock Baltic birch, find it at any hardwood specialty store.
If you choose, you can make the sides of the rollout drawers from any 1x4 solid wood that matches your cabinets and then finish to match (use plywood for the bases). But if you use 3/4-in. material for the sides, subtract 3 in. from the opening to size the rollout (not 2-1/2 in., as described in ).
The drawer carriers (). The MDF keeps the drawer bottom spaced properly while you shim and attach it to the cabinet sides. It can be removed and reused for other carriers after installation. If MDF isnt available, substitute any other 1/4-in. hardboard or plywood.
Side-mounted slides are the best choice among drawer slide options. Their ball-bearing mechanisms and precise fit make for smooth-operating drawers that hold 90 lbs. or more. Shown here are 22-in. full-extension side-mount drawer slides that have a 90-lb. weight rating. That means theyll be sturdy enough even for a drawer full of canned goods. Full-extension slides allow the rollout to extend completely past the cabinet front so you can access all the contents. You can find slides at any home center or well-stocked hardware store.
Nearly all standard base cabinets are 23-1/4 in. deep from the inside of the face frame ().
Then measure the cabinet width. The drawer has to clear the narrowest part of the opening ().
Shown here are drawers with 3-1/2-in.-high sides, but you can customize your own. Plan on higher sides for lightweight plastic storage containers or other tall or tippy items, and lower sides for stable, heavier items like small appliances.
At first glance, drawer slides are pretty hard to figure out, but after you install one set, youll be an expert. Theyre sold in pairs and each of the pairs has two parts. The drawer part attaches to the rollout while the cabinet part attaches to the carrier. To separate them for mounting, slide them out to full length and then push, pull or depress a plastic release to separate the two parts. The cabinet part, which always encloses the drawer part, is the larger of the two, and the mounting screw hole locations will be shown in the directions. (Screws are included with the drawer slides.) The oversized holes allow for some adjustment, but if you follow the instructions, you shouldnt have to fuss with fine-tuning later. When mounting the slides, you should make sure to hold them flush with the front of the rollout drawer and carrier sides (). The front of the drawer part usually has a bent metal stop that faces the front of the drawer.
Its important to build the rollout drawers perfectly square for them to operate properly. show a simple squaring jig that you can clamp to a corner of any workbench to help. Use the jig to nail the frame together, but even more important, to hold the frame square when you nail on the bottom panel. If it hangs over the sides even a little, the drawer slides wont work smoothly.
Use 1-1/4-in. brads for all of the assembly. Glue the drawer parts together but not the bottom of the carrier. It only serves as a temporary spacer for mounting. (After mounting the carrier and drawer, you can remove it if it catches items on underlying drawers or even reuse it for other carriers.) If youd like to finish the rollout for a richer look and easier cleaning, sand the edges with 120-grit paper and apply a couple of coats of water-based polyurethane before mounting the slides.
To figure the spacer thickness, rest the lower carrier on the bottom of the shelf, push it against one side of the cabinet and measure the gap on the other ().
Slip the rollout into its carrier and check for smooth operation. If you followed the process, it should work perfectly. If it binds, its probably because the spacers are too wide or narrow. Pull out the carrier, remove the spacers and start the spacer process all over again.
The best way to level and fasten the upper rollout is to support it on temporary plywood spacers (). The photo shows pieces of plywood cut 7 in. high. In reality, the exact height is up to you. If, for example, you want to store tall boxes of cereal on the bottom rollout and shorter items on the top, space the top rollout higher. You can even build and install three or more rollouts in one cabinet for mega-storage of short items like cans, cutlery or beverages. (Those now-obsolete shelves youre replacing with rollouts are good stock to use for your spacers.) Again, pin the spacers in place with a brad or two to hold them while youre predrilling and screwing the carriers to the cabinet sides. Be sure to select screw lengths that wont penetrate exposed cabinet sides! In most cases, 1-5/8-in. screws are the best choice. Strive for 1/2-in. penetration into the cabinet sides. Countersink the heads as far as necessary to get the proper penetration.
Next pageFont size:
Interval:
Bookmark:
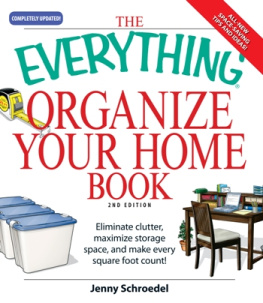
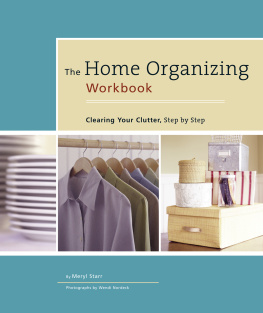
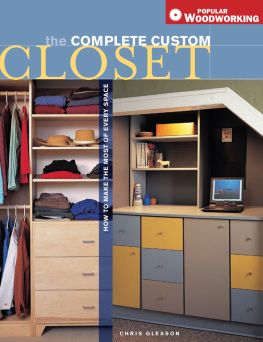
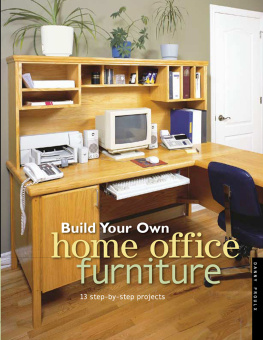
Similar books «Family Handyman Ultimate Organizing Solutions»
Look at similar books to Family Handyman Ultimate Organizing Solutions. We have selected literature similar in name and meaning in the hope of providing readers with more options to find new, interesting, not yet read works.
Discussion, reviews of the book Family Handyman Ultimate Organizing Solutions and just readers' own opinions. Leave your comments, write what you think about the work, its meaning or the main characters. Specify what exactly you liked and what you didn't like, and why you think so.