 CHRISTMAS COOKIE SWAP! MORE THAN 100 TREATS TO
SHARE THIS HOLIDAY SEASON 
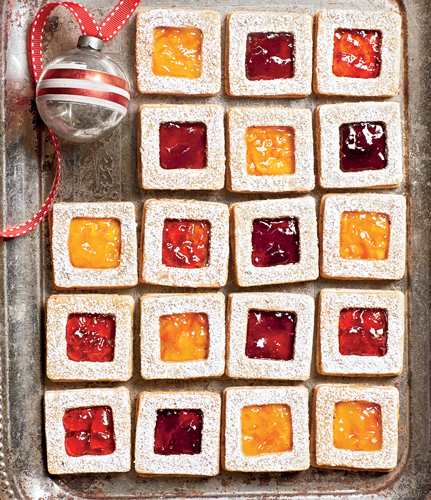 MERRY CHRISTMAS! Nothing compares to a homemade gift, especially if it comes from a warm oven. The smell of sugar, butter, and flour transforming into scrumptious cookies is the perfect reminder that its the holidays. In this book you will find the ultimate cookie swap guide along with seasonal recipes and wrapping tips ensuring a special selection of sweet treats to savor with friends and family. Because the only thing better than sharing with the ones you love is enjoying a glass of cold milk and freshly-baked cookies with them, too.
 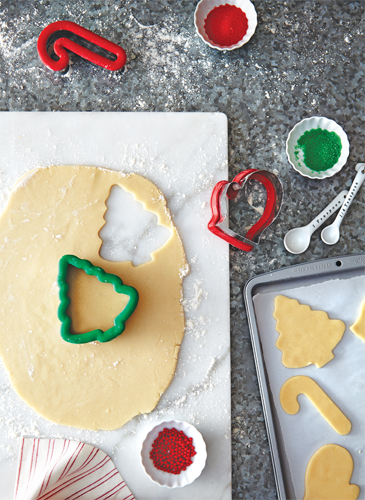 CHRISTMAS COOKIE BASICS Use a colorful arsenal of frostings, sugars, sprinkles, and more to decorate your favorite holiday cookies.
  THE BEST FROSTING Royal Icing creates a smooth surface on decorated cookies.
  THE BEST FROSTING Royal Icing creates a smooth surface on decorated cookies.
Its made with either whipped egg whites or whipped meringue powder, powdered sugar, and water. The addition of just a bit of corn syrup boosts the flavor and helps create a shiny finish. If you want melt-in-your-mouth creamy frosting, use Buttermilk Frosting, which is great for spreading on cookies, cakes, and cupcakes. Its also a yummy filling for sandwich cookies. ROYAL ICING TOTAL TIME 10 MINUTES 1 (16-ounce) package powdered sugar 3 tablespoons meringue powder 5 to 6 tablespoons warm water 1 teaspoon light corn syrup Food coloring paste (optional) Combine powdered sugar, meringue powder, water, and corn syrup in a large bowl. Beat at medium-low speed with an electric mixer 5 to 7 minutes.
Divide and tint with food coloring, if desired. Icing dries quickly, so keep it covered at all times. MAKES about 3 cups BUTTERMILK FROSTING TOTAL TIME 8 MINUTES cup butter, softened 1 (16-ounce) package powdered sugar 1 teaspoon vanilla extract 4 to 5 tablespoons buttermilk Beat butter at medium speed with an electric mixer until creamy. Gradually add powdered sugar, beating at low speed until blended. Slowly beat in vanilla and 4 tablespoons buttermilk. Increase speed to medium, and beat until smooth.
If desired, beat in remaining 1 tablespoon buttermilk, 1 teaspoon at a time, until desired consistency is reached. MAKES about 3 cups DECORATING WITH ROYAL ICING Use the tips below when decorating with Royal Icing.  PIPE BORDERS: Use a piping bag or squeeze bottle to pipe the borders and edges of your cookies. Let the icing dry completely, about 20 minutes, before continuing to the next step.
  FLOOD: Apply the icing to the surface of the cookie. You dont have to fill every spot.
Tilting the cookie will allow the icing to flow into space. A toothpick can help pull it into smaller spaces.  TRIM: You can accent Royal Icing with sanding sugar or colored sprinkles before the icing hardens. Allow the cookies to dry several hours before storing them between sheets of waxed paper.
 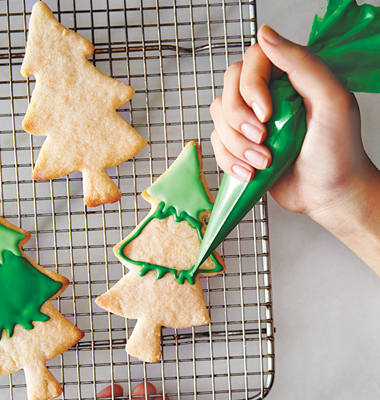 COLOR: Allow the first color to dry before adding a second color. Colored icing will darken a bit as it sets, so its best to make the color just a bit lighter than you want.
It can then darken to the desired shade.  THIN: After piping edges of the cookies, add a few drops of water to the remaining icing to thin it. If it becomes too thin, mix in a small amount of powdered sugar. If its too thick, it wont flow over the cookies for a smooth finish. If any air bubbles form on the icing, use a toothpick to gently pop them. HOW TO FREEZE COOKIES Cool unfrosted cookies completely before storing.
Separate unfrosted cookies with layers of waxed paper. Double-bag cookies in zip-top plastic bags for freezing. For crisp cookies, bring to room temperature, and then reheat at 325F for 3 to 5 minutes. SECRETS OF A CHRISTMAS COOKIE SWAP Hosting a cookie swap is a great way to multitask, offering you a chance to get together with friends during the busy season and shortcut your holiday baking. Everyone loves holiday cookies, but not everyone has time to bake three or more varieties. Cookie swaps are easy to organize, and everyone goes home with a multitude of treats to celebrate the holiday season.
Follow these five simple steps to hosting a successful swap. 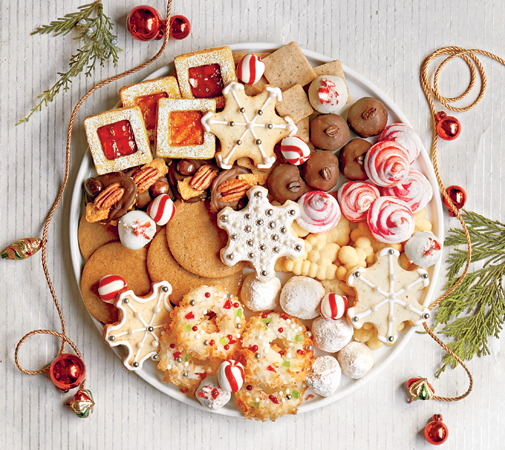 1. PLAN EARLY! The holiday season becomes busy, and friends schedules fill up quickly. People are more likely to attend if you allow for plenty of advance notice. 2. INVITE! Extend the invite to a few more guests than you want to have.
Chances are not everyone you invite will be able to attend. Remember to ask attendees to tell you what type of cookie they plan to bring since its the hosts job to keep a running list and (hopefully!) avoid duplicates. 3. SHARE! Ask guests to email you their recipes ahead of time so you can print them on Christmas-themed recipe cards. For a souvenir, bind the cards in a cookie swap cookbook, complete with the date of the party. 4.
SNACK! Prepare some savory seasonal snacks and drinks to enjoy. You and your guests will be sampling lots of cookies, so its nice to offer something to eat to balance the sweets. 5. WRAP IT UP! With all the cookies gathered in one area, provide tins, boxes, and trays for guests to package their goodies together. Dont forget labels! Set out pens, tags, ribbons, and bows for finishing touches. Consider buying festive glass ornaments as a party favor to add an extra-special touch to the wrapped cookies.
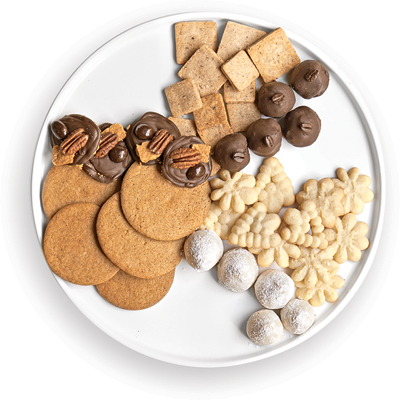
ASSEMBLE A SHOWSTOPPING COOKIE PLATTER Think of your platter like a clock, and youll have an artful presentation in about a minute. 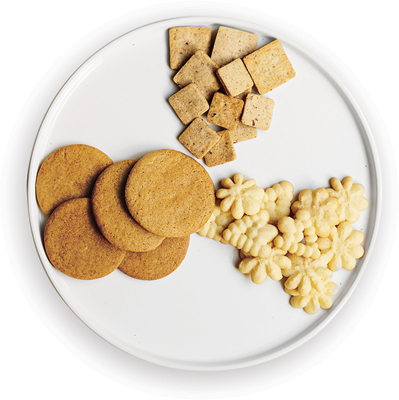 STEP 1: Begin with the tan and light beige cookies, grouping them at roughly twelve, four, and eight on your imaginary cookie clock.
Next page











 CHRISTMAS COOKIE SWAP! MORE THAN 100 TREATS TO
 MERRY CHRISTMAS! Nothing compares to a homemade gift, especially if it comes from a warm oven. The smell of sugar, butter, and flour transforming into scrumptious cookies is the perfect reminder that its the holidays. In this book you will find the ultimate cookie swap guide along with seasonal recipes and wrapping tips ensuring a special selection of sweet treats to savor with friends and family. Because the only thing better than sharing with the ones you love is enjoying a glass of cold milk and freshly-baked cookies with them, too.
  CHRISTMAS COOKIE BASICS Use a colorful arsenal of frostings, sugars, sprinkles, and more to decorate your favorite holiday cookies.
  THE BEST FROSTING Royal Icing creates a smooth surface on decorated cookies.
  PIPE BORDERS: Use a piping bag or squeeze bottle to pipe the borders and edges of your cookies. Let the icing dry completely, about 20 minutes, before continuing to the next step.
  FLOOD: Apply the icing to the surface of the cookie. You dont have to fill every spot.
 TRIM: You can accent Royal Icing with sanding sugar or colored sprinkles before the icing hardens. Allow the cookies to dry several hours before storing them between sheets of waxed paper.
  COLOR: Allow the first color to dry before adding a second color. Colored icing will darken a bit as it sets, so its best to make the color just a bit lighter than you want.
 THIN: After piping edges of the cookies, add a few drops of water to the remaining icing to thin it. If it becomes too thin, mix in a small amount of powdered sugar. If its too thick, it wont flow over the cookies for a smooth finish. If any air bubbles form on the icing, use a toothpick to gently pop them. HOW TO FREEZE COOKIES Cool unfrosted cookies completely before storing.
 1. PLAN EARLY! The holiday season becomes busy, and friends schedules fill up quickly. People are more likely to attend if you allow for plenty of advance notice. 2. INVITE! Extend the invite to a few more guests than you want to have.
 STEP 1: Begin with the tan and light beige cookies, grouping them at roughly twelve, four, and eight on your imaginary cookie clock.