This chapter is, in essence, a shopping list of the tools, parts, and software youll need to do the projects in this book. Most of the parts are common, and you probably have some in your junk box. A few arent worth getting anywhere else. Ill list the kinds of gear that has the parts we need, but these lists are certainly not the only places to look.
Some parts are best purchased new, and Ill list sources for them. You should know that I live in the continental United States, and my usual suppliers are nearly all in my country, which saves me postage. Ive taken care to name only suppliers Ive dealt with personally or large-scale operations I would buy from without trepidation.
If you are not in the continental United States, you can still use the websites that I list to look at the parts, but it will probably be cheaper for you to use suppliers in your own country to deliver them.
As for tools, if you have some or all of the tools on this list, great. No need to buy new ones. If not, Ill go into how to pick good ones without breaking the bank.
All the software and information listed are free, and many are open source.
Tools and Supplies
Science officers from certain starships may be able to build computers from stone tools and animal hides, but I'm here to tell you that it's easier with the right tools and supplies.
An Arduino
Well be building an Arduino-compatible device called the Cestino. (Thats Italian for recycling bin.) To build it, ironically, you need an Arduino. I developed the Cestino with an Adafruit DC Boarduino and an Arduino Mega but, except for the Leonardo, nearly any Arduino or any fully compatible clone that can handle 5v circuits will do.
If you dont already have an Arduino, then there are some questions to consider. First, can you solder? Second, do you want to be able to use Arduino shields, which are add-on boards that require the standard Arduino pin arrangement?
The Cestino will not have the standard pin layout, and it cannot be used with shields without a lot of jumpering and reworking of code.
If you can solder, and you dont care about shields, I strongly recommend Adafruits USB Boarduino kit. Once you solder it together, it can plug directly into your breadboard, and you can jumper it to the Cestinos breadboard sockets with ease. These are available from Adafruit ( http://www.adafruit.com ).
If you dont want to solder, or if it will save you a bundle to order in your home country instead of overseas from the United States, but you still dont care about shields, then the Arduino Nano will do all the same things as the Boarduino, and they come preassembled. They should be available at the usual Arduino (now Genuino) distributors, which are listed here: https://www.arduino.cc/en/Main/Buy . Make sure that the one you buy comes with its pins already soldered.
If you do care about shields, I suggest an Arduino Mega 2560 or an Arduino Uno R3. Like the micro and nano listed earlier, they should be available at the usual Arduino distributors. They are also the most commonly cloned boards, so non-Arduino-branded alternatives may be cheaper and easier to obtain.
Solderless Breadboards
All the projects in this book , as well as the Cestino itself, will live on solderless breadboards (Figure ). If youve not encountered these before, they consist of a plastic case drilled with holes every 1/10th of an inch (2.54mm) surrounding a central trough. Each row of holes is connected together under the plastic case so that an IC plugged into the central trough has several holes beside each pin so you can plug wires or other components in and connect them to the pin.
Figure 1-1.
Solderless Breadboard
The most common size of solderless breadboard is 6.5 inches by 2.1 inches (165.1 mm x54.36 mm) with 830 tie points (holes.) Youll need two of these, preferably the kind that can snap together along the long edge. While the pin spacing is standard and the power busses along each edge are usually standard, the connectors to snap two or more boards together are anything but. Make sure that both boards are the same brand if you have to order them.
The only extra feature on these boards thats really useful is to have the pin rows numbered. Its not absolutely essential, but youll be working with ICs with 40 pins on a side at times, and IC makers love to put the power and ground connectors right next to each other. For sanitys sake, I urge you to pay the tiny amount extra it costs to get labeled boards. You can also order a pair of these breadboards connected together with a metal backing and nice rubber feet to keep them from sliding off your workbench, with or without a built-in power supply, but these are much more expensive.
Solderless breadboards are available at Mouser ( http://www.mouser.com ), Digikey ( http://www.digikey.com (although its harder to find the cheap ones there), Adafruit, and so on. Theyre a standard tool for prototyping circuits, so your usual electronics suppliers should have them. You might consider shopping surplus dealers like MPJA ( http://www.mpja.com ) as they sometimes have solderless breadboards considerably cheaper. Its conceivable that old boards from the junk box might have corrosion in the tiepoints that would cause problems, or that the board has been used so much that the tiepoints are loose. They do wear out .
Jumpers (Optional)
A jumper is, in its most basic form, a piece of wire with two bare ends for connecting tiepoints of your breadboards together or to connect tiepoints to sockets on your Arduino.
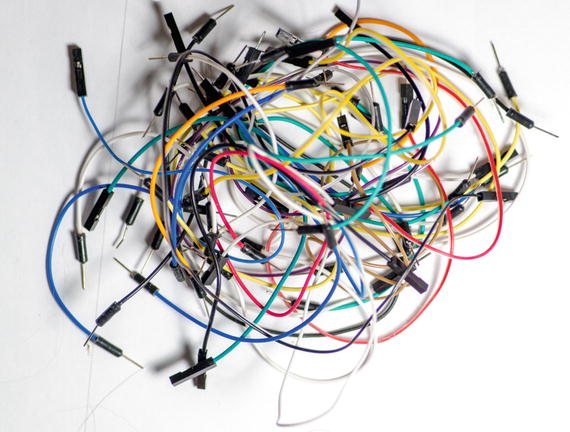
You dont actually have to buy jumpers like the ones in Figure . You can make your own out of hookup wire. When you get to the chapter on building the Cestino, youll see I did exactly that for the Cestinos wiring, mostly to make it neat and easily discernible from the project wiring in the photographs. But make no mistake. Stripping each jumper on both ends is tedious . I recommend a set of premade jumpers with hard connectors at each end for easy grabbing. These are available at Mouser and Jameco, but theyre very expensive there. Adafruit has them at a much more reasonable price. Most hobbyist electronics shops sell these as well. The more colors they come in, the better. If you're buying them, you want male-to-male jumpers.
Jumpers wear out.
Maybe I abuse my jumpers, pulling them out from the middle instead of the molded connectors on each end, but I had several jumpers turn up bad during the course of developing these projects and the Cestino itself, and spent several frustrating hours debugging software problems that turned out to be bad jumpers. If your jumpers have been around a while, and something just doesnt seem to work, test the jumpers for continuity .
Hookup Wire
You need hookup wire (Figure ). I recommend using it for the standing wiring of the Cestino, to keep it out of the way, if for no other reason. It also looks nicer. Also, sometimes you need a jumper of an unusual length, and having some hookup wire to make your own is very handy. There are only a couple of important specifications.

