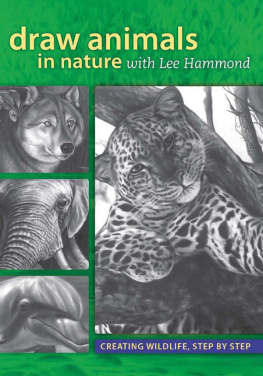
Draw Animals In Nature
With Lee Hammond
North Light Books
PANTHER
Graphite on smooth bristol
12 9 (30cm 23cm)
(For information on helping to save panthers, visit www.floridapanther.org.)
Contents
Introduction
I have actually lost track of the number of art instruction books I have written over the past fifteen years. While I have written books on how to draw animals and books on how to draw landscapes, this is the first time I have combined the two for creating complete nature studies.
In this book you will learn how to create an entire scene using my blended pencil technique. Please study the lessons in the order in which they are presented and complete each of the demonstration exercises. If you do this, you will achieve a greater success in your artistic growth.
I am a firm believer in learning through practice and trial and error. It takes time to develop a skill, and you must be diligent. Its no different than learning a new language or a musical instrument. It may feel clumsy at first, but it will get easier and easier with practice. Be easy on yourself and just enjoy the process. I always say, It is all in the doing! It is the process that gives us the satisfaction. Just enjoy!
You Can Do It!
One of the most common concerns I have heard throughout my years of teaching is, I cant even draw a straight line with a ruler! There is no way I can do this. Well, to that I say, Yes you can! The following examples are drawings done by students who were new to my methods and had little art experience before coming into my class.
Their first attempts reflect some common mistakes made by most beginners. For example, shapes are a bit distorted because no measuring methods were used. The students had previously believed that freehanding was the only way to draw like a real artist. The drawings are also over-outlined and a bit cartoon-like. There is a lack of dimension and realism due to not understanding my blended pencil technique.
The students second attempts at drawing the subjects show the vast improvements made within just a couple of weeks of training. There is clear improvement in both the shapes and the rendering. To help them with their shapes, I explained the process of graphing using the grid system. If their subject was difficult with a lot of detail, I also allowed them to use a projector to capture their shapes on paper.
Before I let them jump in and start the details, I made all of them practice the techniques we will cover in this book. These techniques are critical to drawing realistically. In practicing them, you will see how quickly your art will improve.
Before
In her first attempt Chrissie struggled with the shapes. The slight turn in the lions pose created some distortion in her initial line drawing. In creating the look of long hair, she stopped too soon. The results look incomplete.
Artwork by Chrissie Leander
After
Using a projector helped to draw the proportions of the face accurately. Adding background tones behind the face makes the light look like it is reflecting off the lion. The fur looks thicker and more dimensional due to layers of pencil strokes and blending. The use of a kneaded eraser makes the fur look full and shiny. Chrissie said, I never thought to add darkness around my drawing to make it stand out. It really helps make it look better. I was also surprised to see how many layers it takes to create the look of long hair.
Lees Lessons
Using a projector is not cheating! It is a smart way to capture an accurate line drawing, which is the foundation for your work. The rendering of the subject is what makes it art. Even the Old Masters used forms of projection to get the shapes correct before they began painting. Rulers, grids and projectors are all smart tools for achieving accuracy in your artwork.
Before
In this attempt, the shapes are a bit cartoon-like. While Randy did try to use some blending, the drawing still lacks realism.
Lees Lessons
The phrase I use the most when teaching is Get it darker! Some students swear they hear it in their sleep now. Contrast and the use of tones give a drawing believable dimensions. Without tone and contrast, the drawing appears flat and unfinished.
Artwork by Randy Williams
After
Everything about this drawing has improved. A projector helped to get the proportions correct, but the real improvement was in the blending technique and use of tone. Deepening the tones for more darkness brought out the contours of the panthers shape. A kneaded eraser helped create light areas to make the panther come to life. Randy said, I learned so much from this exercise. Shapes are really important, but the shading is critical. It is all about getting it darker, and knowing where to put the lights and darks.
CHAPTER ONE
Materials & Techniques
I am a self-taught artist. I had a natural style to my drawing for as long as I can remember. I loved realism. Most of the time in school everyone else was doing just the opposite. When I was learning, self-expression and Impressionism ruled the art world. Abstract and loose drawing styles were the norm. I felt like I didnt belong. Fact is, I didnt.
I admired the works of Rembrandt and Michelangelo. I liked subtle shading and a smooth approach. Unfortunately, there was no one who could teach me those techniques. So the long, hard road of trial and error ensued. It took me years of practice to find the methods to create the look I wanted.
The following pages will reveal my secretssecrets that took me years to develop and hone. We will cover the basics for drawing: shapes, contrast, form and blending. Even though it may seem a bit boring, these basic instructions are what separate the amateurs from the pros. Go slowly and really absorb the information. Before long, you too will be drawing realistically.
Basic Shapes Found in Nature
LIONS
Graphite on smooth bristol
9 12 (23cm 30cm)
Materials

