Frank Brody - Woodworking : Projects for beginners How to design Indoor Projects
Here you can read online Frank Brody - Woodworking : Projects for beginners How to design Indoor Projects full text of the book (entire story) in english for free. Download pdf and epub, get meaning, cover and reviews about this ebook. year: 2020, genre: Home and family. Description of the work, (preface) as well as reviews are available. Best literature library LitArk.com created for fans of good reading and offers a wide selection of genres:
Romance novel
Science fiction
Adventure
Detective
Science
History
Home and family
Prose
Art
Politics
Computer
Non-fiction
Religion
Business
Children
Humor
Choose a favorite category and find really read worthwhile books. Enjoy immersion in the world of imagination, feel the emotions of the characters or learn something new for yourself, make an fascinating discovery.

- Book:Woodworking : Projects for beginners How to design Indoor Projects
- Author:
- Genre:
- Year:2020
- Rating:3 / 5
- Favourites:Add to favourites
- Your mark:
Woodworking : Projects for beginners How to design Indoor Projects: summary, description and annotation
We offer to read an annotation, description, summary or preface (depends on what the author of the book "Woodworking : Projects for beginners How to design Indoor Projects" wrote himself). If you haven't found the necessary information about the book — write in the comments, we will try to find it.
Frank Brody: author's other books
Who wrote Woodworking : Projects for beginners How to design Indoor Projects? Find out the surname, the name of the author of the book and a list of all author's works by series.


Woodworking : Projects for beginners How to design Indoor Projects — read online for free the complete book (whole text) full work
Below is the text of the book, divided by pages. System saving the place of the last page read, allows you to conveniently read the book "Woodworking : Projects for beginners How to design Indoor Projects" online for free, without having to search again every time where you left off. Put a bookmark, and you can go to the page where you finished reading at any time.
Font size:
Interval:
Bookmark:
WOODWORKING
PROJECTS FOR BEGINNERS
How to design Indoor Projects
Volume 2
Frank Brody
Copyright
All rights reserved.
No part of this book may be reproduced in any form or by any electronic, print or mechanical means, including information storage and retrieval systems, without permission in writing from the publisher.
Copyright 2020Frank Brody
Table of Contents
Disclaimer
Purchasing this book can be seen as consent to the fact that both the publisher and the author of this book are in no way experts on the topics discussed within. This book is produced with the goal of providing information that is as accurate and reliable as possible. Under no circumstances will any legal responsibility or blame be held against the publisher for any reparation, damages, or monetary loss due to the information herein, either directly or indirectly. This declaration is deemed fair and valid by both the American Bar Association and the Committee of Publishers Association and is legally binding throughout the United States. There are no scenarios in which the publisher or the original author of this work can be in any fashion deemed liable for any hardship or damages that may befall the reader or anyone else after undertaking information described herein. The information in the following pages is intended only for informational purposes. As befitting its nature, it is presented without assurance regarding its prolonged validity or interim quality. Trademarks that are mentioned are done without written consent and can in no way be considered an endorsement from the trademark holder.
Then you are in the best place. Since furniture itself is the heart of furniture manufacturing, we start with a few pieces of furniture. Once you have started researching the furniture you want to deal with, or if you are drawing what you want to build, this guide will help you step by step. Knowing the language of woodworking will not make you a professional woodworker, yet it can help you master this ancient craft, implement their ideas and express them. This craft connects you in the same way. With the traditions and history of woodworking. What will you learn in this book?
How to build a leg
How to make flower inserts
Veneering the front and side aprons
How to build back aprons
How to stick the foundation
How to make a coffee table
And many other things you can become great with and enjoy in it.
It's time to start!
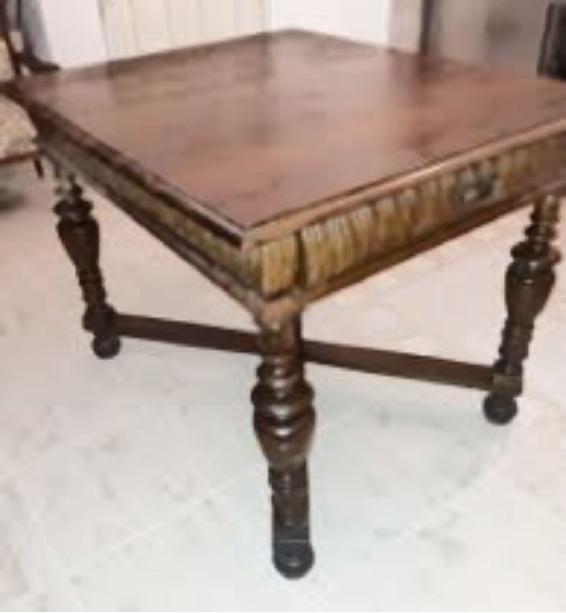
Card Table with tapered legs and string inlay, are frequently attributed to the 18th-cenrury furniture designer George Hepplewhite, but research suggests that this association may not be exclusively accurate.
I made a similar table from cherry, with crotch mahogany veneer on the aprons. The legs require 6 bd. ft of 8/4 stock, which is enough for the table's four legs plus one extra for confirming the tool setups for the many machining operations involved with the inlays.
The top requires 11 bd. ft. of well-matched 4/4 stock. You'll also need a supplementary 2 bd, ft. of 4/4 cherry for the back apron, which is essentially a three-part building that embraces an inner apron dovetailed into the side aprons and the two-part knuckle-joint gate-leg mechanism that supports the hinged top when open.
The cherry apron beads can be made from leg or top scraps. The front and side aprons are stack-laminated poplar, band sawn to shape and then veneered. I used about 10 bd. ft of in. thick poplar for the laminated blanks.
Since of the curved aprons and the intricacies of the inlays, the first step in building this table is to make full-scale drawings to work out the particulars in actual size.
You'll need patterns for the curved parts anyway, and so you might as well prepare them ahead of time. In addition, if you buy the oval flower inlays and the banding that trims the lower leg as I did, you should have them on hand In advance beginning fie venture.
I got my inlays traditionally made from holly, maple or satinwood. I had a piece of 4/4 satinwood, which I sawed into 1/16 -in. wide inlay strips.
- Begin by ripping the five 1 11/6 in. sq. leg blanks from the 8/4 stock.
- Crosscut the blanks to completed Distance, and then taper each side make use of a jig that holds the leg at a slight angle as it's passed through the table saw.
- The taper begins 4 in. below the top of each leg and extends to its base, which is only 5/8 in. sq.
- After tapering, each leg requires five separate operations to cut the grooves for the inlays.
- The legs must also be mortised to receive the apron tenons and dadoed for the lower apron bead that runs across the legs, but it's best to do these operations after constructing and veneering the aprons to ensure these joints are located properly.
- You should cut the banding grooves around the bottom of the legs first as they make handy stops for the long stringing grooves that you will cut afterward.
- This bit of wisdom comes from hindsight; I cut the stringing grooves first.
- I routed the banding grooves on the tapered legs with the aid of a miter gauge, even though the router table had no miter gauge slot;
- I simply ran the gauge's bar along the table's front edge with the router table fence clamped parallel to the front edge to locate the grooves.
- I set the miter gauge angle to compensate for the legs' taper by making test cuts on the fifth leg and measuring up squarely from the bottom of the leg until the groove ran parallel to the bottom.
- I made the long, straight grooves for the stringing with a Dremel tool fitted with a router-base attachment and guide.
- To cut the in-radius grooves at the top of the stringing pattern, I made a 1/8 in. thick Plexiglas fixture that has a 1/8 in. dia. hole in the centre of each of the arcs.
- A pivot pin screwed through the router-attachment base is inserted into each centre hole in turn and the Dremel tool is pivoted to cut the arcs.
- I used a pair of dividers with a dowel taped to one leg to locate the fixture on the surface to be inlaid.
- When the fixture was aligned so the arcs began at the ends of the straight stringing grooves and met at the centreline of the leg, I clamped the fixture to the leg and cut the grooves.
- After cutting the banding and stringing grooves, I ripped out the thin satinwood strips.
- When I got around to fitting the curved stringing sections, I discovered that satinwood is too brittle to bend well, and so I had to soak the stringing in water for numerous minutes and then bend it over a hot pipe mounted on a soldering iron.
- The soaking and heating had to be repeated numerous times to achieve the desired bend, and even then I broke numerous pieces.
- I cut and fit all the stringing for one leg surface at a time, including miters at the curves, and then glued the pieces in right away so I wouldn't lose them.
- The stringing expands to somewhat when it absorbs glue; so you should press the pieces into the glue-filled grooves as rapidly as possible.
- The expansion holds the pieces so rightly that there is no need to clamp the stringing.
Font size:
Interval:
Bookmark:
Similar books «Woodworking : Projects for beginners How to design Indoor Projects»
Look at similar books to Woodworking : Projects for beginners How to design Indoor Projects. We have selected literature similar in name and meaning in the hope of providing readers with more options to find new, interesting, not yet read works.
Discussion, reviews of the book Woodworking : Projects for beginners How to design Indoor Projects and just readers' own opinions. Leave your comments, write what you think about the work, its meaning or the main characters. Specify what exactly you liked and what you didn't like, and why you think so.