Tone Finnanger - Tilda Homemade & Happy
Here you can read online Tone Finnanger - Tilda Homemade & Happy full text of the book (entire story) in english for free. Download pdf and epub, get meaning, cover and reviews about this ebook. year: 2014, publisher: F+W Media, genre: Home and family. Description of the work, (preface) as well as reviews are available. Best literature library LitArk.com created for fans of good reading and offers a wide selection of genres:
Romance novel
Science fiction
Adventure
Detective
Science
History
Home and family
Prose
Art
Politics
Computer
Non-fiction
Religion
Business
Children
Humor
Choose a favorite category and find really read worthwhile books. Enjoy immersion in the world of imagination, feel the emotions of the characters or learn something new for yourself, make an fascinating discovery.

- Book:Tilda Homemade & Happy
- Author:
- Publisher:F+W Media
- Genre:
- Year:2014
- Rating:3 / 5
- Favourites:Add to favourites
- Your mark:
Tilda Homemade & Happy: summary, description and annotation
We offer to read an annotation, description, summary or preface (depends on what the author of the book "Tilda Homemade & Happy" wrote himself). If you haven't found the necessary information about the book — write in the comments, we will try to find it.
Tone Finnanger: author's other books
Who wrote Tilda Homemade & Happy? Find out the surname, the name of the author of the book and a list of all author's works by series.


Tilda Homemade & Happy — read online for free the complete book (whole text) full work
Below is the text of the book, divided by pages. System saving the place of the last page read, allows you to conveniently read the book "Tilda Homemade & Happy" online for free, without having to search again every time where you left off. Put a bookmark, and you can go to the page where you finished reading at any time.
Font size:
Interval:
Bookmark:
HOMEMADE & HAPPY

www.stitchcraftcreate.co.uk
When writing this book we took a trip to the mountains and photographed the designs in our log cabin, where the whole family gets together to celebrate Christmas. The photoshoot was particularly fun this time, as my little sister modelled with the projects for us.
Many of us enjoy nature and woodland, and the calming peace they bring us. At our cabin, nestled among the high mountains and expansive forests, you feel as if you've moved down a gear. Time doesnt matter any more.
Most of the projects were made in the cabins little sewing room with its rustic log walls as a backdrop, and with next winter and the family Christmas in our thoughts. In our family, we celebrate Christmas the whole year round.
When the publishers asked me what type of book this would be, I answered an autumn and winter book with a hint of Christmas, although many of the figures and models are just perfect for any season. The appliqu on the Christmas stockings, for example, works just as well throughout the year on a cushion or bag.
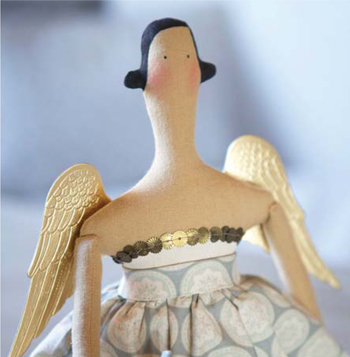
Homemade was an important theme in this book; the figures and projects must really look hand made. The homemade angel has proportions inspired by primitive dolls from yesteryear; the animals are deliberately too long or wide and a little naive in appearance.
Some of the projects can take a little while to make, as they are hand appliqud and hand quilted. They can be made simpler, though, and you will find a good selection of easier figures and designs to create throughout the book.
We hope you are inspired by these projects and have a fun and creative autumn, winter and Christmas!
Warmest regards,

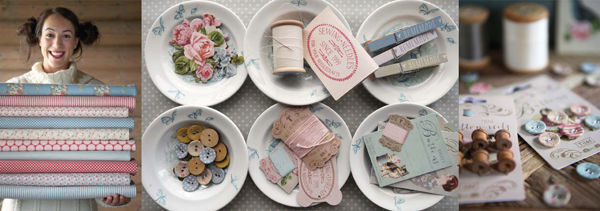
This book uses materials mainly in grey-blue, cold and warm green tones, and combines blue and soft red tones to create tiny treasures.
The monochrome off-white and skin-tone fabrics are made from soft Indian cotton in various colours, which can be found in the Tilda range. These are used for many of the projects, such as Quilted Father Christmas, the Christmas Stockings, the My Town Placemat and the figures.
The cotton wadding (batting) for the quilted models and fusible adhesive are available from Tilda's partner, Panduro Hobby and quilting shops.
Buttons, paper elements, ribbon and gift-wrap can also be found at from Panduro Hobby and quilting shops. Bag rings and hangers for the cardholders, as well as the pins and hearts, are also available from the Tilda range.
A large selection of Tilda products is also available from Tilda's partner and their retailers.
Get the latest news and ideas from Tilda at: www.tildasworld.com
To make a template, transfer the pattern onto cardboard, either using tracing paper or by gluing a copy onto it. Carefully cut the template out using a pair of sharp pointed scissors.
Cut out a piece of fabric large enough for the piece(s) of the figure twice. Fold the fabric in two, right sides together, and press (iron) the fabric completely flat. Place the template onto the fabric and draw around it with a thin marker pen.
Do not cut out the parts of fabric before you sew.
Sew a small seam, using a 1.5cm (58in) stitch. Be careful of openings and follow the project instructions carefully. For figures with thin necks, sew an extra small seam on each side of the neck to strengthen it.
Cut out the pieces. Use small pointed scissors to cut about 4mm (18in) outside the seam. Cut out a small curve at the openings in the seam.
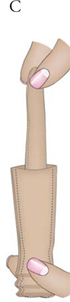
For figures with bases, sew around the pieces after cutting out, before turning them inside out. This is described in more detail in each of the project instructions. Cut small notches in the seam allowance where the seam curves in, keeping at least 1mm (116in) away from the seam. Turn the base inside out using a wooden stick. Pull the stick up from the inside of the seams and press the inside out pieces. Keep going until your piece matches the shape on the template and everything is properly turned inside out.
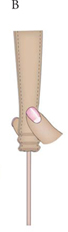
To turn thin legs and arms inside out, push the blunt end of a wooden stick (such as a flower stick or similar) towards the tip of the arm/leg, see .

To stuff the head, start by stuffing the tips of the hair and nose. For the tips of the angels' hair we recommend rolling a lump of stuffing in your hand, pushing it into place with a thin stick and fastening a pin through the tip of the hair to keep it in place. You can use the same technique for small noses, such as pig snouts. Stuff the rest of the head.
To stuff the neck, avoid using two lumps of stuffing for a thin neck, as this will create a kink. Push a large lump of stuffing in with a larger stick and press it in until it fills the whole neck. If you do get a bend in the neck, twist a pointed stick into the doll. Hold the head straight and twist the stick up through the neck into the head. Break the stick off so it protrudes slightly from the bottom of the neck and leave it in place. This will keep the neck straight and not damage it. Do not use this technique for figures that will be given to small children. Stuff the rest of the body.
To stuff large simple shapes, first decide which is the right side and which is the wrong side. Place the stuffing loosely on what will be the right side, i.e. the side facing the room, for example, on a pig, and stuff towards the back. Press the stuffing well in towards the seams. Continue filling until the seams are as even as possible.
Place legs on angels, sew up the openings and attach the arms and ears as described in the project instructions.
If you find a bend or a bump on a figure, take a large pin or a long needle, stick it into the area next to it and use it to push the stuffing towards the bend or bump to even it out. This is also a good technique if the stuffing has worked its way out of a nose or similar so that it's too flat or dented. Use the needle to push the stuffing back inside the figure.
- Paint
- Flat brush: size 24
- Larger brush: size 812
- Vanishing marker (optional)
The angels in the book have painted on details, such as hair, low-cut tops and shoes.
It is important to paint the pieces before sewing the angel together. However, the face should be painted (see ) after the figure has been sewn together to avoid smudging the paintwork while you are stitching.
Font size:
Interval:
Bookmark:
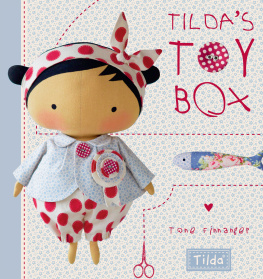
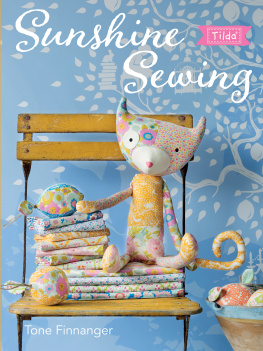
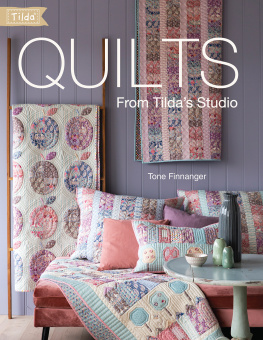
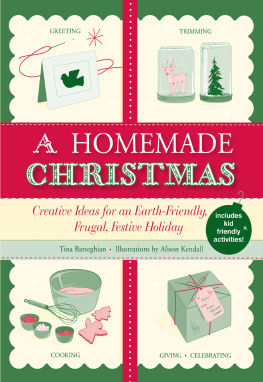
Similar books «Tilda Homemade & Happy»
Look at similar books to Tilda Homemade & Happy. We have selected literature similar in name and meaning in the hope of providing readers with more options to find new, interesting, not yet read works.
Discussion, reviews of the book Tilda Homemade & Happy and just readers' own opinions. Leave your comments, write what you think about the work, its meaning or the main characters. Specify what exactly you liked and what you didn't like, and why you think so.