it-ebooks - introduction-to-touchdesigner
Here you can read online it-ebooks - introduction-to-touchdesigner full text of the book (entire story) in english for free. Download pdf and epub, get meaning, cover and reviews about this ebook. year: 2018, publisher: iBooker it-ebooks, genre: Home and family. Description of the work, (preface) as well as reviews are available. Best literature library LitArk.com created for fans of good reading and offers a wide selection of genres:
Romance novel
Science fiction
Adventure
Detective
Science
History
Home and family
Prose
Art
Politics
Computer
Non-fiction
Religion
Business
Children
Humor
Choose a favorite category and find really read worthwhile books. Enjoy immersion in the world of imagination, feel the emotions of the characters or learn something new for yourself, make an fascinating discovery.

- Book:introduction-to-touchdesigner
- Author:
- Publisher:iBooker it-ebooks
- Genre:
- Year:2018
- Rating:4 / 5
- Favourites:Add to favourites
- Your mark:
introduction-to-touchdesigner: summary, description and annotation
We offer to read an annotation, description, summary or preface (depends on what the author of the book "introduction-to-touchdesigner" wrote himself). If you haven't found the necessary information about the book — write in the comments, we will try to find it.
it-ebooks: author's other books
Who wrote introduction-to-touchdesigner? Find out the surname, the name of the author of the book and a list of all author's works by series.


introduction-to-touchdesigner — read online for free the complete book (whole text) full work
Below is the text of the book, divided by pages. System saving the place of the last page read, allows you to conveniently read the book "introduction-to-touchdesigner" online for free, without having to search again every time where you left off. Put a bookmark, and you can go to the page where you finished reading at any time.
Font size:
Interval:
Bookmark:
Wiring Operators is the most basic operation in TouchDesigner. All projects are made up of nothing more than groups of Operators wired together. Each Operator, on its own, does a very specific thing, but when they are combined together into a Network, they can solve extremely complex problems.
All data in TouchDesigner flows from left to right. Any inputs that an Operator has will always be on the left side, and outputs will be on the right side. The inputs and outputs will also be ordered first to last, going from top to bottom. In the example diagram below, follow the two signals starting on the left. As they flow from left to right, they are composited, one over the other.

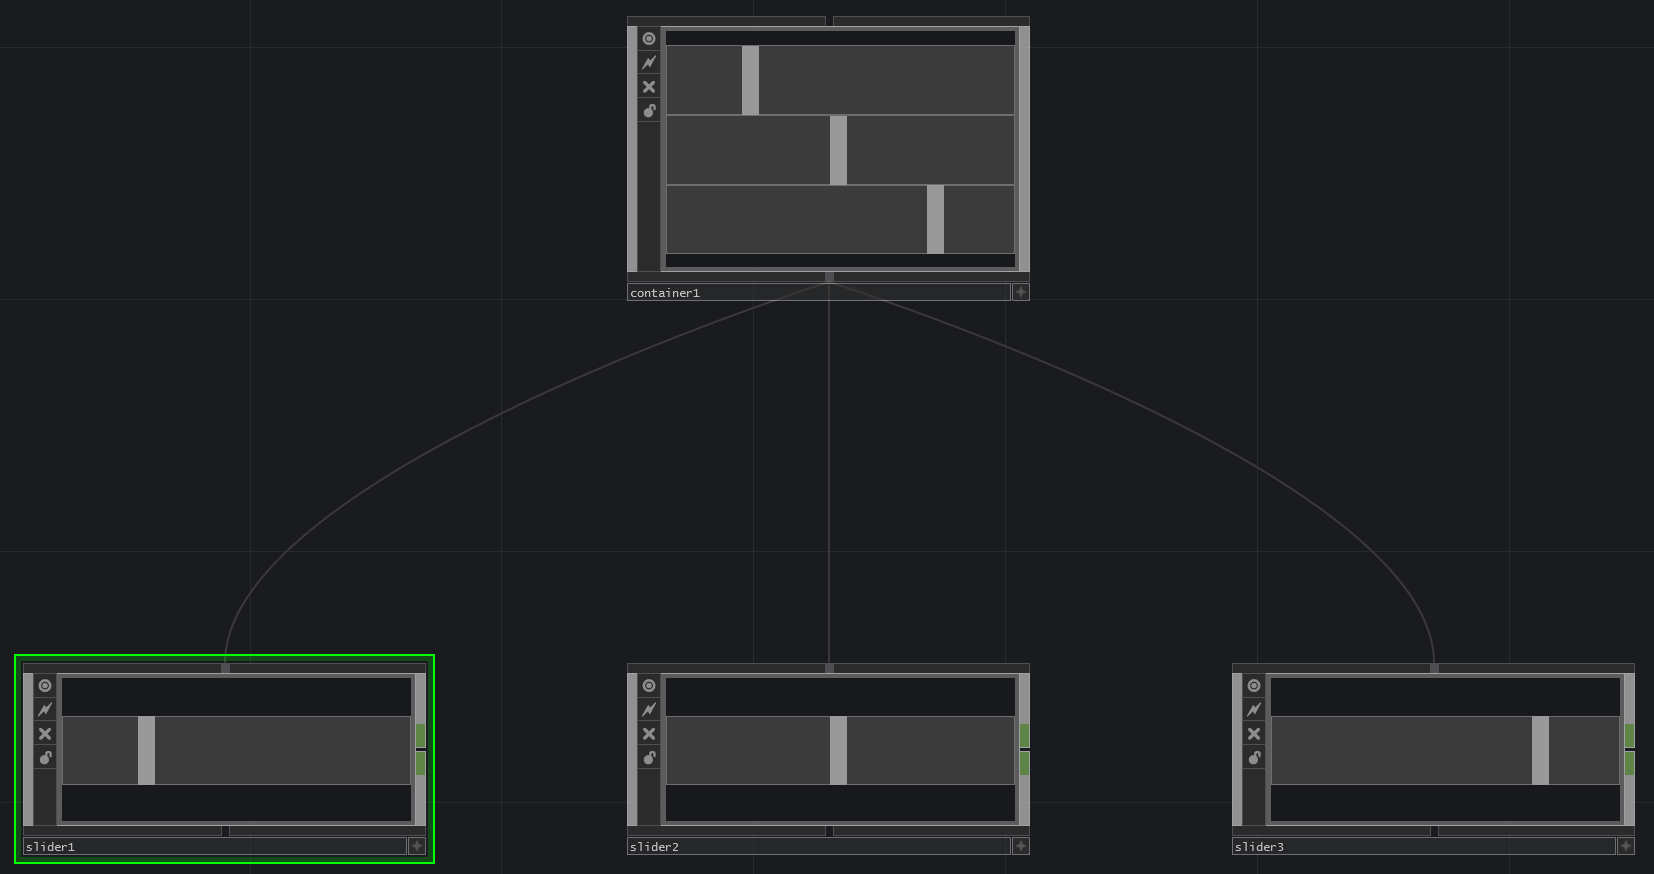
Components, interestingly, have the same data signal flow as Operators, flowing from left to right, but they are also capable of parent and child relationships, which flow from top to bottom. The component at the top of the signal chain is the parent, and the components below it are its children, and below that are the childrens children, and so on. In the example below, there is a small UI, that is made of a few sliders. In this example, the Slider COMPs are the children of the Container COMP, which is the parent.
The OP Create Dialog can be reached in a multitude of ways. Each has a correct time and place of usage. When creating Operators from scratch the two easiest methods are to hit Tab on the keyboard, or to double click on the Network background.
When working with existing chains of Operators, there are two easy ways to add Operators. The first is to right click on either the input or output of an Operator. This will add the chosen Operator, pre-wired, directly before the input or after the output. This is especially useful as it inserts the Operator seamlessly into a pre-existing chain.
For example, there is a Constant TOP wired to a Null TOP, and a Transform TOP needs to be added between the two. Right clicking either the output of the Constant TOP, or the input of the Null TOP, and selecting Transform TOP, would create a Transform TOP, that would be pre-wired in-between the Constant TOP and Null TOP.
The second way to add an Operator to an existing chain is to middle click on the output of an Operator. The difference is that right clicking integrates the newly created Operator into the current Operator chain, whereas middle clicking creates a new branch in parallel to the chain of Operators.
Similar results can be achieved by right clicking on the wire itself and clicking on Insert Operator or Add Operator. Insert Operator acts like right clicking an Operators output and integrates it into the current Operator chain, whereas Add Operator acts like middle clicking and creates a new branch in parallel to the chain.
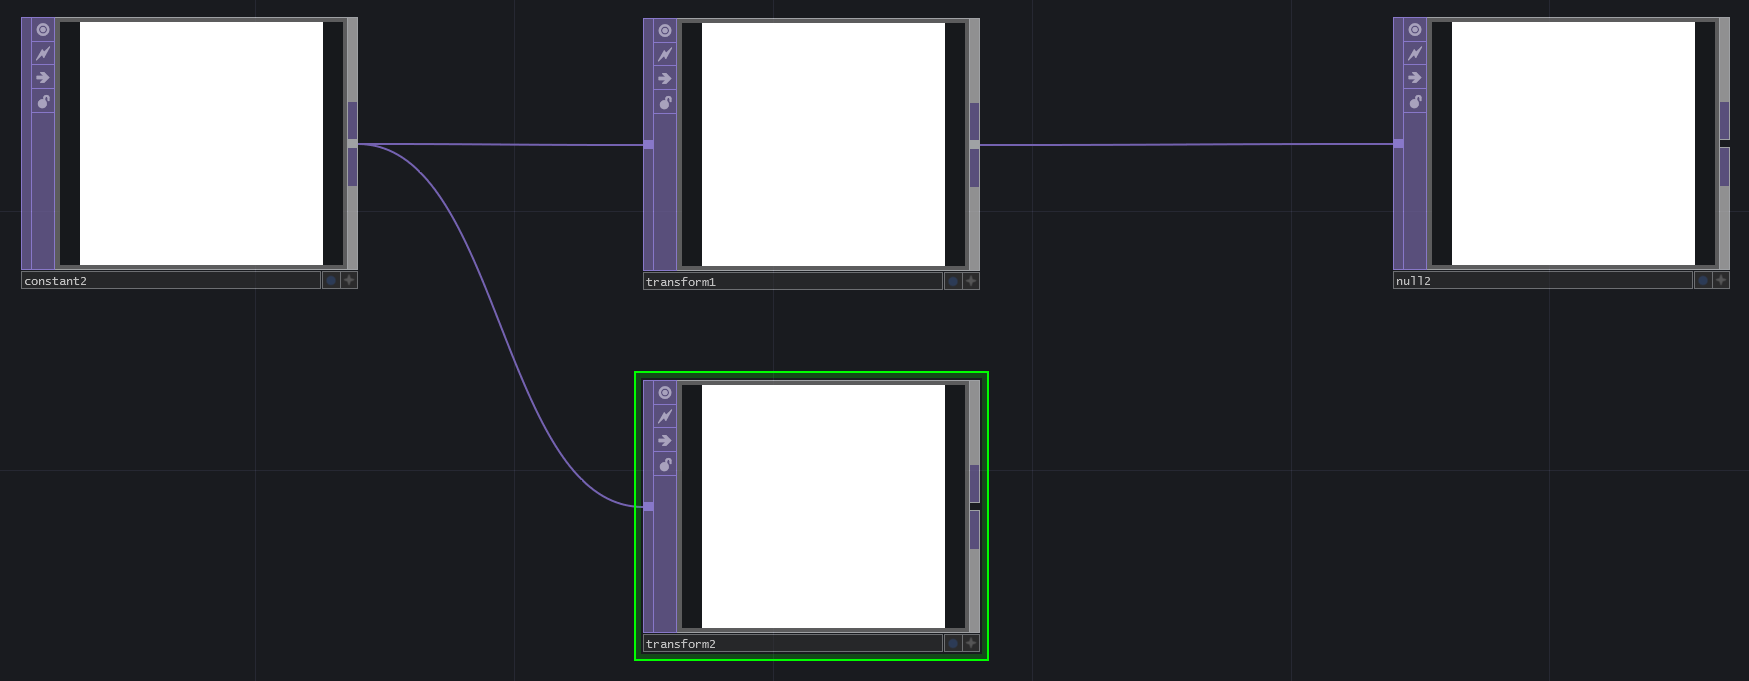
In the diagram below, there is an example with a Constant TOP and a Null TOP. In the next diagram, the wire connecting them was right clicked and a Transform TOP was created using Insert Operator. In the proceeding diagram, the wire connecting the Operators was right clicked and a Transform TOP was created using Add Operator. Notice how it is pre-wired in parallel to the first Transform TOP.


There are two useful key commands when working with the OP Create Dialog: Control and Shift. Open the OP Create dialog, hold down Control on the keyboard, and then begin to select multiple Operators in a row. Each one will be added to the Network below the last. This is useful for quickly populating a Network with a few different Operators.
Similarly, open the OP Create dialog, press and hold the Shift key, and then begin to select multiple Operators. This is different than above, in that the Operators will be wired together in series. This key command can be used to quickly create small, or large, chains of pre-wired Operators.
Both of these key commands are quite powerful, but they become even more so when they are usedin tandem. For example, a project requires 3 chains of Operators. The first will consist of a Circle TOP, connected to a Blur TOP, connected to a Null TOP. The second will consist of a Circle TOP, connected to an Edge TOP, connected to a Noise TOP, connected to a Null TOP. The final chain will consist of a Movie In TOP, connected to a Blur TOP, connected to a Null TOP. Lets go through this step by step, to demonstrate practical use of the above key commands:
Open the OP Create dialog
Press and hold down Shift
While holding Shift, click on Circle TOP, Blur TOP, then Null TOP. This will create the first chain.
Release the Shift key
Press and hold down Control. This will place the next Operator below the first Operator.
Holding Control, click on Circle TOP
Release the Control key
Press and hold down the Shift key
While holding Shift, click on Edge TOP, Noise TOP, and then Null TOP. This will create the second chain
Release the Shift key
Press and hold Control
While holding Control, click on Movie In TOP.
Release the Control key
Press and hold Shift
Click on the remaining operators: Blur TOP, and Null TOP
Now that all of the Operators are created, use the Esc key to close the OP Create dialog.
After closing the OP Create Dialog, all the required Operators will be wired and ready to go in the project. These key commands have not only saved having to open and close the OP Create Dialog for every Operator, but theyve saved the need to manually wire them.
The mouse plays a vital role in TouchDesigner programming, and a high-quality mouse is highly recommended. The mouse is used to move around the Network and work with Operators.
To navigate around the Network, left click and drag the Network background. Left click on an Operator to select it. Left click and drag that Operator to move it around the Network. Right click on an Operator to reveal a menu with options that will be introduced slowly. To select and work with more than one Operator, right click and drag the selection box around the desired Operators. Middle click on an Operator to get more info about it. There is a UI button that displays the same Operator info window, which is useful when using a mouse that doesnt have a middle click button.
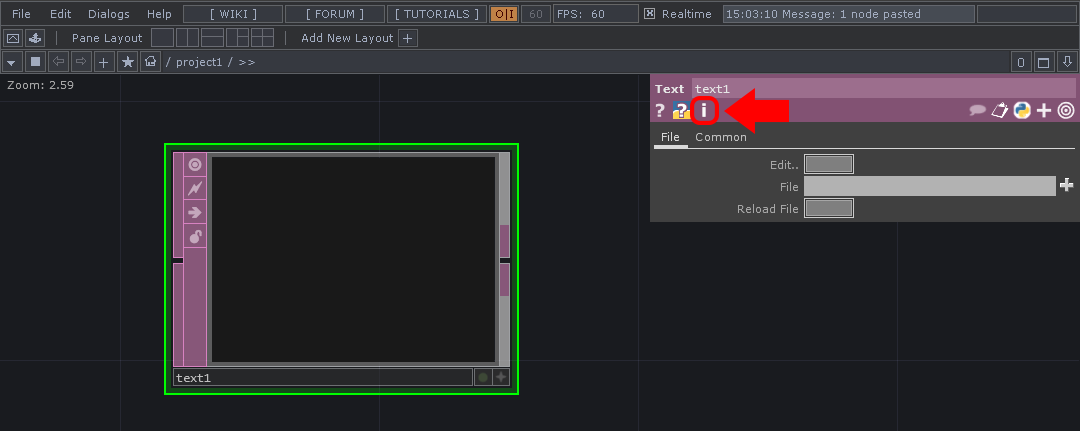
Left-click on the i to get more detailed information about the selected operator.
There are several key commands used to navigate TouchDesigner projects. Two of these key commands are u and i. Press u will move up one Network, and out of the current component. To go inside of a Network or component (like a Container COMP or Base COMP), select the component and hit i.
Font size:
Interval:
Bookmark:
Similar books «introduction-to-touchdesigner»
Look at similar books to introduction-to-touchdesigner. We have selected literature similar in name and meaning in the hope of providing readers with more options to find new, interesting, not yet read works.
Discussion, reviews of the book introduction-to-touchdesigner and just readers' own opinions. Leave your comments, write what you think about the work, its meaning or the main characters. Specify what exactly you liked and what you didn't like, and why you think so.