Lee - Building Applications for the Mac App Store
Here you can read online Lee - Building Applications for the Mac App Store full text of the book (entire story) in english for free. Download pdf and epub, get meaning, cover and reviews about this ebook. year: 2011, publisher: Wrox, genre: Home and family. Description of the work, (preface) as well as reviews are available. Best literature library LitArk.com created for fans of good reading and offers a wide selection of genres:
Romance novel
Science fiction
Adventure
Detective
Science
History
Home and family
Prose
Art
Politics
Computer
Non-fiction
Religion
Business
Children
Humor
Choose a favorite category and find really read worthwhile books. Enjoy immersion in the world of imagination, feel the emotions of the characters or learn something new for yourself, make an fascinating discovery.

- Book:Building Applications for the Mac App Store
- Author:
- Publisher:Wrox
- Genre:
- Year:2011
- Rating:3 / 5
- Favourites:Add to favourites
- Your mark:
Building Applications for the Mac App Store: summary, description and annotation
We offer to read an annotation, description, summary or preface (depends on what the author of the book "Building Applications for the Mac App Store" wrote himself). If you haven't found the necessary information about the book — write in the comments, we will try to find it.
Lee: author's other books
Who wrote Building Applications for the Mac App Store? Find out the surname, the name of the author of the book and a list of all author's works by series.


Building Applications for the Mac App Store — read online for free the complete book (whole text) full work
Below is the text of the book, divided by pages. System saving the place of the last page read, allows you to conveniently read the book "Building Applications for the Mac App Store" online for free, without having to search again every time where you left off. Put a bookmark, and you can go to the page where you finished reading at any time.
Font size:
Interval:
Bookmark:
Contents
Building Applications for the Mac App Store
WHAT YOU WILL LEARN
- How to use the Mac App Store to download and purchase applications
- The tools you need to develop for the Mac App Store
- How to obtain the various developer certificates
- How to prepare your application for submission to the Mac App Store
- How to test your applications
Apple announced the Mac App Store October 20, 2010, during Apples Back to the Mac event. Encouraged by the success of the iOS App Store, Apple built the Mac App Store as a digital distribution platform for Mac OS X applications. This enables users to easily search and purchase applications from a single source, much like users purchase apps from the App Store from the iPhone or iPad. Apple began accepting app submissions November 3, 2010, and the Mac App Store opened for business January 6, 2011. Within 24 hours, Apple reported more than a million downloads.
In this eBook, you learn how to obtain and access the Mac App Store from your Mac. You also learn about the available opportunities for developers who want to venture into the Mac market. And the second part of this eBook walks you through the steps you need to perform to publish your apps in the Mac App Store.
OBTAINING THE MAC APP STORE ON YOUR MAC
The Mac App Store is only available with version 10.6.6 or above for Mac OS X. If you run Snow Leopard (10.6), be sure to perform a software update to update your Mac OS X to the latest version.
After you update your Mac, you can find the App Store icon located on the Dock (see ).
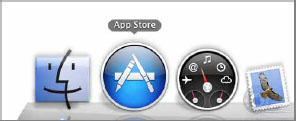
Accessing the Mac App Store
You can directly access the Mac App Store in two ways:Launch it through the App Store icon or through the Apple App Store menu.
After the Mac App Store launches, you see the window shown in .
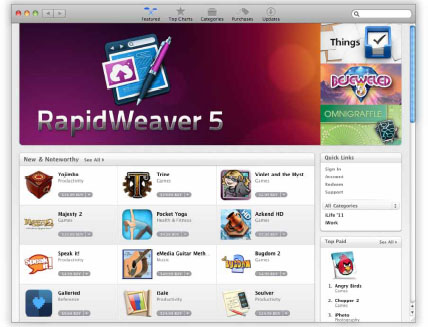
Similar to the iOS App Store (for the iPhone, iPod touch, and iPad), the Mac App Store has five sections: Featured, Top Charts, Categories, Purchases, and Updates.
To make purchases (or download free apps) on the Mac App Store, you need an Apple ID. You can use the existing Apple ID that you use for your iOS App Store or apply for one if you do not have one. To sign in to the Mac App Store (or to apply for an Apple ID), in the Quick Links box on the right of the window, click Sign In. In the pop-up that appears, enter your Apple ID, or click the Create Apple ID button.
To install an application, click the gray button below the application that you want to purchase or download; the application automatically downloads onto your computer. The application icon then appears on the Dock. You can also find the installed application in the Applications folder.
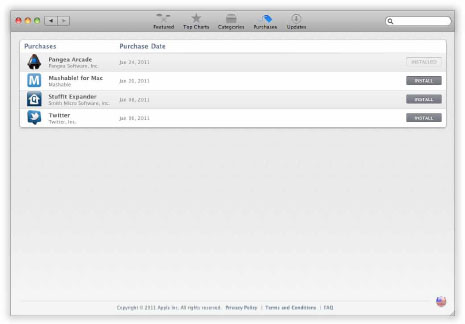
On the Mac App Store application window, if you click the Updates tab, you see a list of applications you previously have purchased or downloaded. For those applications installed on the current computer, you can see the grayed out Installed button (see ). For those applications you installed on another computer, you can click the Install button to download and install them on the current computer again.
SETTING YOUR APP STORE EXPECTATIONS
The success of the iOS App Store has inspired many iOS developer wannabes to start learning and writing iOS apps. In the early days, it was much easier to make money selling apps on the App Store, but as more and more apps populate the App Store, its a challenge to stand out among the crowd. Although you may have heard of many success stories of people making millions of dollars a month selling apps in the App Store, behind every success story there are probably a few hundred sad stories as well. Most developers cant make enough to justify the time and effort they spend on building the apps.
That said, you can make some money from the Mac App Store if you have realistic expectations. Do not expect the earnings from the App Store to keep you alive. Instead, treat it as a supplement to your income from your full-time job. Do it in your spare time, such as at night or during the weekends. Gauge the response from customers, and add more features as time goes by. When you are sure your application has a group of followers, you can then dedicate more time to it and slowly make it your main source of income if the customer base is sufficient.
WRITING FOR THE MAC APP STORE
Now that you are sufficiently motivated with the potential success that you might enjoy with the Mac App Store, its time to take stock of what you need to have and, most important, know to publish your apps in the Mac App Store.
The greatest hurdle to most developers who are new to Mac OS is the language used for Mac development: Objective-C. Although Objective-C is an extension of the C language, with object-oriented features, its syntax is not quite the same as most modern programming languages such as Java, C#, and Visual Basic.NET. In particular, its arcane syntax for declaring and calling methods (known as message parsing in Objective-C) often trips up beginning programmers. Therefore, the first thing aspiring Mac developers should invest in is getting a good foundation in the Objective-C language. For this, you can get a copy of Stephen Kochans Programming in Objective-C 2.0 book, published by Addison Wesley, 2009.
Besides learning Objective-C, you should also have a basic understanding of the development framework used in Mac OS development: the Cocoa Framework. For a good grounding in the Cocoa Framework, check out Objective-C, Cocoa, and Xcode All-in-One For Dummies , by Robert Holcomb, published by Wiley, 2010.
Requirements to Get Started
To write for the Mac, you obviously need a Mac any Intel Mac will do from the entry level MacBook to the high-end Mac Pro. The tool for writing Mac OS X and iOS applications is Xcode, which you can obtain for free from http://developer.apple.com/technologies/xcode.html . (You do need to register for a free Apple Developer Connection [ADC] membership.)
To publish your applications in the Mac App Store, you need to enroll in the Mac Developer Program, which costs $99 per year (allowing you to publish an unlimited number of apps). You can enroll for the Mac Developer Program at http://developer.apple.com/programs/mac/ .
After you enroll in the Mac Developer Program, you can log in to the Mac Dev Center at https://developer.apple.com/devcenter/mac/index.action .
If you have not downloaded Xcode yet, this is the time to do so. Ensure that you download Xcode and install it into the default /Developer directory. (Use the default settings during installation and it automatically does it for you.)
After installing Xcode, you also need to download an additional tool: the Application Tools 1.1. This can be downloaded directly from https://developer.apple.com/devcenter/download.action?path=/ios/ios_sdk_4.2__final/application_tools_1.1.dmg .
Creating Mac App IDs
The first step toward publishing your apps in the Mac App Store is to create App IDs. App IDs are identifiers that uniquely identify your applications so that they can update your applications in the future.
To create Mac App IDs for your applications, log in to the Mac Dev Center, and in the Developer Certificate Utility section, click Get Started.
Font size:
Interval:
Bookmark:
Similar books «Building Applications for the Mac App Store»
Look at similar books to Building Applications for the Mac App Store. We have selected literature similar in name and meaning in the hope of providing readers with more options to find new, interesting, not yet read works.
Discussion, reviews of the book Building Applications for the Mac App Store and just readers' own opinions. Leave your comments, write what you think about the work, its meaning or the main characters. Specify what exactly you liked and what you didn't like, and why you think so.