RICHARD TAYLOR
Learn to Draw
in a Weekend

Contents
Introduction
Drawing has, for centuries, been the lifeblood of artists: Leonardo da Vinci drew, Pablo Picasso drew, and so did numerous artists whose names are not so readily acknowledged by history. But these people did not draw just to enable them to produce paintings; they drew for the sake of drawing.
Drawing is the first art form that most of us encounter. At a very early age we are given crayons, and in our first days at school we are encouraged to draw pictures that inform teachers about our life outside school. All of us have some drawing ability somewhere inside, and the purpose of this book is to help you to bring that ability out and to develop it into something you will be proud of.
Drawing in a weekend may seem like rather a tall order, but if you use your weekends in a structured way practising for ten minutes before you set the breakfast table, for example, then ten minutes before you begin to work in the garden, always drawing objects that are part of your daily activities then you will see progress over a series of weekends. I shall be with you all the way through the pages of this book and, hopefully, our weekends will be highly profitable in terms of drawings created.
How to use this book
This book is structured to take you from drawing the most basic of shapes at your kitchen table through to sketching on the quayside at a harbour, making drawings of the boats, the sea and sky and the many stages in between. Work through the book from start to finish, taking as long as you like to practise the different skills explored in the following pages. Every now and again you will come across Try it yourself exercises; these are timed to encourage you to capture the essence of certain shapes or objects and not to spend too long fiddling with lines or tones. The first few minutes of any drawing are decisive, and the quicker and more confident you are in your approach, the greater the likelihood of success.
The step-by-step drawing sequences are designed to show you how drawings can progress from simple shapes to complex images. You may wish either to copy the drawings, or to set up similar subjects yourself and draw them from life. Translating a two-dimensional image onto a two-dimensional surface requires a certain level of skill but the skill you should really be aiming to develop is translating three-dimensional objects onto a two-dimensional sheet of paper.
As you move through the book, you will note that hardly any of the drawings have been made within a rectangle or are bound by hard-edged lines. The reason for this is simple I do not like to feel restricted in my drawing from the outset by knowing that I cannot extend the marks made outside four arbitrarily set outlines.
This leads me on to my final point: when is a drawing finished or complete? If you work within a series of visual boundaries, you will probably judge that your drawing is finished when you have taken it out to the hard edges and filled in the space in between. But this attitude is unnecessarily restrictive. Your drawing may well be finished before you even reach the outline border, but you may feel as if you have to keep working on it. I like to start with my main object and work around it, making my own decision about when I stop and I strongly recommend that you do the same!
Materials
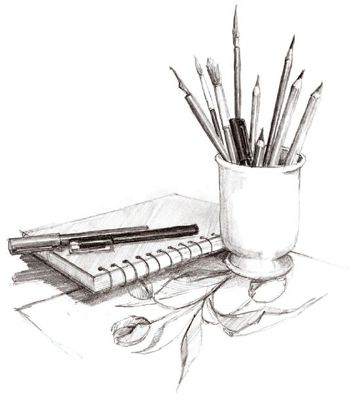
It is a fact that you can draw with almost anything a burnt stick, a finger dipped in coffee, even a foot in sand. Most of us, however, require something a little more permanent, and usually opt for more conventional pencils and pens. But you do not need to be elitist about this you can draw with a ballpoint pen or a childs handwriting pen. The office stationery cupboard may not be so appealing as the art store, but they both hold enough equipment to allow your drawing skills to develop.
The starting point has to be the surface what exactly do you draw onto? Start with a ringbound cartridge paper sketchpad around 100 sheets should suffice; these pads allow you to fold each sheet of paper back on itself without creasing or tearing the paper, while cartridge paper is an excellent multi-purpose paper that allows you to draw with pen, pencil and watercolour paints. Ringbound pads also allow you to keep all your drawings together, enabling you to look back at your progress at any point.
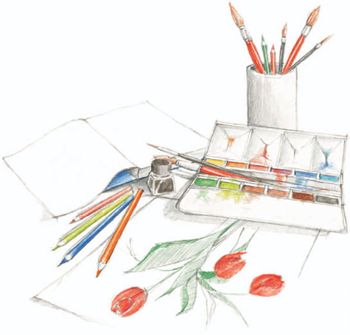
As with anything to do with art, the materials and processes are difficult to categorize, but I have included three distinct types of drawing materials: dry (pencils), wet (ink and watercolour paints) and the particularly useful dry and wet watersoluble pencils.
Starting with dry materials, you can draw with any type of pencil, but a set of B grade (soft) pencils 2B, 4B, 6B, 8B should cover any subject. The standard issue HB pencil can always be used in an emergency, but is restrictive because of the neutral quality of the lead. Coloured pencils come in a wide variety of types and colours, but they can all be blended and used for an amazing selection of subjects. (Charcoal, pastels and all manner of crayons fall into the dry category, but these materials need careful handling and are best used once you reach the next phase of drawing.)
Wet materials include ink pens, Indian ink and watercolour paints yes, I do include paints as materials with which you can draw: if drawing is about recording shapes of objects using line and tone to create the illusion of three-dimensional space and form on a flat surface, paints can be used perfectly legitimately within this definition. Watercolour paints allow you to tint a drawing quickly and effectively, as their translucent qualities allow any line drawing to show through, keeping the essence of the drawing technique intact. The same applies to inks they can become an integral part of the drawing process as long as they remain subservient to the underlying pen or pencil line drawing.
My other favourites are watersoluble pencils. These come in two types: watersoluble graphite pencils, which can be used as normal graphite pencils or washed across with a wet paintbrush to activate the grey pigment, creating soft, watery tones of grey. Watersoluble coloured pencils are used in exactly the same way, only you can blend two or more colours together and then wash over these with water to completely change the nature of the original pencil marks. Alternatively, you can produce a monochrome colour drawing sepia pencils can be very effective for this. Finally, a few peripheral items come in handy. I use a kneaded eraser, which is soft and pliable, and does not damage the surface of the paper. A good pencil sharpener is vital, and you can spray any pencil drawing with a fixative spray to prevent your work from smudging.
Pencils
The pencil is probably the implement that most people immediately associate with the term drawing and not unreasonably, as it is a clean, easily accessible implement that can be found easily anywhere.
A pencil is basically a compressed stick of graphite (the lead) encased within a thin wooden shell. It is the quality and grade of the graphite that makes different types of pencils more suited to certain subjects.

