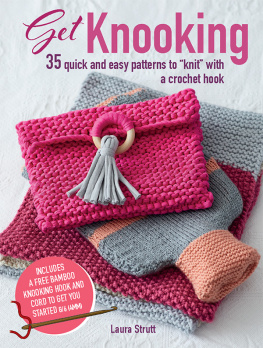
Get Knooking quick and easy patterns to knit with
a crochet hook Laura Strutt

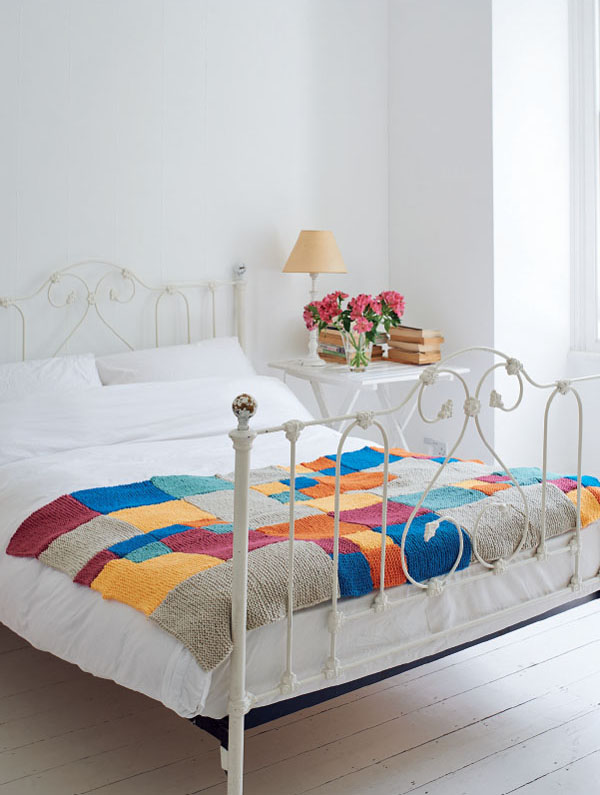
To John and Eth an Wolf Published in 2019 by CICO Books An imprint of Ryland Peters & Small Ltd 2021 Jockey's Fields341 E 116th St London WC1R 4BWNew York, NY 10029 www.rylandpeters.com 10 9 8 7 6 5 4 3 2 1 Text Laura Strutt 2019 Design, illustration, and photography CICO Books 2019 The author's moral rights have been asserted. All rights reserved. No part of this publication may be reproduced, stored in a retrieval system, or transmitted in any form or by any means, electronic, mechanical, photocopying, or otherwise, without the prior permission of the publisher. A CIP catalog record for this book is available from the Library of Congress and the British Library. E-ISBN: 978 1 78249 761 5 ISBN: 978 1 78249 690 8 Printed in China Editor: Kate Haxell Pattern checker: Marilyn Wilson Designer: Louise Le er Photographers: Terry Benson and James Gardiner Illustrator: Stephen Dew Stylist: Nel Haynes In-house editor: Anna Galkina Art director: Sally Powell Head of production: Patricia Harrington Publishing manager: Penny Craig Publisher: Cindy Richards
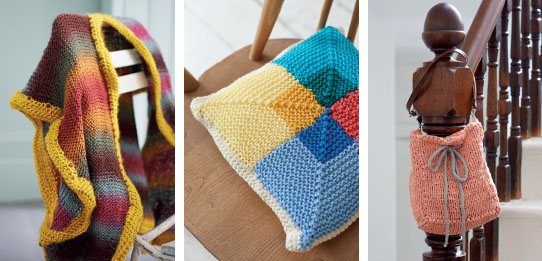
Contents Chapter 1
WEARABLES Chapter 2
ACCESSORIES Chapter 3
HOMEWARES With a life-long love for textile crafts, passed to me from my grandmothers and mother, and with a nudge from my sister (I took up knitting again 14 years ago when my first nephew was born), the opportunity to try my hand at a new technique featuring yarn is a fabulous and exciting opportunity. Knooking is a wonderfully clever way to create knitted fabrics with the use of a single, cord-strung hook, and while I came to it with both knitting and crochet experience, this technique is accessible to those who enjoy other yarn crafts, and also those who are completely new to this creative realm.
The illustrated instructions will show you how to master the knooking technique quickly and easily and soon enough you will fall into the rhythm of working the different stitches. As with knitting, you are able to create a wide range of textures such as those used in the Infinity Scarf (). Due to the small number of supplies that you need, knooking is a wonderfully portable craft, so you can tote along a ball of yarn and you favorite knooking hook and work on your makes on the go! Happy Knooking! Laura 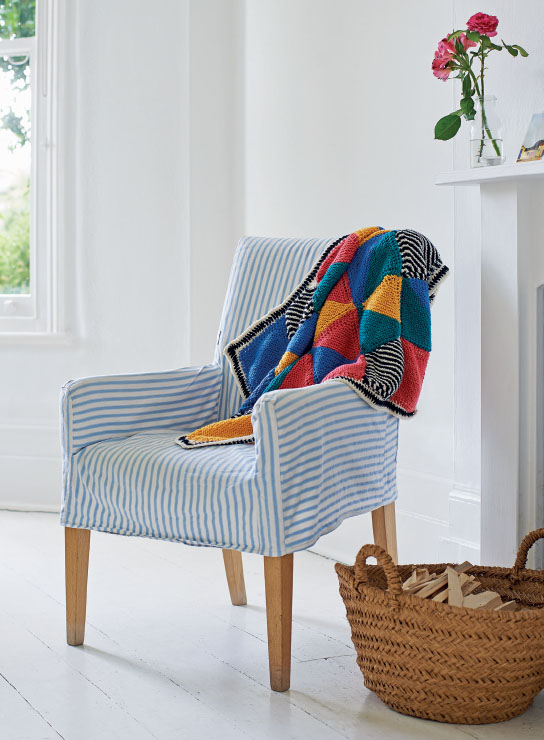 The knooking methods are easy to master for a beginner, and if you have knitted or crocheted before then you will have no problem understanding the simple stitches involved in knooking. GAUGE (TENSION) A gauge (tension) is given with each pattern to help you make your item the same size as the sample. The gauge (tension) is given as the number of stitches and rows you need to work to produce a 4-in (10-c m) square of knitting. Using the recommended yarn and knooking hook, cast on 8 stitches more than the gauge (tension) instruction asks forso if you need to have 10 stitches to 4in (10cm), cast on 18 stitches.
Working in pattern as instructed, work eight rows more than is needed. Bind (cast) off loosely. Lay the swatch flat without stretching it. Lay a ruler across the stitches as shown, with the 2in (5cm) mark centered on the knitting, then put a pin in the knitting at the start of the ruler and at the 4in (10cm) mark: the pins should be well away from the edges of the swatch. Count the number of stitches between the pins. Repeat the process across the rows to count the number of rows to 4in (10cm).
If the number of stitches and rows you've counted is the same as the number asked for in the instructions, you have the correct gauge (tension). If you do not have the same number then you will need to change your gauge (tension). To change gauge (tension) you need to change the size of your knooking hook. A good rule of thumb to follow is that one difference in hook size will create a difference of one stitch in the gauge (tension). You will need to use a larger hook to achieve fewer stitches and a smaller one to achieve more stitches. 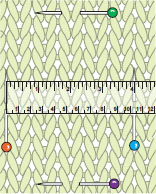 THE ANATOMY OF A KNOOKING HOOK A knooking hook features a hook on one end of the shaft and a hole or eye on the other.
Like a crochet hook, knooking hooks are available in a number of sizes, and each project will include the size and gauge (tension) information. The hook is used to pick up the working yarn to create the new stitches, which are initially held on the shaft of the knooking hook before being fed onto the cord. The eye at the end of the knooking hook is used to hold a length of cord on which the working stitches are placed, allowing you to turn the piece and work back and forth in rows. Thread the cord into the eye in the same way as threading a needlepass one end of the cord through the eye and draw through a short length, leaving the remaining length hanging loose. The cord can be a length of waste yarn. Select something smooth, such as a cotton or acrylic yarn, but avoid anything with long fibers like mohair or angora, as the fibers can get tangled up in the stitches.
If you pick a cord that is a contrasting color to the project, it will help you to clearly see the stitches as you need to work them. Make sure that the cord is two to two-and-a-half times the width of the make to ensure that you can pass the stitches on to the cord without them sliding off the end. Be sure to select a cord that is a similar weight to the project yarn: if the cord is too thick it can distort the stitches, and if it is too thin you may find it not strong enough to hold the weight of chunky knooking projects. 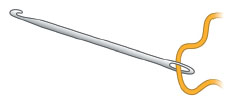 HOLDING THE WORK This method of holding the yarn and hook will work for right-and left-handed people. Hold the yarn in your left hand, catching it between your little and ring fingers, passing it under your middle finger, then over your index finger. Hold the work between your left index finger and thumb, close to the stitch being worked in to.
Hold the knooking hook in your right hand, gripping the shaft a short distance behind the hook. Much like crochet the knook can be held in a pencil grip or a fist griptry both holds to find which is the most comfortable for you. 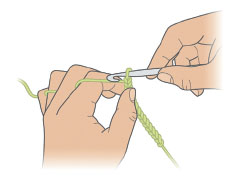 SLIP KNOT This is the start of a foundation chain, the first step in working a piece of knooking.
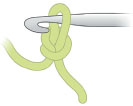
 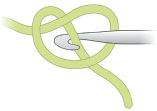 Make a circle of yarn with the tail end going under the circle. With a knooking hook, pull a loop through the circle.




 To John and Eth an Wolf Published in 2019 by CICO Books An imprint of Ryland Peters & Small Ltd 2021 Jockey's Fields341 E 116th St London WC1R 4BWNew York, NY 10029 www.rylandpeters.com 10 9 8 7 6 5 4 3 2 1 Text Laura Strutt 2019 Design, illustration, and photography CICO Books 2019 The author's moral rights have been asserted. All rights reserved. No part of this publication may be reproduced, stored in a retrieval system, or transmitted in any form or by any means, electronic, mechanical, photocopying, or otherwise, without the prior permission of the publisher. A CIP catalog record for this book is available from the Library of Congress and the British Library. E-ISBN: 978 1 78249 761 5 ISBN: 978 1 78249 690 8 Printed in China Editor: Kate Haxell Pattern checker: Marilyn Wilson Designer: Louise Le er Photographers: Terry Benson and James Gardiner Illustrator: Stephen Dew Stylist: Nel Haynes In-house editor: Anna Galkina Art director: Sally Powell Head of production: Patricia Harrington Publishing manager: Penny Craig Publisher: Cindy Richards
  Contents Chapter 1
 The knooking methods are easy to master for a beginner, and if you have knitted or crocheted before then you will have no problem understanding the simple stitches involved in knooking. GAUGE (TENSION) A gauge (tension) is given with each pattern to help you make your item the same size as the sample. The gauge (tension) is given as the number of stitches and rows you need to work to produce a 4-in (10-c m) square of knitting. Using the recommended yarn and knooking hook, cast on 8 stitches more than the gauge (tension) instruction asks forso if you need to have 10 stitches to 4in (10cm), cast on 18 stitches.
 THE ANATOMY OF A KNOOKING HOOK A knooking hook features a hook on one end of the shaft and a hole or eye on the other.
 HOLDING THE WORK This method of holding the yarn and hook will work for right-and left-handed people. Hold the yarn in your left hand, catching it between your little and ring fingers, passing it under your middle finger, then over your index finger. Hold the work between your left index finger and thumb, close to the stitch being worked in to.
 SLIP KNOT This is the start of a foundation chain, the first step in working a piece of knooking.
  Make a circle of yarn with the tail end going under the circle. With a knooking hook, pull a loop through the circle.