Contents
QUILTS for BABY
Complete Instructions for 5 Projects

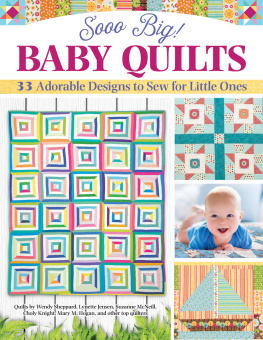
Sail Off to Sleep
Paper-pieced block quilt
L iving on a lake in northern Minnesota, I spend much of my free time relaxing on the shore and watching the water. On breezy mornings, the sailboats often venture out to take advantage of natures power and glide quietly across the waves. Small children, particularly little boys, love boats, so it seemed like a fitting subject for a baby quilt. The sailboat, with its geometric lines, was easy to design as a foundation-pieced pattern. The blocks can be sewn together quickly. You can follow my color scheme or choose several colors for the boat bodies.
Sharon Hultgren
FINISHED SIZE: 40" 49" (102 125 cm)
TECHNIQUES USED: Foundation piecing, stipple quilting or method of choice, mitered-corner binding
Materials
Foundation-piecing paper
/ yd. (0.5 m) white fabric for sails
/ yd. (0.63 m) red fabric for boats and middle borders
1 yd. (0.92 m) light blue fabric for sky
/ yd. (0.32 m) yellow fabric for inner border
1 yd. (0.92 m) medium blue fabric for water, outer border, and binding
1 / yd. (1.15 m) fabric for backing
One low-loft crib batting
Cutting Directions
Light blue sky fabric; cut into smaller pieces at least /" (1.3 cm) larger than each of the four sky areas in the block (16 of each piece)
Eight 9" (23 cm) squares of white fabric, cut in half diagonally
Sixteen 3" 8" (7.5 20.5 cm) rectangles of red fabric
Three 2 /" (6.5 cm) full crosswise strips of medium blue for water
Four 2" (5 cm) full crosswise strips of yellow fabric for inner borders
Four 1 /" (3.8 cm) full crosswise strips of red fabric for middle borders
Four 3 /" (9 cm) full crosswise strips of medium blue fabric for outer borders
Four or five 2 /" (6.5 cm) full crosswise strips of medium blue fabric for binding
Trace or copy the pattern () onto foundation-piecing paper. Trace the pattern eight times; trace the mirror image of the pattern eight times.
Place a piece of blue sky fabric, right side up, on the blank side of the pattern, over area #1; pin. Fold the fabric and pattern on the sewing line between #1 and #2. This will help you set the second piece in place.
Place a white triangle over the blue, right sides together; pin along the sewing line. Flip the white fabric over to be sure it will cover area #2; adjust if necessary. Flip the white fabric back in place.
From the printed side of the pattern, stitch on the line between areas #1 and #2. Use a short stitch length and stitch a few stitches beyond the ends of the line.
With the block printed side up, turn the pattern back on the stitching line and trim the seam allowances to /" (6 mm).
Fold the pattern back in place. Turn the white fabric over area #2; pin.
Apply the fabric for area #3, following steps 3 to 6. Continue until all the areas have been applied.
Press the block. Trim away the excess fabric, leaving a /" (6 mm) seam allowance beyond the outer pattern line. Carefully tear away the paper pattern.
Repeat steps 2 to 8 for all the boat blocks. Sew the boats into four rows of four boats each, with boats in each row facing the same direction. Press the seam allowances open.
Measure the rows. Cut all the water strips the same length as the shortest row. Sew the boats and water strips together, alternating the direction of the boats with each row. Match the ends of the strips to the ends of the rows and ease in any excess length. Make sure the blocks align vertically.
Measure the quilt top to bottom through the center. Cut two yellow strips to this length. Sew these inner border pieces to the sides of the quilt. Press the seam allowances toward the border.
Measure the quilt side to side through the center, including the side inner borders. Cut two yellow strips to this length. Sew the inner border pieces to the top and bottom of the quilt. Press the seam allowances toward the border.
Attach the red middle border, following the procedure in steps 11 and 12. Repeat for the outer blue border.
Press the quilt. Cut batting and backing slightly larger than the quilt top. Layer the backing, batting, and quilt top; baste with safety pins or by hand. Quilt by machine, outlining the blocks and borders and stipple-quilting the sky. Or use your quilting method of choice.
Join the binding strips with /" (6 mm) diagonal seams to minimize bulk; press the seam allowances open. Press the binding in half lengthwise, wrong sides together.
Stitch the binding to the quilt front, stitching /" (1 cm) from the edge; begin on one side about 3" (7.5 cm) from the end of the binding. At each corner, stop stitching at the exact center of the corner; backstitch two stitches. Fold the binding back diagonally, and then fold it down along the next edge. Start stitching again at the center of the corner, and continue.
Stop about 3" (7.5 cm) from the starting point. Mark dots on the inside of the binding fold where the beginning and end would meet. Unfold the binding. Place the beginning and end right sides together, perpendicular to each other, aligning the dots. Stitch diagonally across the strips. Trim the seam allowances to /" (6 mm) and press open. Refold the binding and finish stitching it in place.
Wrap the binding to the back of the quilt, just covering the stitching line with the binding fold and mitering the corners. Stitch in the ditch from the right side.
To download a printable pattern of this template, visit www.quartoknows.com/page/quilts-baby
Designers Tip
There are several special papers made for foundation piecing. There is even paper that can be dissolved in water after the quilt is sewn! If you use a copy machine to copy the pattern from the book, check the pattern to be sure it has not changed in size. If you copy the pattern by hand, use a pencil, never a ballpoint pen, as the ink can transfer to your fabric.
Little Sweetheart
Paper-pieced block quilt
R etro-print pastel fabrics are so sweet and sentimental. I just cant get enough of them, so I was able to pull quite a few from my stash to use in this quilt (I think there are about twenty!). If you dont have a stash like mine to pull from, buy a minimum of eight different fabrics in assorted colors for the pieced hearts. By alternating the fabrics for each area and shuffling them around, you can create twelve unique hearts. The color of the sashing, inner borders, and corner squares can easily be changed to blue for a baby boy or to any other color to match the nursery.


