WAFER PAPER CAKES
STEVI AUBLE
Modern Cake Designs and Techniques for Wafer Paper Flowers and More

www.sewandso.co.uk
CONTENTS
INTRODUCTION
Wafer paper has long been a staple product in the realm of confectionery arts, most notably in the process of nougat making. In centuries past it was considered a dessert only fit for aristocracy and the upper middle class as it was made from potatoes, a high-value commodity at the time. It has since taken on a multitude of uses and, as its main ingredients have become far more readily available, it has transformed into a very cost effective edible decorating tool. Wafer paper is light in appearance and in weight, making it a versatile medium for cake decorating that can be used en masse without compromising the structure of the cakes it is placed on.
In the following pages I will show you how to create a large array of wafer paper innovations from leaves to tetrahedrons, and from basic paper like blossoms to blooms so realistic that they are hard to differentiate from their real counterparts. You will find full instructions for making toppers proper for numerous occasions that are light, airy and quick to assemble; impressive decorative finishes like leather and edible gold sheets, and wreaths, bows and confetti that make expeditious and clever embellishments which can be used over and over. In short, I hope you will find enough practical advice and inspiration here to make you a wafer paper creator, and set you on your own path to discovering just how versatile this simple product can be.
EQUIPMENT & MATERIALS
Some of the equipment and materials required to create the various flowers, decorations and cake projects in this book are listed below and pictured opposite, from left to right and top to bottom. There are a few other essentials including edible glues, as well as a hot glue gun to attach wire to styrofoam shapes, and each project begins with a list of everything you'll need to make it.
- White and green cloth-covered floral wire, in various gauges
- Shell and blade modeling tool
- Wire cutters (needle-nose pliers are also useful)
- Paper Potion, edible paper conditioner
- Painters (masking) tape, narrow
- Closed-cell styrofoam balls and cones, in varying sizes with floral wire attached (using a hot glue gun)
- Closed-cell styrofoam ball
- Styrofoam cone (egg and ball shapes also required)
- Hexagon cookie cutter (or paper punch)
- Craft fringe scissors
- White and green floral tape
- Foam brush
- Large rolling pin
- Small rolling pin
- Ruler (a clear ruler and fabric tape measure are also needed)
- Large fluffy brush
- Flat head paint brushes, in varying widths, soft and bristled
- Pencil
- Silicone round (petal) molds (silicone mold trays also required)
- Scissors
- Embossing wheel
- Vodka (or other clear high-alcohol-content liquid)
- Piping gel
- Black gel color (various other colors also needed)
- Gold highlighter dust (you'll need gold glitter too)
- Black gumpaste (white and pale green also required)
- Edible paint, in various colors
- Craft knife
- Circle paper punch (varying sizes required)
- Isomalt nibs
- Multi-star paper punch
- Fondant
- Hole punch
- Small leaf punch
- Extruder tool
- All-over-the-page paper punch
- Edible gold leaf on transfer sheets
- Petal dust (various colors needed)
- Two-sided silicone leaf veiner
- Wafer paper, in various thicknesses (you'll need wafer paper cardstock too)

COLORING & PRINTING
There are a multitude of ways to color wafer paper and each technique will yield a different effect. These four techniques are a few of the simplest and most effective for the projects in this book.
Edible printing
My go-to, and favorite, method for coloring wafer paper is to use an edible printer. An edible printer allows you to have complete control of the color results. It is also the only one of the following techniques that will give you a solid, consistent, even, overall colored sheet. There are numerous products on the edible image/printing market and all it takes to find one that works for you is to do a little research. It is important to know the products that are available in your area as well as the ones that follow your local laws and regulations. Once you have a machine that works for your needs, you can use any simple program to create a full sheet of color. I like to use Microsoft Word and simply insert a rectangular shape that encompasses the full page and then fill it with my color of choice. The paper is designed to be printed on the smooth (front) side; however, If a deeper color is desired, both sides of the paper can be printed on.
Dry petal dusts
Petal dusts can be brushed onto the smooth (front) side of the wafer paper. This is a very quick and easy coloring method that will give you a light, airy, watercolor finish. Brushing on the color in a small circular motion is the best method to disperse the petal dust. This can be done prior to assembling a flower or used as additional decoration afterwards depending on the over all look that is preferred.
Oil based colors
Edible oil based paints can be used to color wafer paper without the risk of dissolving the paper like water based colors can. There are many ready mixed colors on the market but you can also make your own by mixing a small amount of oil such as Flo-Coat, vegetable oil or shortening (white vegetable fat), with petal dust or a small amount of gel paste color. Simply mix together your dust with your oil base of choice to a medium consistency. Then brush the color onto the smooth (front) side of the paper in long smooth strokes. Once the page is full of color, set it aside to dry. Depending on the oil base used, dry time can take anywhere from a couple of hours to 24 hours plus. This method will give you a deeper tone and finish of color but will still have some streaking and inconsistency. This typically happens because the oil will soak into the paper in different areas at different rates, as well as accenting the naturally occurring imperfections within the paper.
Edible paints
This method will yield the most consistent finish next to the edible printer. Edible paints are specially formulated to work on various edible surfaces including wafer paper. It only takes a small amount brushed onto the smooth (front) side of the sheet to saturate it with color. It is also a quicker drying product than oil based paints, so paper colored in this way can be painted and used within 20 or 30 minutes.

Flowers
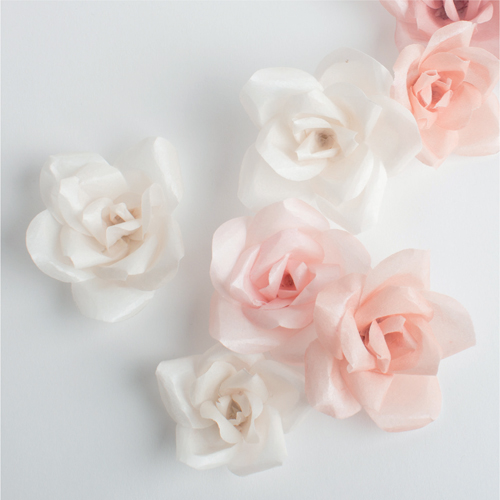
BASIC FLOWERS: Paper Rose
You will find that you return to this rose again and again in your designs, so its a great idea to master it.
YOU WILL NEED
- AD-0 wafer paper
- Pencil
- Scissors
- Gumpaste, white


