Table of Contents
Guide
Page List

Published by Annies, 306 East Parr Road, Berne, IN 46711. Printed in USA. Copyright 2020 Annies. All rights reserved. This publication may not be reproduced in part or in whole without written permission from the publisher.
RETAIL STORES: If you would like to carry this publication or any other Annies publication, visit AnniesWSL.com.
Every effort has been made to ensure that the instructions in this publication are complete and accurate. We cannot, however, take responsibility for human error, typographical mistakes or variations in individual work. Please visit AnniesCustomerService.com to check for pattern updates. ISBN: 978-1-64025-425-1 1 2 3 4 5 6 7 8 9 Introduction Whether you choose to use the beautiful Charm squares you find at your local quilt shop or online shop, or you decide to use your scraps and cut your own 5" squares, youll love these patterns. These patterns are timeless. When you need a great pattern in a hurry and dont have the time to search one out simply grab this book and Im sure youll find just what youre looking for.
Whatever your quilting needs, its probably here in these pages filled with great quilts. You can make them easily with lots of style and the convenience of using precut 5" charm squares. What more could a quilter ask for? Weve put together eight classic quilt designs just for you. Im sure youll love them all! Enjoy! Table of Contents If you are an Annies customer and have a question about the instructions on a pattern you have purchased, please visit: AnniesCatalog.com/pages/customer_care/pattern_services.html To download templates for easy printing, view the download instructions at the end of this book or click the Templates chapter in the Table of Contents. Create a trellis-looking pattern by inserting a white strip in the center of each 5" charm square. A pretty floral collection is a good choice for this design.
Designed & Quilted by Chris Malone 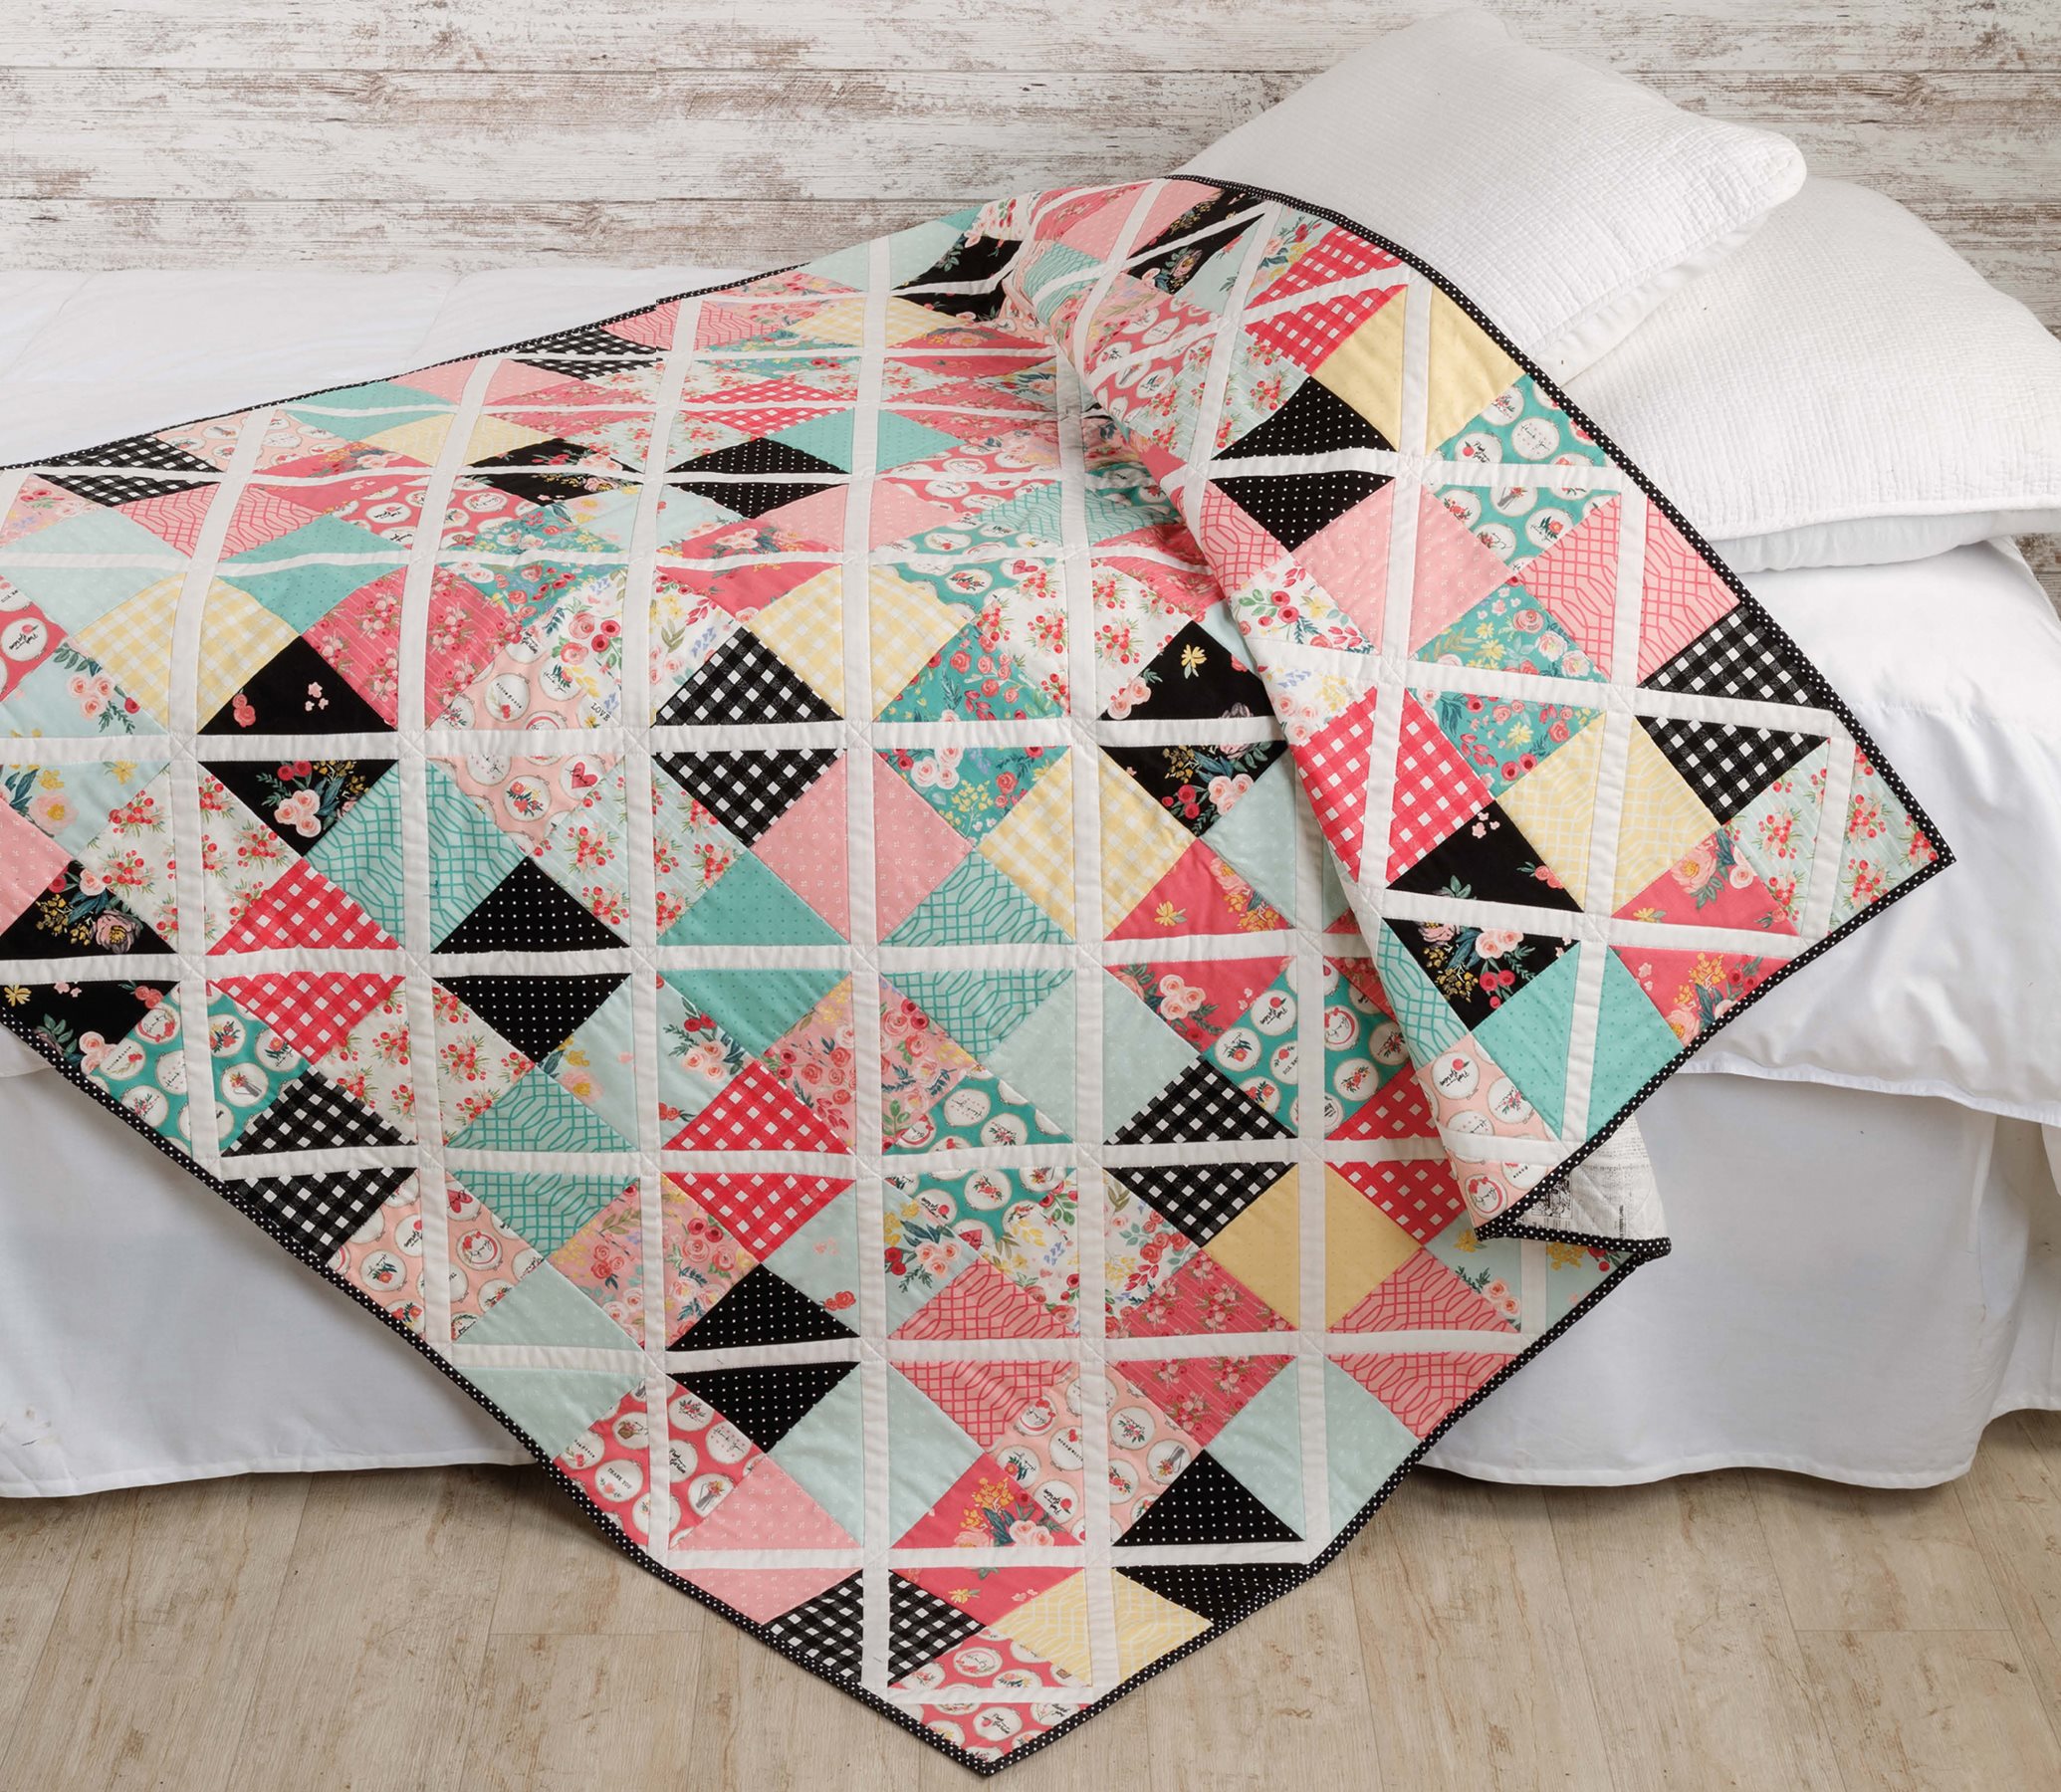 Skill Level Confident Beginner Finished Sizes Quilt Size: 54" 54" Block Size: 4" 4" Number of Blocks: 144
 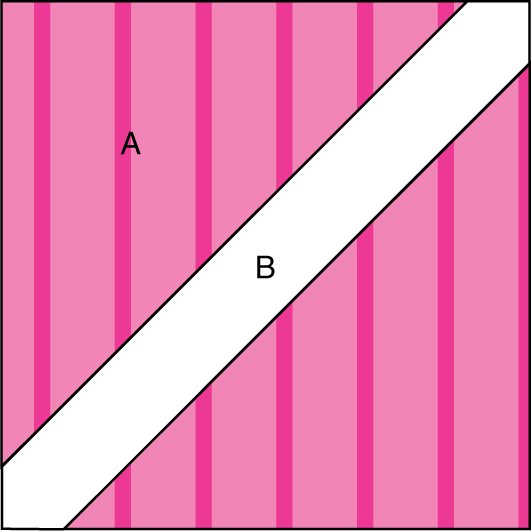 Crisscross 4" 4" Finished Block Make 144 Materials 144 precut 5" A squares in assorted aqua, rose, yellow, black tonals and prints 1 yard white solid yard black with white dots Backing to size Batting to size Square ruler (at least 5" 5") - optional Basic sewing tools and supplies Project Notes Read all instructions before beginning this project. Stitch right sides together using a " seam allowance unless otherwise specified. Materials and cutting lists assume 40" of usable fabric width for yardage. WOF width of fabric HST half-square triangle
  QST quarter-square triangle
  CuttingFrom white solid cut: 5 (7" WOF) strips, then subcut into: 144 (1" 7") B strips From black with white dots cut: 6 (2" WOF) binding strips Completing the Quilt Cut each A square in half diagonally, from corner to corner, keeping the triangle pairs together. Fold an A triangle in half and finger press a crease at the midpoint of the cut edge. Repeat with matching A triangle.
Fold a B strip in half lengthwise and finger press a crease. Matching center creases, pin B to A triangle and stitch as shown in Figure 1. Repeat with remaining A, sewing it to the opposite side of B.  Figure 1 Repeat steps 2 and 3 using all the triangle pairs and white strips to make 144 blocks. Randomly divide blocks into two groups of 72 blocks. Press one set of blocks with seam allowances toward A and the other set of blocks with seam allowances toward B so that seams will nest when joining the blocks.
Trim each block to 5" 5" with the white strip centered diagonally. If using a square ruler for trimming, align the diagonal line down the center of the strip. Referring to the Assembly Diagram, arrange the blocks into 12 rows of 12 blocks each, alternating the direction of the seam allowances and the B strips so a trellis design is formed with the white strips. Sew the blocks together in each row. Sew the rows together to complete the quilt top.  Crisscross Throw Assembly Diagram 54" 54 This is the perfect pattern for a lodge or cabin in the woods.
  Crisscross Throw Assembly Diagram 54" 54 This is the perfect pattern for a lodge or cabin in the woods.
The warm earth tones and ease of using 5" squares make this a great weekend project. Designed & Quilted by Julie Weaver 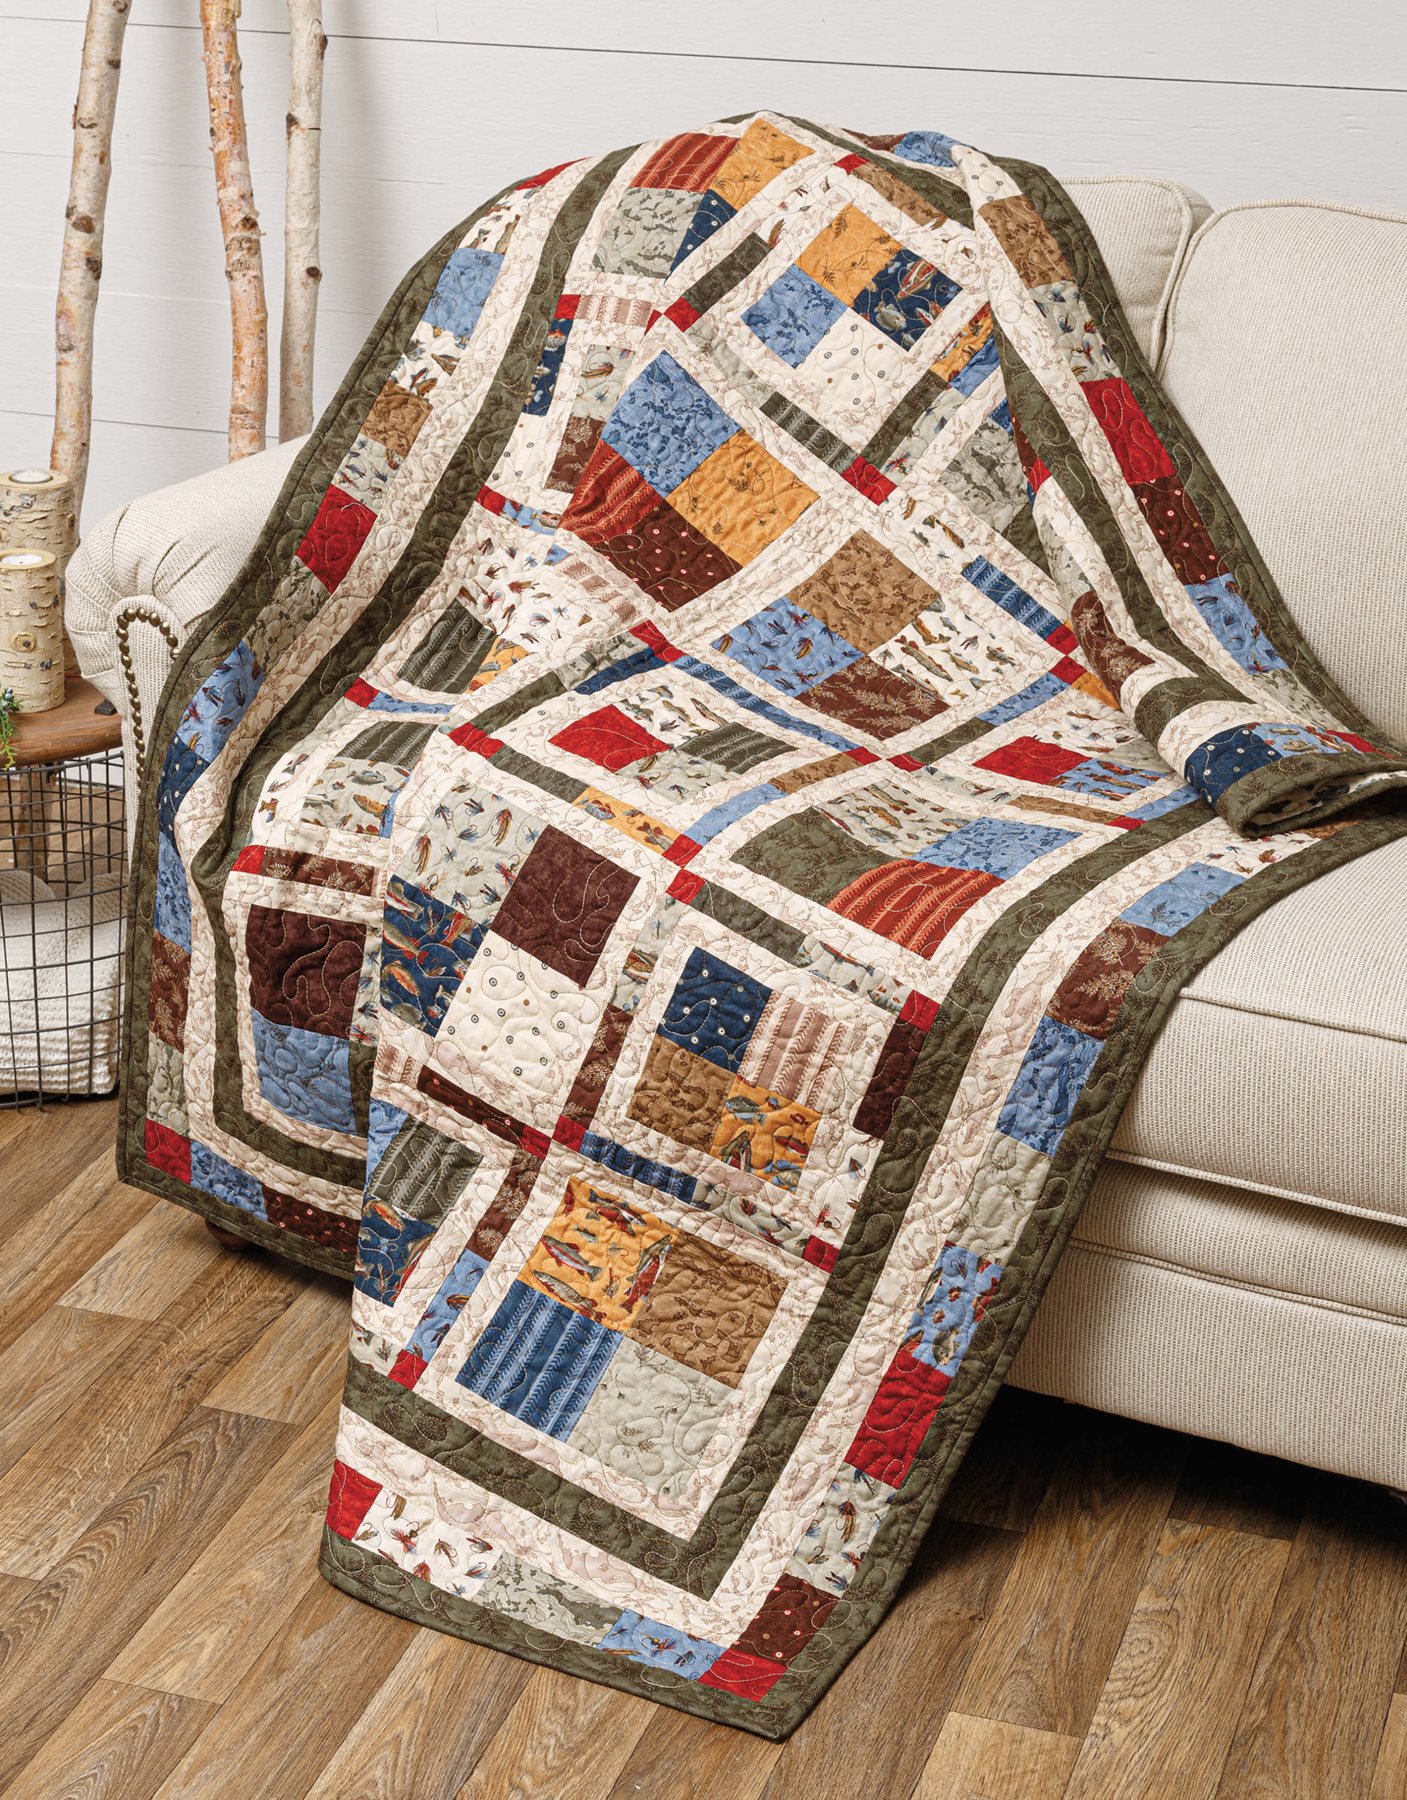 Skill Level Confident Beginner Finished Sizes Quilt Size: 52" 62" Block Size: 10" 10" Number of Blocks: 20
 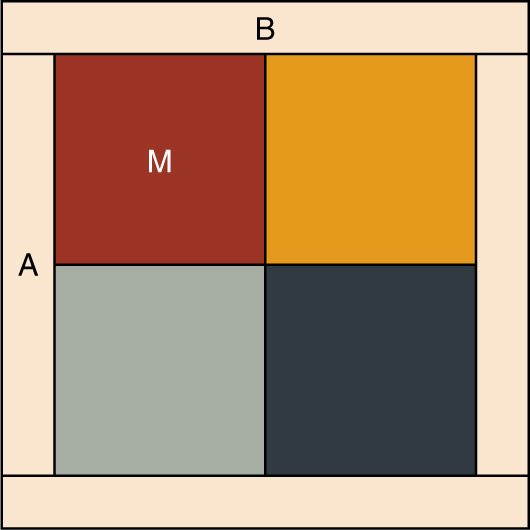 Fish Tales Throw Block A 10" 10" Finished Block Make 10
 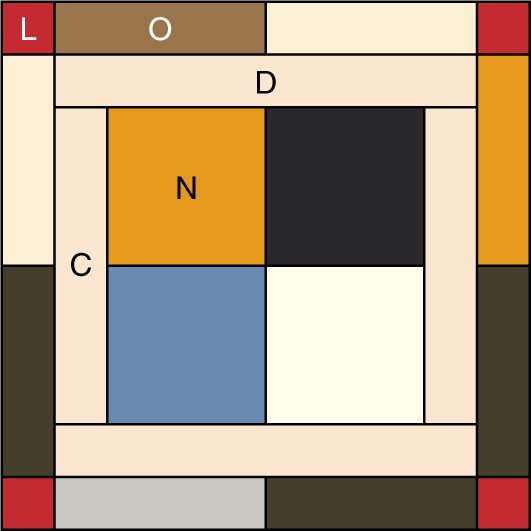 Fish Tales Throw Block B 10" 10" Finished Block Make 10 Materials 1 yards cream* 1 yards green* yard red* 135 assorted 5" squares* Backing to size Batting to size* Thread Basic sewing tools and supplies *Lake Views fabric collection by Holly Taylor for Moda Fabrics and Thermore batting from Hobbs used to make sample. Project Notes Read all instructions before beginning this project. Stitch right sides together using a " seam allowance unless otherwise specified. Materials and cutting lists assume 40" of usable fabric width for yardage. Press.
 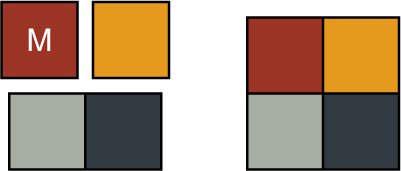 Figure 1 Referring to the Block A diagram, stitch an A rectangle to each side of the unit from step 1. Press. Press.
Stitch a B rectangle to the top and bottom to complete an A block. Press. Make 10 A blocks. Block B Stitch four N squares together as shown in Figure 2. Press. Press. Press.
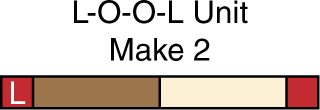
Stitch a D rectangle to the top and bottom. Press. 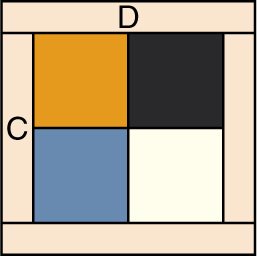 Figure 3 Stitch two O rectangles together as shown in Figure 4. Press. Make four O-O units.




 Published by Annies, 306 East Parr Road, Berne, IN 46711. Printed in USA. Copyright 2020 Annies. All rights reserved. This publication may not be reproduced in part or in whole without written permission from the publisher. RETAIL STORES: If you would like to carry this publication or any other Annies publication, visit AnniesWSL.com.
  Skill Level Confident Beginner Finished Sizes Quilt Size: 54" 54" Block Size: 4" 4" Number of Blocks: 144
  Crisscross 4" 4" Finished Block Make 144 Materials 144 precut 5" A squares in assorted aqua, rose, yellow, black tonals and prints 1 yard white solid yard black with white dots Backing to size Batting to size Square ruler (at least 5" 5") - optional Basic sewing tools and supplies Project Notes Read all instructions before beginning this project. Stitch right sides together using a " seam allowance unless otherwise specified. Materials and cutting lists assume 40" of usable fabric width for yardage. WOF width of fabric HST half-square triangle
  Figure 1 Repeat steps 2 and 3 using all the triangle pairs and white strips to make 144 blocks. Randomly divide blocks into two groups of 72 blocks. Press one set of blocks with seam allowances toward A and the other set of blocks with seam allowances toward B so that seams will nest when joining the blocks.
 Crisscross Throw Assembly Diagram 54" 54 This is the perfect pattern for a lodge or cabin in the woods.
  Skill Level Confident Beginner Finished Sizes Quilt Size: 52" 62" Block Size: 10" 10" Number of Blocks: 20
  Fish Tales Throw Block A 10" 10" Finished Block Make 10
  Fish Tales Throw Block B 10" 10" Finished Block Make 10 Materials 1 yards cream* 1 yards green* yard red* 135 assorted 5" squares* Backing to size Batting to size* Thread Basic sewing tools and supplies *Lake Views fabric collection by Holly Taylor for Moda Fabrics and Thermore batting from Hobbs used to make sample. Project Notes Read all instructions before beginning this project. Stitch right sides together using a " seam allowance unless otherwise specified. Materials and cutting lists assume 40" of usable fabric width for yardage. Press.
  Figure 1 Referring to the Block A diagram, stitch an A rectangle to each side of the unit from step 1. Press. Press.
 Figure 3 Stitch two O rectangles together as shown in Figure 4. Press. Make four O-O units.