If you are an Annies customer and have a question about the instructions on a pattern you have purchased, please visit: AnniesCatalog.com/pages/customer_care/pattern_services.html
Templates
To download templates for easy printing, view the download instructions at the end of this book or click the Templates chapter in the Table of Contents.
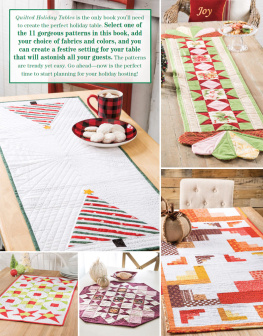
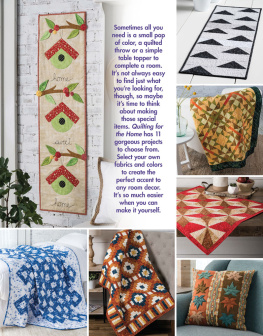
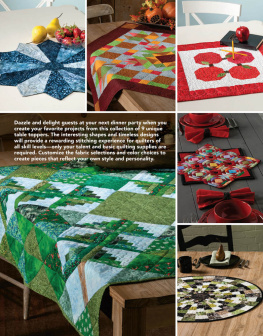
The beauty of quilting and sewing is that when you cant find what youre looking for in the department stores you can head to the local quilt shop and purchase the fabrics and patterns to make your own. You can whip up the perfect table covering in your colors and your style. All you need is the right pattern. Well
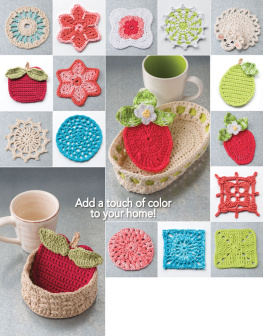
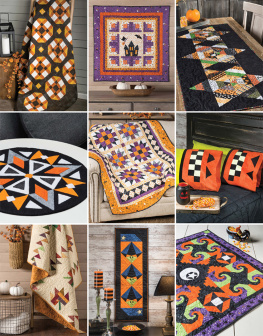
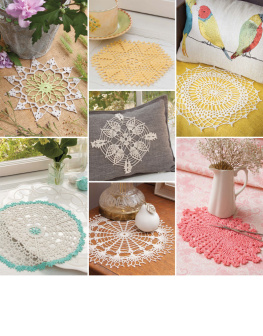
Quilting Holiday Tables has everything you need to create the table covers youve been dreaming about for any holiday. Now you can make runners, toppers and place mats to fit your own personal style and in the colors you love.
No longer will you have to settle! Quilted Holiday Tables has 11 projects that are perfect for autumn and winter gatherings, and many that can easily be used for other times of the year, or even for every day with a bit of imagination and a few fabric changes. Dont limit yourself. This book contains patterns that will fit into any lifestyle. Youll find quick and easy projects and also some that are a bit more challenging. This will be your go-to book for table covers for both your home and for gift-giving. So, pull out your fabrics and get started.
Enjoy!
Table of Contents
General InformationTable of Contents
Guide
Pages
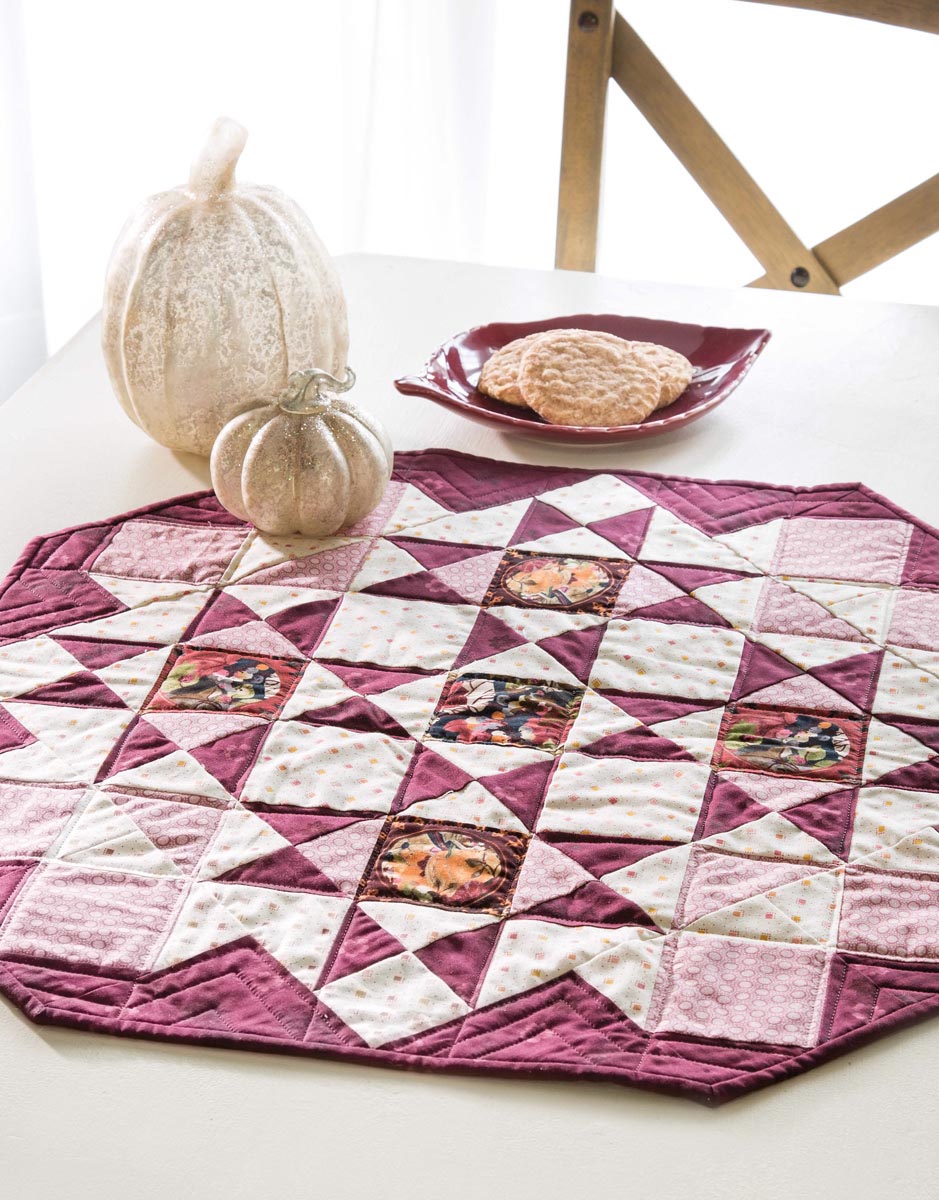
This topper will be the focal point of the meal when placed on your holiday table. Designed & Quilted by Gina Gempesaw
 Skill Level
 Confident Beginner
Finished Size Table Topper Size: 24" 24" Block Size: 16" 16" Number of Blocks: 1
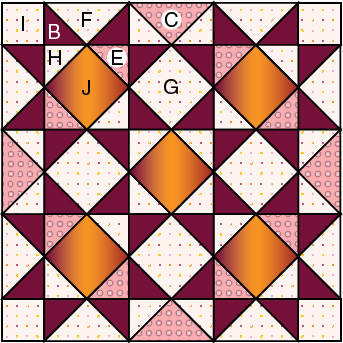 Center
 16" 16" Finished Block
Make 1
Materials yard holiday print yard medium tonal yard light tonal yard dark tonal Backing to size Batting to size Thread Basic sewing tools and supplies
Project Notes Read all instructions before beginning this project. Stitch right sides together using a " seam allowance unless otherwise specified. Materials and cutting lists assume 40" of usable fabric width.
Cutting Alternate cutting directions for the AccuQuilt GO! 8" Mix and Match Block can be found below.
From medium tonal: Cut 1 (5" by fabric width) strip.
From medium tonal: Cut 1 (5" by fabric width) strip.
Subcut strip into 1 (5") square. Cut the square on both diagonals to make 4 C triangles. Trim remainder of previously cut strip to 3" by remaining fabric width. Subcut strip into 8 (3") D squares. Cut 1 (2" by fabric width) strip. Subcut strip into 4 (2") squares.
Cut each square in half on 1 diagonal to make 8 E triangles. From light tonal: Cut 1 (5" by fabric width) strip. Subcut strip into 2 (5") squares. Cut each square on both diagonals to make 8 F triangles. Trim remainder of previously cut strip to 3" by remaining fabric width. Subcut strip into 4 (3") G squares.
Cut 2 (2" by fabric width) strips. Subcut strips into 18 (2") squares. Cut each square in half on 1 diagonal to make 36 H triangles. Trim remainder of previously cut strip to 2" by remaining fabric width. Subcut strip into 4 (2") I squares. From dark tonal: Cut 1 (7" by fabric width) strip.
Subcut strip into 2 (7") squares. Cut each square on both diagonals to make 8 A triangles. Cut remainder of previously cut strip into 2 (2" by remaining fabric width) strips. Subcut strips into 11 (2") B squares. Cut 1 (2" by fabric width) strip. Subcut strip into 13 (2") B squares.
Cut these and the B squares from the previous step in half on 1 diagonal to make 48 B triangles. Cut 3 (2" by fabric width) binding strips. Completing the Blocks & Corner Units Referring to Figure 1a, sew H triangles to opposite sides of a J square; press. Sew H triangles to the remaining sides as shown in Figure 1b to make one H-J unit; press. 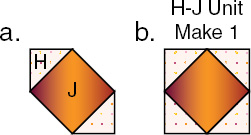 Figure 1 Repeat step 1 to make a total of four each E-H-J and B-G units, and eight B-D-H units using pieces shown in Figure 2.
 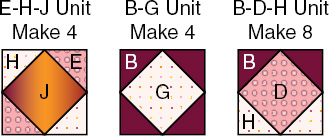 Figure 2 Referring to Figure 3a, sew a B triangle to one angled edge of an F triangle; press.
Stitch a B triangle to the opposite angled edge to make one B-F unit as shown in Figure 3b; press. Repeat to make a total of eight B-F units.  Figure 3 Sew an H triangle to one angled end of a C triangle as shown in Figure 4a; press. Stitch an H triangle to the opposite angled end to make one C-H unit (Figure 4b); press. Repeat to make a total of four C-H units.
  Figure 4 Referring to Figure 5, arrange and stitch I squares with B-F, C-H, B-G, H-J and E-H-J units to make five rows; press.
Stitch rows together to complete the Center block; press. 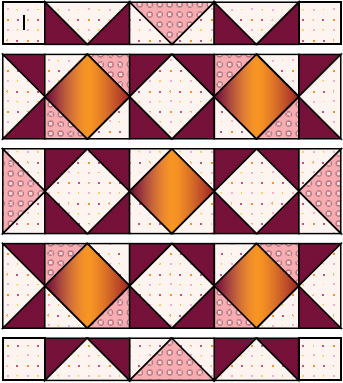 Figure 5 Arrange and sew two each A triangles and B-D-H units to form a corner unit as shown in Figure 6; press. Repeat to make a total of four corner units.
 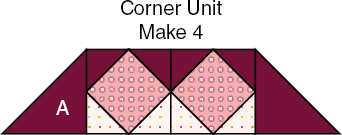 Figure 6Completing the Table Topper Refer to the Assembly Diagram for positioning of blocks and corner units. Sew corner units on opposite sides of the Center block; press. Sew corner units on the remaining two sides to complete the pieced top; press.
Layer, quilt and bind referring to Quilting Basics. 
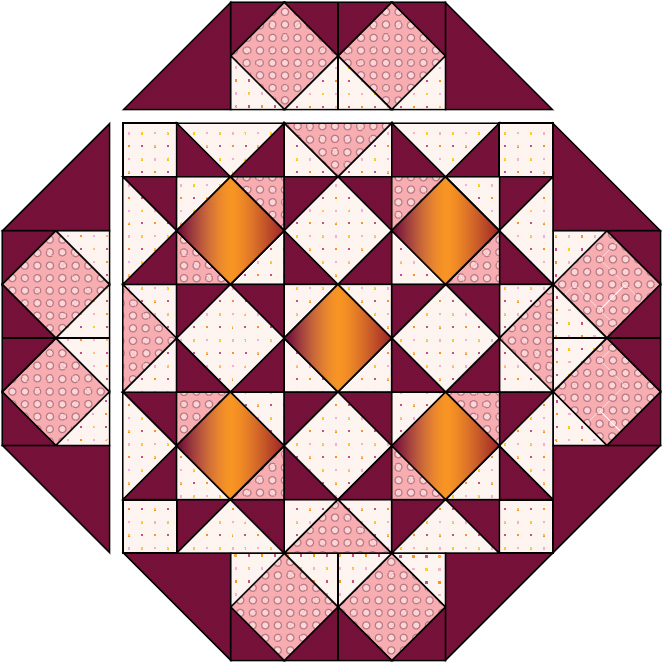 Star Power
Assembly Diagram 24" 24" Fussy Cutting The quilting term fussy-cut refers to selectively cutting fabric to create patch or unit shapes that showcase a particular motif or part of the fabric pattern. Make a fussy-cutting template from a piece of cardstock, cardboard or frosted plastic template material 2" larger all around than the size of the finished fussy-cut shape desired. For example, if the fussy-cut finished piece will be 4" square, you will need a piece of template material at least 6" square. Draw the size of the finished fussy-cut shape onto the template material, then add a 1" border all the way around, Photo A. 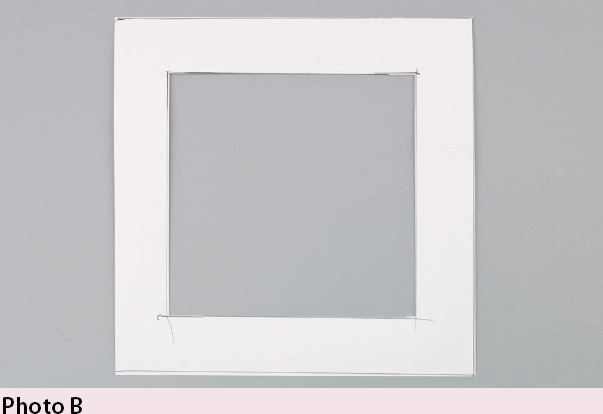







 Skill Level Confident Beginner Finished Size Table Topper Size: 24" 24" Block Size: 16" 16" Number of Blocks: 1
  Center
 Figure 1 Repeat step 1 to make a total of four each E-H-J and B-G units, and eight B-D-H units using pieces shown in Figure 2.
  Figure 2 Referring to Figure 3a, sew a B triangle to one angled edge of an F triangle; press.
 Figure 3 Sew an H triangle to one angled end of a C triangle as shown in Figure 4a; press. Stitch an H triangle to the opposite angled end to make one C-H unit (Figure 4b); press. Repeat to make a total of four C-H units.
  Figure 4 Referring to Figure 5, arrange and stitch I squares with B-F, C-H, B-G, H-J and E-H-J units to make five rows; press.
 Figure 5 Arrange and sew two each A triangles and B-D-H units to form a corner unit as shown in Figure 6; press. Repeat to make a total of four corner units.
  Figure 6Completing the Table Topper Refer to the Assembly Diagram for positioning of blocks and corner units. Sew corner units on opposite sides of the Center block; press. Sew corner units on the remaining two sides to complete the pieced top; press.
 Star Power