Contents
Guide
Pages
If you are an Annies customer and have a question about the instructions on a pattern you have purchased, please visit:
AnniesCatalog.com/pages/customer_care/pattern_services.html
Templates
To download templates for easy printing, view the download instructions at the end of this book or click the Templates chapter in the Table of Contents.
Introduction
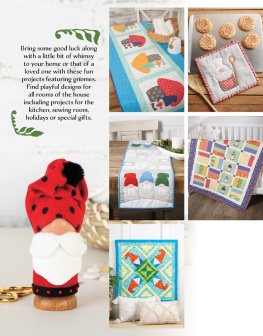
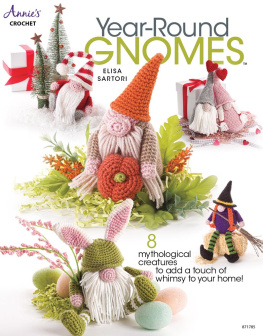
Gnomes have been considered good luck charms ever since they first popped up hundreds of years ago. The tall-hatted protectors were thought to live underground and guard earths treasures. More recently, they have been spotted aboveground standing watch over our gardens and inhabiting our homes in playful and creative ways.
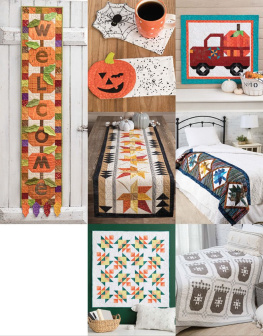
Each of the nine patterns in this book provides an opportunity to add some whimsy to your home with a colorful gnomewhether it is in your kitchen, draped over a sofa or chair, on your wall, in your sewing room or wrapped around a baby.
Bring some good luck to your home with one of these fun projects. Or make one for a special friendthey will love the thoughtfulness of a quilted good luck charm of their own.
Table of Contents
Use this small quilt as a table topper on your patio at your next garden party or as an adorable wall hanging.
Designed & Quilted by Jennifer Thomas of Curlicue Creations
Skill Level
Easy
Finished Sizes
Table Topper Size: 29" 29"
Block Size: 12" 12"
Number of Blocks: 4

Gnome #1
12" 12" Finished Block
Make 2
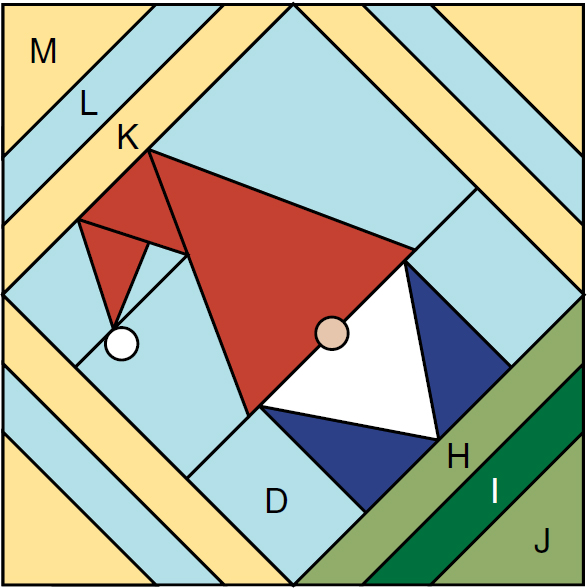
Gnome #2
12" 12" Finished Block
Make 2
Materials
yard beige
yard each four blues
yard white
yard green
yard dark green
yard yellow
yard orange
yard medium blue
1 yard light blue
Backing to size
Batting to size
Fusible web
Paper for foundation piecing
Basic sewing tools and supplies
Fabrics from the Free to Fly collection by Island Batik; Hobbs Heirloom Cotton Batting from Hobbs Bonded Fibers used to make sample.
Project Notes
Read all instructions before beginning this project.
Stitch right sides together using a " seam allowance unless otherwise specified.
Materials and cutting lists assume 40" of usable fabric width for yardage
WOF width of fabric
HST half-square triangle 
QST quarter-square triangle 
Cutting
From each yard blue cut:
2 (3" 5") C1 and C3 rectangles
From white cut:
4 (5") C2 squares
From green cut:
1 (4") J square, then cut once diagonally 
2 (1" 10") H rectangles
2 (1" 8") F rectangles
From dark green cut:
1 (4") G square, then cut once diagonally 
2 (1" 10") E rectangles
2 (1" 8") I rectangles
From yellow cut:
6 (4") M squares, then cut once diagonally 
12 (1" 10") K rectangles
From orange cut:
4 (5" 7") B1 rectangles
4 (2" 3") A2 rectangles
4 (3" 4") A4 rectangles
From light blue cut:
4 (5" 8") B2 rectangles
4 (4") A5 squares
4 (3") A1 squares
8 (2" 3") D rectangles
2 (2" 27") O strips
2 (2" 24") N strips
12 (1" 8") L rectangles
4 (1" 2") A3 rectangles
From medium blue cut:
4 (2" WOF) binding strips
2 (1" 29") Q strips
2 (1" 27") P strips
Completing the Blocks
Make four copies each of foundation patterns A, B and C. Referring to the Paper Piecing sidebar, use the indicated pieces to foundation-piece units A, B and C. Make four of each unit as shown in .
Figure 1
Sew unit A to unit B to make a hat unit as shown in . Make four.
Figure 2
Sew D rectangles to opposite sides of unit C to make a beard unit as shown in . Make four.
Figure 3
Referring to , sew one hat unit to one beard unit to make a gnome unit. Make four.
Figure 4
Trace eight of the nose/pompom template onto the paper side of the fusible web. Cut shapes apart and fuse to the wrong side of the indicated fabrics.
White: 4
Beige: 4
Cut out each circle on the drawn line. Fuse the white circles to the hat tips and the beige circles to the seams where the hats and beards meet. Secure in place with a small zigzag stitch.
Center and sew one E rectangle to the bottom of a gnome unit as shown in . Add one F rectangle, and then one G triangle, centering each. Make two.
Figure 5
Referring to , add H and I rectangles and a J triangle to the bottom of a gnome unit, centering each. Make two.
Figure 6
Center and sew K rectangles to the remaining three sides of a gnome unit as shown in .
Figure 7
Center and sew L rectangles to the K strips on three sides of a gnome unit as shown in .
Figure 8
Referring to , center and sew M triangles to the L rectangles on three sides of a gnome unit.

