Annies - Quilting for the Home
Here you can read online Annies - Quilting for the Home full text of the book (entire story) in english for free. Download pdf and epub, get meaning, cover and reviews about this ebook. year: 2019, publisher: Annies, genre: Home and family. Description of the work, (preface) as well as reviews are available. Best literature library LitArk.com created for fans of good reading and offers a wide selection of genres:
Romance novel
Science fiction
Adventure
Detective
Science
History
Home and family
Prose
Art
Politics
Computer
Non-fiction
Religion
Business
Children
Humor
Choose a favorite category and find really read worthwhile books. Enjoy immersion in the world of imagination, feel the emotions of the characters or learn something new for yourself, make an fascinating discovery.
- Book:Quilting for the Home
- Author:
- Publisher:Annies
- Genre:
- Year:2019
- Rating:4 / 5
- Favourites:Add to favourites
- Your mark:
Quilting for the Home: summary, description and annotation
We offer to read an annotation, description, summary or preface (depends on what the author of the book "Quilting for the Home" wrote himself). If you haven't found the necessary information about the book — write in the comments, we will try to find it.
Annies: author's other books
Who wrote Quilting for the Home? Find out the surname, the name of the author of the book and a list of all author's works by series.

Quilting for the Home — read online for free the complete book (whole text) full work
Below is the text of the book, divided by pages. System saving the place of the last page read, allows you to conveniently read the book "Quilting for the Home" online for free, without having to search again every time where you left off. Put a bookmark, and you can go to the page where you finished reading at any time.
Font size:
Interval:
Bookmark:

You can purchase prepackaged sizes or battings by the yard and trim to size. Quilting Press quilt top on both sides and trim all loose threads. Make a quilt sandwich by layering the backing right side down, batting and quilt top centered right side up on flat surface and smooth out. Pin or baste layers together to hold. Mark quilting design on quilt top and quilt as desired by hand or machine. Note: If you are sending your quilt to a professional quilter, contact them for specifics about preparing your quilt for quilting. When quilting is complete, remove pins or basting.
Trim batting and backing edges even with raw edges of quilt top. Binding the Quilt Join binding strips on short ends with diagonal seams to make one long strip; trim seams to " and press seams open (). 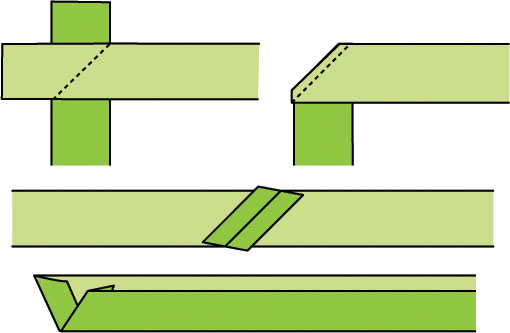 Figure A Fold 1" of one short end to wrong side and press. Fold the binding strip in half with wrong sides together along length, again referring to ; press. Starting about 3" from the folded short end, sew binding to quilt top edges, matching raw edges and using a " seam.
 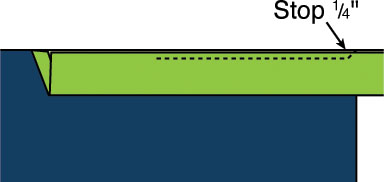 Figure B Fold binding up at a 45-degree angle to seam and then down even with quilt edges, forming a pleat at corner, referring to .
 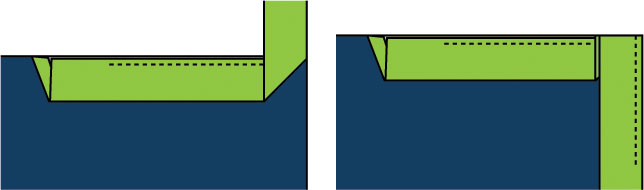 Figure C Resume stitching from corner edge as shown in , down quilt side, backstitching " from next corner. Figure C Resume stitching from corner edge as shown in , down quilt side, backstitching " from next corner.
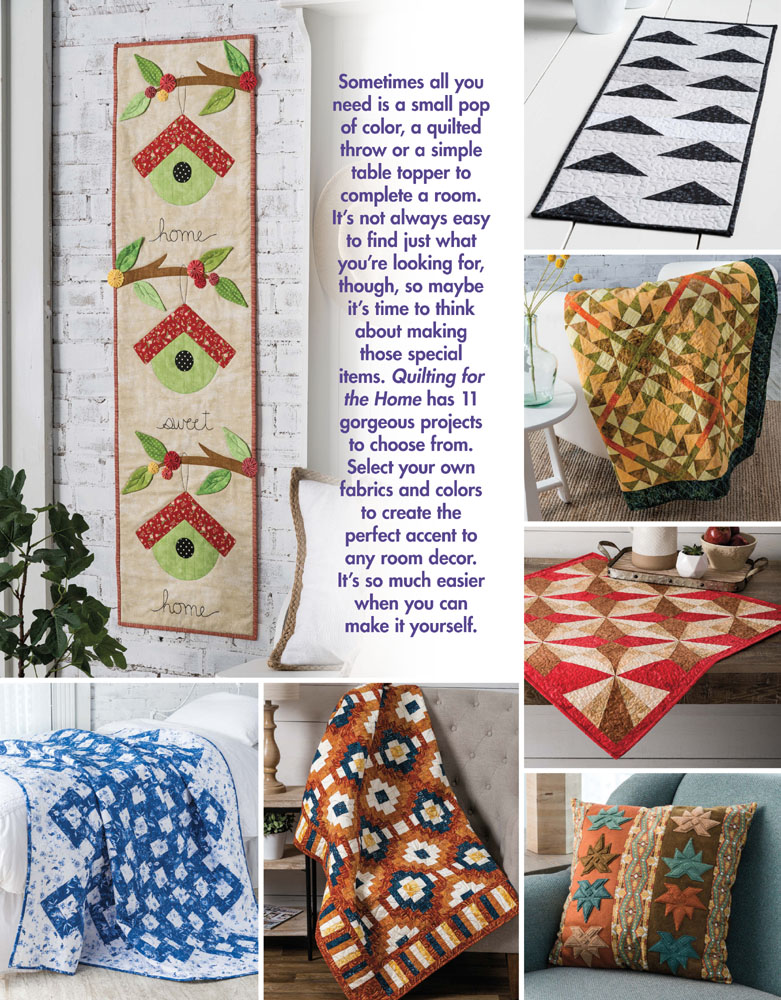
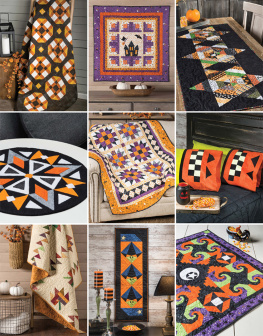
Repeat, mitering all corners, stitching to within 3" of starting point. Trim binding end long enough to tuck inside starting end and complete stitching (). 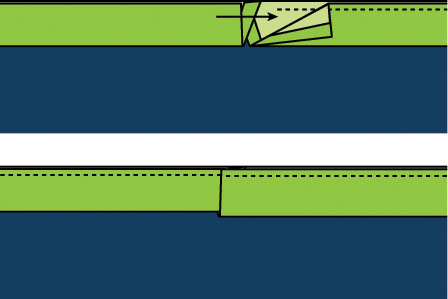 Figure D Fold binding to quilt back and stitch in place by hand or machine to complete your quilt. Please join us in thanking the talented designers whose work is featured in this collection. Kathleen Berlew Maple Leaf Camp Cushion Holly Daniels Magic Carpet Lap Quilt Takeoff Table Runner Karen DuMont of KariePatch Designs True Blue Gina Gempesaw Dandelion Fluff Chris Malone Home Sweet Home Star Pillows Michelle Strassburg Nifty Napkin Basket Jennifer Schifano Thomas Village Star Carolyn S. Nifty Napkin Basket: Craf-Tex nonwoven sew-in stabilizer from Bosal Takeoff Table Runner: Warm & Natural cotton batting from The Warm Co. Cherry Marmalade Topper: Batiks from Hoffman California-International Fabrics and Tuscany Cotton Wool batting from Hobbs Maple Leaf Camp Cushion: Wool felt from National Nonwovens and embroidery floss from Sullivans USA Magic Carpet Lap Quilt: Warm & Natural cotton batting from The Warm Co. Village Star: The Orchard Collection from Island Batik and Warm & Natural cotton batting from The Warm Co. Village Star: The Orchard Collection from Island Batik and Warm & Natural cotton batting from The Warm Co.
Now you can create a fun basket for every occasion. Just think of all the compliments youll receive at your next gathering! Design by Michelle Strassburg 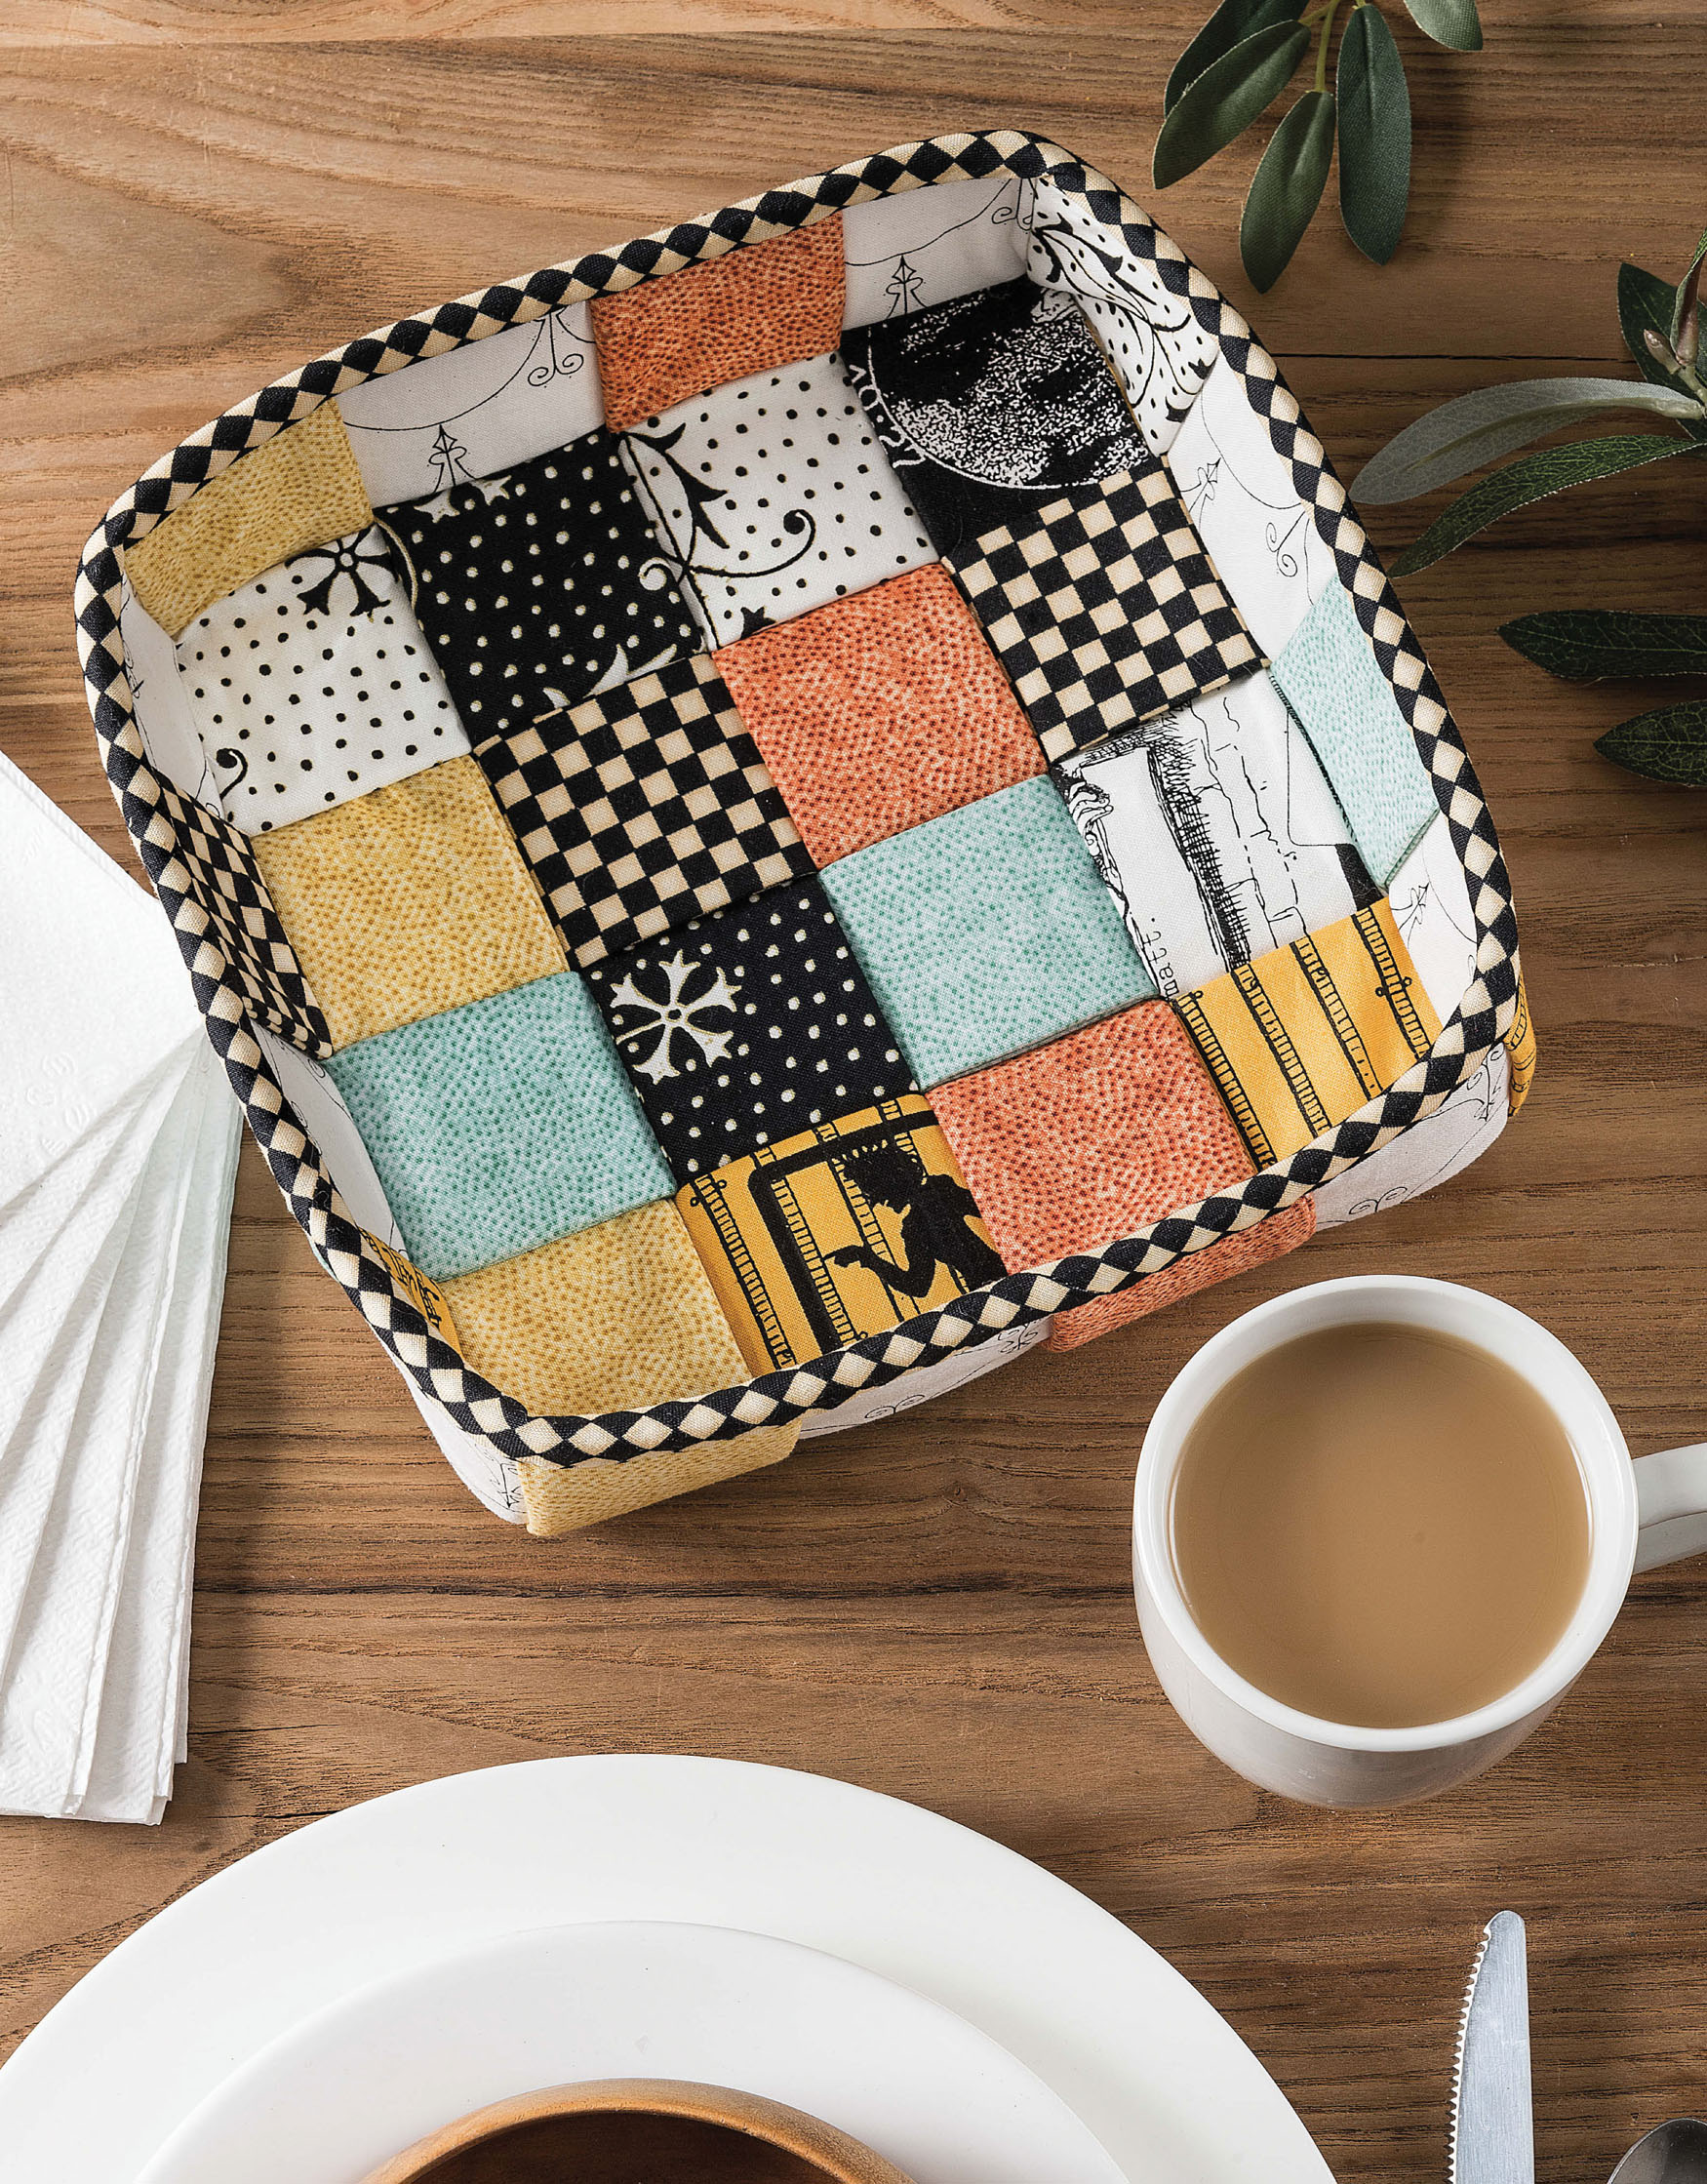 Skill Level Confident Beginner Finished Size Basket Size: Approximately 7" 7" 2"
Turn tube right side out. Repeat with all A strips to make a total of eight tubes.  Figure 1 Referring to , insert a same-length stabilizer strip inside each A tube. Note: Gathering the tube over a pair of needle-nose pliers will allow you to grab the stabilizer at one end and pull it through the tube.
 Figure 2 Repeat steps 1 and 2 using a B strip and the long stabilizer strip to make a B tube. Bring ends of the B tube together. Push the fabric back, butt the stabilizer ends and, using a zigzag stitch, sew the ends together to form a loop as shown in .
Fold under one end of the fabric tube and pull it over the opposite raw edge so the stabilizer is completely covered; press and machine-stitch through all layers to secure. 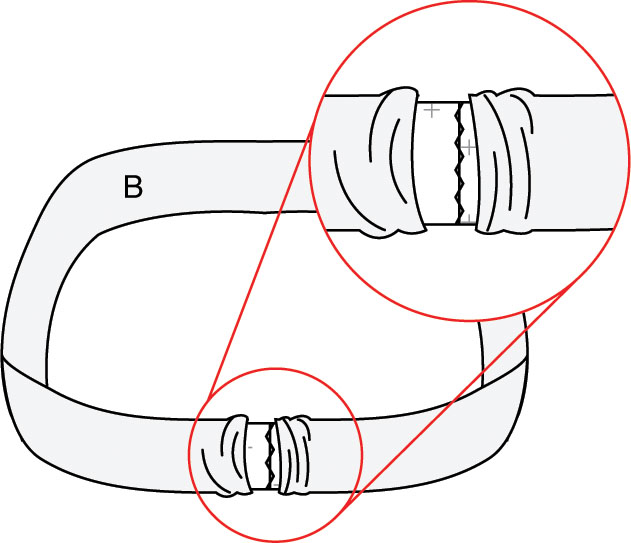 Figure 3 Referring to , arrange four A tubes vertically with long sides touching. Weave the four remaining A tubes over and under the vertical tubes.
  Figure 4 Position the B loop around the edge of the woven section and clip or pin in place. Weave ends of A tubes into the B loop to form the basket sides as shown in . Note: Binding clips are an easy way to hold each A tube on the B loop as you are weaving.
 Figure 5 Bind the top edge referring to Quilting Basics.
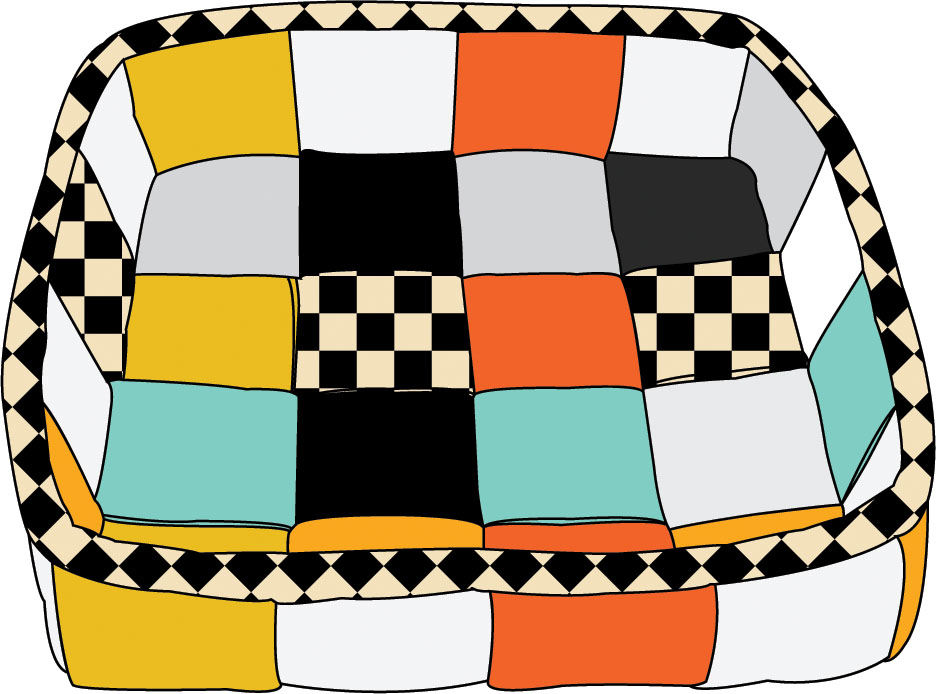 Nifty Napkin Basket Placement Diagram Approximately 7" 7" 2" Sometimes less is more.
Font size:
Interval:
Bookmark:
Similar books «Quilting for the Home»
Look at similar books to Quilting for the Home. We have selected literature similar in name and meaning in the hope of providing readers with more options to find new, interesting, not yet read works.
Discussion, reviews of the book Quilting for the Home and just readers' own opinions. Leave your comments, write what you think about the work, its meaning or the main characters. Specify what exactly you liked and what you didn't like, and why you think so.