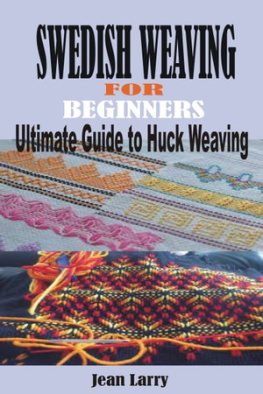
SWEDISH WEAVING FOR BEGINNERS
Ultimate Guide to Huck Weaving
Jean Larry
copyright@2022
Table of contents
CHAPTER ONE
Introduction
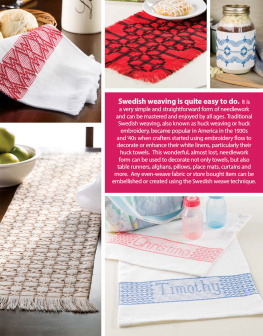
This is the best guide every beginner needs to acquire before carrying out any DIY Project. Once you understand the fundamentals, Swedish weaving is not difficult to perform and you'll soon be producing a lot of lovely items. It is a very basic form of weaving that mimics weaving on canvas by employing the elevated threads on what is frequently referred to as huck toweling.

Huck toweling, also known as Swedish weaving, is a style of embroidery that is applied to fabric with the huck weave; a pair of longer vertical threads are woven into this pattern in regular intervals across the fabric. They are arranged from row to half-row, much like bricks. This book will give you the basic skills and knowledge you need to acquire as beginner in Swedish weaving techniques even weave fabrics like Aida can occasionally be utilized.
To create unique patterns, embroidery strands or yarns of different colors are inserted under the thread pairs in different order. Since the decorative strands do not penetrate the fabric, the reverse side does not reveal them.
Aprons, bibs, curtains, draperies, dresser scarves, knitting bags, napkins, place mats, purses, skirts, tablecloths, and towels are just a few examples of the many items that can be embellished.
Equipment and Tools
Huck toweling requires a minimal amount of tools and gear, many of which you probably already own.
a. Thread for embroidery. For items that will need to be washed frequently, either pearl cotton or 6-strand floss is employed.
b. Huck textile.
1. Cotton. obtainable in a range of hues. The thread pairs are easier to see, and it is less expensive than linen huck.
2. Linen. available in a variety of hues. Towels, dresser scarves, and place mats can be made with high-quality linen and handiwork.
Unbroken (even weave) fabric

There are towels available that come with a blank ring of fabric with an even weave that is suitable for embroidery.
Needles
1. Tapestry needles with blunt points are used to tuck under the pairs of threads in the huck.
2. Pointy sewing needles, required for sewing through fabric, such as when hemming clothing.
Huck Patterns, d.
Metalized thread; used for adorning items like evening purses.
f. Pins. used to identify the center of an embroidery project as well as to pin hems.
Scissors, g.
h. Squeak.
the thread. used for constructing clothing and stitching hems.
j. Yarn. used to embroider non-laundered items like knitting bags and purses.
Instructions:
In order to focus the design on the piece, the item to be decorated should be carefully designed. While it is occasionally wise to finish the hems on smaller items in order to ascertain the exact size, skirts and handbags can be finished more skillfully after they are embellished.
b. Picking a pattern is an exciting and crucial step in the task. The pattern ought to fit the item it will be used to embellish.
1. The larger design, which may be repeated multiple times in the project, is appropriate for a large project like a skirt, an apron, drapes, or curtains.
2. For tiny items like placemats, bibs, and guest towels, smaller patterns are preferable.
3. There are situations when exceptions to these generalizations have fairly dramatic results. On a guest towel, a single sizable theme can work well. On a skirt, pairing little border patterns with a huge pattern can look lovely.
4. Using two, three, or four distinct colors of floss or yarn, metallic threads combined with colored thread, or variously colored cloth can all provide interesting effects.
c. Each strand of embroidery floss should be long enough to be stitched over the item once because it is best to avoid splicing the strands. Some designs specify how long each strand should be.
For instance, No. 2, T 3 12 indicates that a strand 3 12 times the width of the cloth to be stitched is required for the second row of embroidery.
The quantity and size of the offsets in the pattern affect the length of each strand in different ways.
For instance, in figure 1, strands 1, 2, 4, and 5 should be more than twice the width of the piece, or T 2 12, whereas thread No. 3, which runs across, needs to be just a little bit longer than the width of the piece being embroidered.

Figure 1 shows the Huck weaving style.
d. Centering the design is a crucial step, particularly for smaller items where the whole pattern can be seen at a look.
1. Fold the fabric in half or count the pairs of threads across the row to get the middle pair of threads in the breadth of the fabric. Pin the middle pair to identify it.
2. Find and mark the design's center in the pattern.
3. Find the middle of the embroidery floss or yarn, and then tuck it halfway beneath the main two strands.
e. Strand 1 in the chosen pattern is worked by pulling the strand under the pairs of threads specified in the pattern, first on one side of the center, then on the other.
This is because the positioning of all succeeding strands is dependent on the initial one, great care must be given with this first strand of the pattern to ensure precision in adhering to the design.
You can run a guide string under each pair of threads and straight across the fabric in a color other than the pattern. This can be useful for beginning the pattern's first strand. The subsequent strands can be started at the right, as is customary in sewing, since only the first strand needs to be centered.

Figure 2 shows the offset of one over and two up in huck weaving.

Open loops in Figure 3
f. There are two ways to read patterns; the one chosen depends on how the pattern is "written."
1. Some patterns are illustrated diagrammatically, as was done in this case. In these situations, the diagrams are followed by counting the corresponding pairs of threads.
2. Following written instructions is a different strategy that is more challenging but more accurate for complex patterns. The pattern is typically photographed to illustrate these instructions, however the images frequently lack clarity in the details. The written instructions have the following code:
(a) Offsets are denoted by symbols like 1 over 2. This indicates counting two pairs of threads up or down and one pair of threads above or below (fig. 2).
(b) Open loops are denoted with 1 12 (indicating 1 12 over) (one and one-half rows up). Thus, 12 /112, 12/2 12, and 12 / 12 are as seen in Figure 3.
(c) Closed loops are represented by the numbers 0, 1, and 3. (fig. 4). Rarely is a 0/4 loop employed.

Next page
