Annies - More Quick & Easy Quilts for Kids
Here you can read online Annies - More Quick & Easy Quilts for Kids full text of the book (entire story) in english for free. Download pdf and epub, get meaning, cover and reviews about this ebook. year: 2017, publisher: Annies, genre: Home and family. Description of the work, (preface) as well as reviews are available. Best literature library LitArk.com created for fans of good reading and offers a wide selection of genres:
Romance novel
Science fiction
Adventure
Detective
Science
History
Home and family
Prose
Art
Politics
Computer
Non-fiction
Religion
Business
Children
Humor
Choose a favorite category and find really read worthwhile books. Enjoy immersion in the world of imagination, feel the emotions of the characters or learn something new for yourself, make an fascinating discovery.
- Book:More Quick & Easy Quilts for Kids
- Author:
- Publisher:Annies
- Genre:
- Year:2017
- Rating:3 / 5
- Favourites:Add to favourites
- Your mark:
More Quick & Easy Quilts for Kids: summary, description and annotation
We offer to read an annotation, description, summary or preface (depends on what the author of the book "More Quick & Easy Quilts for Kids" wrote himself). If you haven't found the necessary information about the book — write in the comments, we will try to find it.
Annies: author's other books
Who wrote More Quick & Easy Quilts for Kids? Find out the surname, the name of the author of the book and a list of all author's works by series.


More Quick & Easy Quilts for Kids — read online for free the complete book (whole text) full work
Below is the text of the book, divided by pages. System saving the place of the last page read, allows you to conveniently read the book "More Quick & Easy Quilts for Kids" online for free, without having to search again every time where you left off. Put a bookmark, and you can go to the page where you finished reading at any time.
Font size:
Interval:
Bookmark:
If you are an Annies customer and have a question about the instructions on a pattern you have purchased, please visit:
AnniesCatalog.com/pages/customer_care/pattern_services.html
To download templates for easy printing, view the download instructions at the end of this book or click the Templates chapter in the Table of Contents.
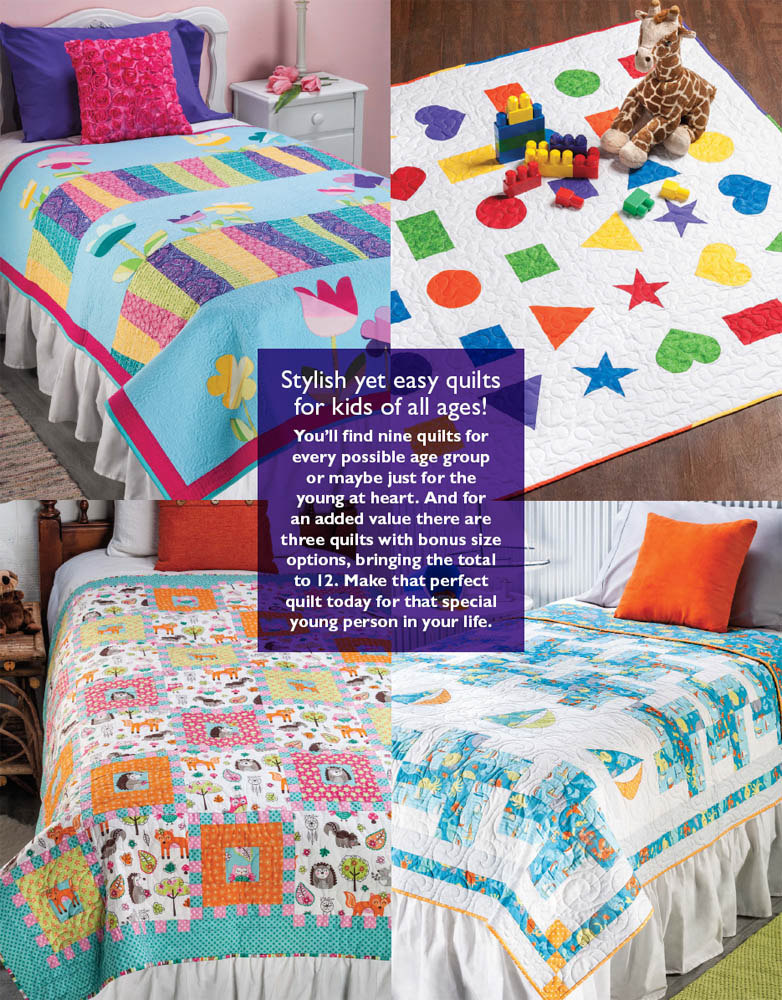
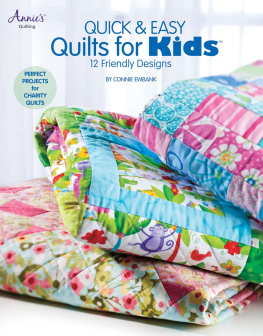
More Quick & Easy Quilts for Kids has nine fantastic quilts that are perfect for that special young person in your life! Thats nine patterns with great design elements that can be made in a short amount of time with techniques that wont slow you down. If time is your enemy, then this is the pattern book for you. Why sacrifice style or cuteness just because youre busy?
Theres nothing as special to a young child as a quilt made by a loved onea quilt that has his or her favorite things included in favorite colors. Each of these creative patterns can be used to make that special quilt. The construction of each quilt is designed for ease and speed. The appliqus are all fusible and can all be finished by machine. If youve been looking for a great quilt pattern, look no further. Our designers have put forth an excellent selection for the young and the young at heart.
Enjoy!
General Information
Designed & Quilted by Nancy Walhout Recker
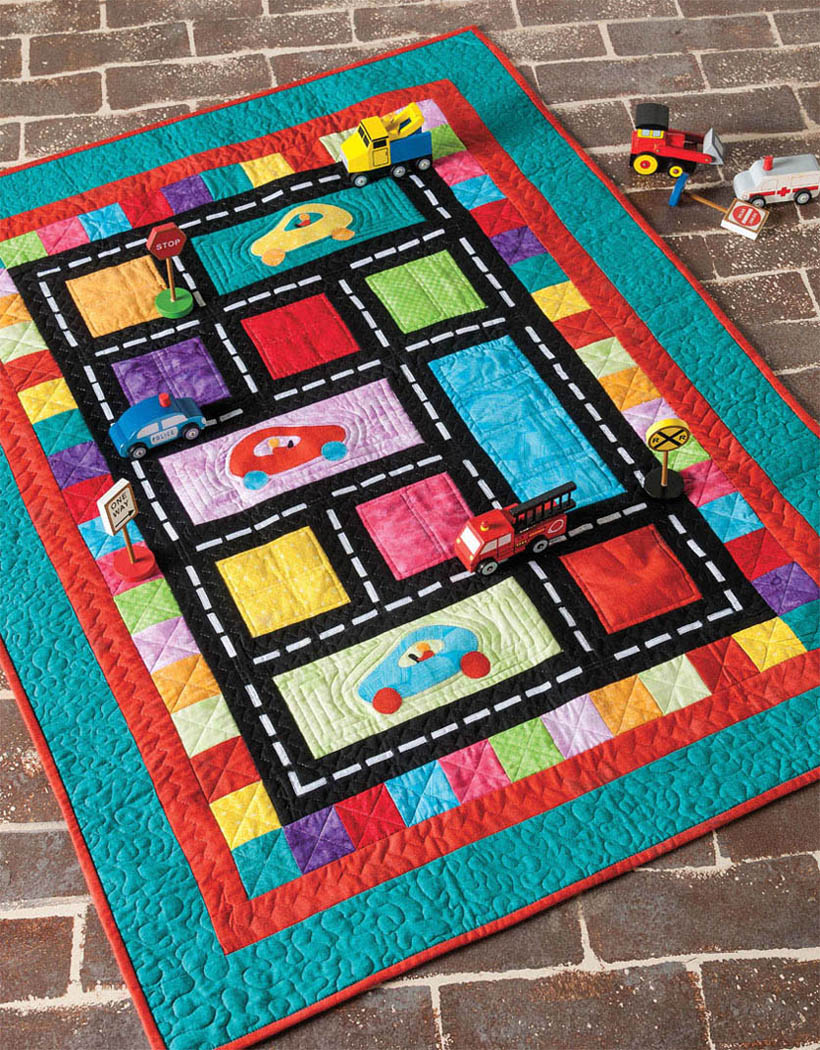
Confident Beginner
Quilt Size: 33" x 45"
1 solid or tonal fat eighth in each of the following colors: orange, red, purple, yellow, lime green, pink, salmon, light green and blue
yard black solid
yard teal tonal
1 yard red/orange tonal
Backing to size
Batting to size
Thread
yard 18"-wide fusible web
4 yards "-wide white twill tape
Glue stick
No-fray solution
Template material
Basic sewing tools and supplies
Read all instructions before beginning this project.
Stitch right sides together using a " seam allowance unless otherwise specified.
Refer to a favorite quilting guide for specific techniques.
Materials and cutting lists assume 40" of usable fabric width for yardage and 20" for fat eighths.
Prepare templates for appliqu pieces using the patterns given in the insert. Prepare pieces as per patterns and referring to Raw-Edge Fusible Appliqu instructions.
Cut a total of 3 different-color 4" x 10" A rectangles and 6 different-color 4" B squares.
Cut 5 (2") H squares from each fat eighth to total 45 squares.
Cut 5 (2" by fabric width) strips.
Subcut strips into 2 each 2" x 20" G, 2" x 28" F and 2" x 10" D strips, 3 (2" x 16") E strips and 5 (2" x 4") C rectangles.
Cut 1 (4" by fabric width) strip.
Subcut strip into 1 (4" x 10") A rectangle and 6 (2") H squares.
Cut 4 (3" by fabric width) strips.
Trim strips to make 2 each 3" x 39" K strips and 3" x 33" L strips.
Cut 1 (4" by fabric width) strip.
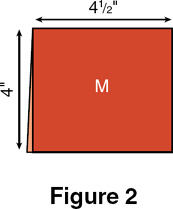
Subcut strip into 1 (4") B square, 1 (4" x 8") M rectangle and 5 (2") H squares.
Cut 4 (2" by fabric width) strips.
Trim strips to make 2 each 2" x 36" I strips and 2" x 27" J strips.
Cut 5 (2" by fabric width) binding strips.
Soak in no-fray solution; let dry. Cut into 1" lengths.
Center and fuse the appliqu pieces to make one car motif to each of three of the A rectangles in numerical order referring to the appliqu motif, the Assembly Diagram and Raw-Edge Fusible Appliqu instructions to complete two appliqud A rectangles and one reverse appliqud A rectangle.
Using stitch of choice and thread to match fabrics, stitch around each shape to complete the appliqu.
Refer to and the Assembly Diagram as needed to determine color placement for all pieces.
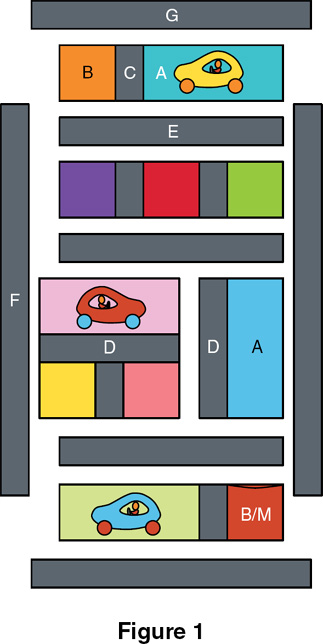
Select and join one each B square, C rectangle and appliqud A rectangle to make row 1; press.
Select two C rectangles and three different-color B squares and join, starting and ending with a B square, to make row 2; press.
Join two different-color B squares with one C rectangle; press. Add D and then the reverse appliqud A rectangle; press. Add D and then the non-appliqud A rectangle to the right side to complete row 3.
Fold the M rectangle in half with wrong sides together to make a 4" x 4" pocket piece as shown in ; press.
Place the pocket piece on the red/orange B square, matching side and bottom edges, and baste raw edges to make the pocket square as shown in .
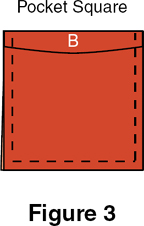
Select and join the remaining appliqud A rectangle with one C rectangle and the pocket square (with opening toward the top of the row) to complete row 4; press.
Join the rows in numerical order with three E strips; press.
Sew F to opposite long sides and G to the top and bottom of the row section to complete the pieced center; press.
Select and join 16 H squares in random color order to make a side strip; press. Repeat to make a second side strip. Sew a side strip to opposite long sides of the pieced center; press.
Repeat step 9 with 12 H squares in each strip and sew to the top and bottom of the pieced center; press.
Sew I strips to opposite long sides and J strips to the top and bottom of the pieced center; press.
Repeat step 11 with the K and L strips to complete the quilt top.
Arrange and pin the 1" twill tape pieces along the center of all black pieces to make pavement lines, leaving spaces at intersections. When satisfied with the arrangement, apply glue stick to temporarily hold lines in place. Straight-stitch all around each piece referring to .

Create a quilt sandwich referring to Quilting Basics instructions.
Quilt as desired.
Bind referring to Quilting Basics instructions to finish. 
Font size:
Interval:
Bookmark:
Similar books «More Quick & Easy Quilts for Kids»
Look at similar books to More Quick & Easy Quilts for Kids. We have selected literature similar in name and meaning in the hope of providing readers with more options to find new, interesting, not yet read works.
Discussion, reviews of the book More Quick & Easy Quilts for Kids and just readers' own opinions. Leave your comments, write what you think about the work, its meaning or the main characters. Specify what exactly you liked and what you didn't like, and why you think so.