If you are an Annies customer and have a question about the instructions on a pattern you have purchased, please visit:
AnniesCatalog.com/pages/customer_care/pattern_services.html
Templates
To download templates for easy printing, view the download instructions at the end of this book or click the Templates chapter in the Table of Contents.
Introduction
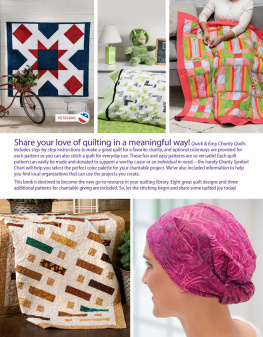
There are times when you want and need a fast and easy quilt pattern. Sometimes all you have is an afternoon free here and there to devote to your craft. And, of course, there are times when you really want to make a very special gift, but you dont have a lot of time to dedicate to making it. Well, being short on time wont stop you from making that special quilt when you have Jiffy Quick Quilts at your disposal. This book will allow you to make the most out of your available time.
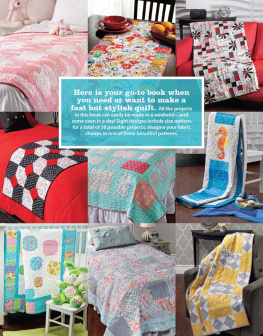
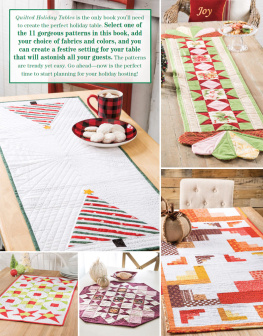
Jiffy Quick Quilts has eight quilts, all with size options, plus a bed runner and a table runner. The patterns were designed for both speed and versatility. Your fabric choices and these excellent patterns will give you endless possibilities. You can make everything from baby quilts to quilts that are perfect for the man cave. Its all herethe designs and the instructions. All you need to do is add fabric and get stitching.
Jiffy Quick Quilts is destined to be your go-to book for both patterns and inspiration.
Table of Contents
General Information
This quilt uses precut 10 squares or enough fabric to cut your own. Either way, here is a fast and easy project.
Design by Nancy Scott
Quilted by Masterpiece Quilting

Skill Level
Beginner
Specifications
Quilt Size: 62 x 72
Materials
19 assorted precut 10 A squares
yard binding fabric
2 yards aqua dot
Backing to size
Batting to size
Thread
Basic sewing tools and supplies
Project Notes
Read all instructions before beginning this project.
Stitch right sides together using a seam allowance unless otherwise specified.
Materials and cutting lists assume 40 of usable fabric width.
Designer Tip
Use as many different precut squares as you like, or use duplicate fabrics as shown in the sample quilt.
Cutting
From 6 precut 10" A squares:
Subcut squares in half across width to make 12 (5 x 10") B rectangles.
From binding fabric:
Cut 7 (2 by fabric width) strips for binding.
From aqua dot:
Cut 2 (10 by fabric width) strips.
Subcut strips into 20 (3 x 10") C rectangles.
Cut 1 (3 by fabric width) strip.
Subcut strip into 4 (3 x 10") D rectangles.
Cut 6 (3 by fabric width) E strips.
Cut 7 (6 by fabric width) F/G strips.
Completing the Quilt
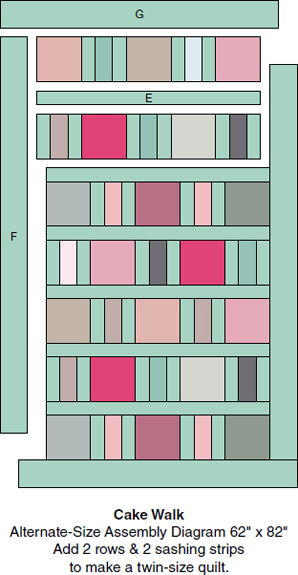
Refer to the Assembly Diagram for positioning of rows and strips for steps 36.
Join three A squares, two B rectangles and four C rectangles as shown in Figure 1; press. Repeat to make three of row 1.

Join two D rectangles, two A squares, three B rectangles and four C rectangles as shown in Figure 2; press. Repeat to make two of row 2.

Join the E strips on the short ends to make a long strip; press. Subcut strip into four 3 x 50" E sashing strips.
Join the rows alternating with E sashing strips to complete the quilt center; press.
Join the F/G strips on the short ends to make a long strip; press. Subcut strip into two 6 x 60" F strips and two 6 x 62 G strips.
Sew F strips to opposite sides of the quilt center and G strips to the top and bottom to complete the quilt top; press.
Create a quilt sandwich referring to the Quilting Basics chapter.
Quilt as desired.
Bind referring to the Quilting Basics chapter to finish. 
Inspiration
"I love fabrics with medium- to large-size prints, and Cake Walk is perfect for showcasing such beautiful fabrics." Nancy Scott

Three fabrics and a free weekend and you can have this top ready to quilt.
Designed & Quilted by Denise Russell

Skill Level
Confident Beginner
Specifications
Quilt Size: 45 x 63
Block Size: 9 x 9 finished
Number of Blocks: 35

Materials
1 yards gray with white dots
1 yards yellow print
1 yards white solid
Backing to size
Batting to size
Thread
Basic sewing tools and supplies
Project Notes
Read all instructions before beginning this project.
Stitch right sides together using a seam allowance unless otherwise specified.
Materials and cutting lists assume 40 of usable fabric width.
Cutting
From gray with white dots:
Cut 7 (3 by fabric width) strips.
Subcut strips into 70 (3) B squares.
Cut 6 (2 by fabric width) strips for binding.
From yellow print:
Cut 9 (5 by fabric width) strips.
Subcut strips into 70 (5) A squares.
From white solid:
Cut 13 (3 by fabric width) strips.
Subcut strips into 140 (3) C squares. Cut each C square in half on 1 diagonal to make 280 C triangles.
Completing the Blocks
Fold a B square in half both directions and fingerpress to make a crease to mark the center. With wrong sides together, fold four C triangles in half and crease to mark the center.
Referring to Figure 1a, lay two C triangles on opposite sides of the B square, right sides together, so the creases match up. Sew triangles to the square; press open (Figure 1b). In the same manner, add remaining C triangles to the remaining sides of the B square as shown in Figure 1c. Press and trim units to measure 5 square if necessary.

Repeat steps 1 and 2 to make 70 B-C units.
Stitch an A square to a B-C unit to make a row. Repeat to make two rows. Stitch rows together as shown in Figure 2. Repeat to make 35 blocks.

Next page
