• Complain

Storey Publishing LLC - Simple Home Repairs

Here you can read online Storey Publishing LLC - Simple Home Repairs full text of the book (entire story) in english for free. Download pdf and epub, get meaning, cover and reviews about this ebook. year: 1997, publisher: Storey Publishing, LLC, genre: Home and family. Description of the work, (preface) as well as reviews are available. Best literature library LitArk.com created for fans of good reading and offers a wide selection of genres:

Romance novel Science fiction Adventure Detective Science History Home and family Prose Art Politics Computer Non-fiction Religion Business Children Humor

Choose a favorite category and find really read worthwhile books. Enjoy immersion in the world of imagination, feel the emotions of the characters or learn something new for yourself, make an fascinating discovery.

No cover

Simple Home Repairs: summary, description and annotation

We offer to read an annotation, description, summary or preface (depends on what the author of the book "Simple Home Repairs" wrote himself). If you haven't found the necessary information about the book — write in the comments, we will try to find it.

Since 1973, Storeys Country Wisdom Bulletins have offered practical, hands-on instructions designed to help readers master dozens of country living skills quickly and easily. There are now more than 170 titles in this series, and their remarkable popularity reflects the common desire of country and city dwellers alike to cultivate personal independence in everyday life.

Storey Publishing LLC: author's other books


Who wrote Simple Home Repairs? Find out the surname, the name of the author of the book and a list of all author's works by series.

Simple Home Repairs — read online for free the complete book (whole text) full work

Below is the text of the book, divided by pages. System saving the place of the last page read, allows you to conveniently read the book "Simple Home Repairs" online for free, without having to search again every time where you left off. Put a bookmark, and you can go to the page where you finished reading at any time.

Light

Font size:

Reset

Interval:

Bookmark:

Make
Simple Home Repairs
Contents
Introduction
Broken window? Leaking faucet? Wouldnt you rather fix it yourself than pay someone else to do it? Its frustrating to have to depend on other people. And with the cost of living rising every day, it becomes increasingly painful to pay your hard-earned money for services you could easily perform yourself if you only had the know-how. This Garden Way Bulletin is designed to give you just the knowledge you need to do your own repairs and avoid the inconvenience and expense of calling in the plumber or carpenter. From this guide, youll learn that home repair is simpler than it looks and a lot less costly than hiring outside help. Plus, youll have the satisfaction of doing it yourself. Picture 3 Dripping faucet may cause a spot in the sink. Picture 4 Constant dripping is annoying.
What You Need:
Picture 5 A box of assorted size washers, unless you know the size. Picture 6 A screwdriver. An adjustable wrench HOW-TO First turn off the water at the shut-off valve - photo 7 An adjustable wrench.
HOW-TO:
.
HOW-TO:
.

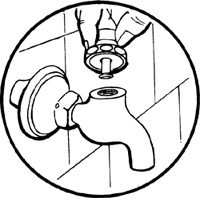
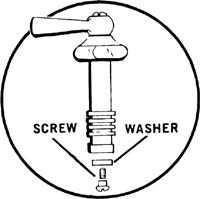
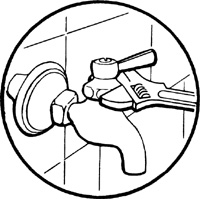
First turn off the water at the shut-off valve nearest to the faucet you are going to repair. Then turn on the faucet until the water stops flowing. ()(fig. 1)fig 2 fig 3 Remove the screw holding the old washer at the - photo 8 ) (fig. 2)fig 3 Remove the screw holding the old washer at the bottom of the - photo 9(fig. 3)Remove the screw holding the old washer at the bottom of the valve unit - photo 10 .

Remove the screw holding the old washer at the bottom of the valve unit. ()(fig. 4)Put in new washer and replace screw fig 5 Put valve unit back - photo 11 . Put in new washer and replace screw. ()(fig. 5)Put valve unit back in faucet Turn handle to the proper position Tighten - photo 12 .
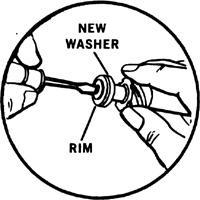
Put valve unit back in faucet. Turn handle to the proper position. . Tighten the packing nut. ()(fig. 6)Turn on the water at the shut-off valve Faucets may look different but they - photo 13 .

Turn on the water at the shut-off valve. Faucets may look different, but they are all built about the same. Mixing faucets, which are used on sinks, laundry tubs, and bathtubs are actually two separate units with the same spout. Youll need to repair each unit separately. ()(fig. 7)Is water leaking around the packing nut Try tightening the nut If there is a - photo 14 Is water leaking around the packing nut? Try tightening the nut.
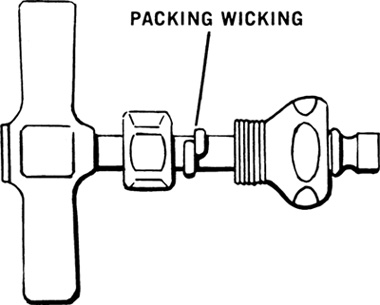
If there is a washer under it, replace the washer. If theres no washer, you may need to wrap the spindle with packing wicking. () Then replace packing nut and handle, and turn water back on at the shut-off valve. (fig. 8)Your Reward Lower water costs Spots in sink prevented You save money by - photo 15

Your Reward:
Picture 16 Lower water costs. Picture 18 You save money by doing the job yourself.
Electric Plugs Repair or Replace
Your Problem:
Picture 19 Lamps or appliances do not work right. Picture 20 A damaged plug is dangerous. Picture 21 Its hard to hire help for small repairs.
What You Need:
Picture 22 New plug if your old one cannot be used. (Buy one with a UL label.) Screwdriver Knife HOW-TO Cut the cord off at the damaged part fig - photo 23 Screwdriver Knife HOW-TO Cut the cord off at the damaged part fig 1 Slip - photo 24 Knife
HOW-TO:
. (Buy one with a UL label.) Screwdriver Knife HOW-TO Cut the cord off at the damaged part fig - photo 23 Screwdriver Knife HOW-TO Cut the cord off at the damaged part fig 1 Slip - photo 24 Knife
HOW-TO:
.

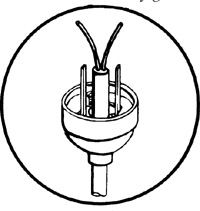
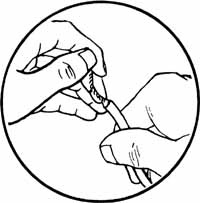
Cut the cord off at the damaged part. ()(fig. 1)Slip the plug back on the cord fig 2 Clip and separate the - photo 25 . Slip the plug back on the cord. ()(fig. 2)Clip and separate the cord fig 3 fig 4 Remove a - photo 26 .
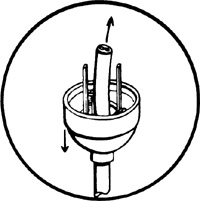
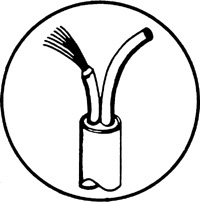
Clip and separate the cord. ()(fig. 3)fig 4 Remove a half-inch of the insulation from the end of the - photo 27 ) (fig. 4)Remove a half-inch of the insulation from the end of the wires Do not cut - photo 28 . Remove a half-inch of the insulation from the end of the wires. ()(fig. 5)Twist small wires together clockwise fig 6 Pull knot down - photo 29 . 5) Twist small wires together clockwise fig 6 Pull knot down - photo 29 .
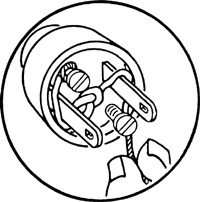
Twist small wires together, clockwise. ()(fig. 6)Pull knot down firmly in the plug fig 7 Pull one wire around - photo 30 . Pull knot down firmly in the plug. ()(fig. 7)Pull one wire around each terminal to the screw fig 8 fig - photo 31 .
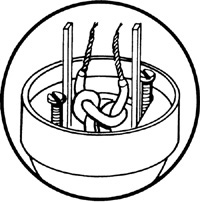
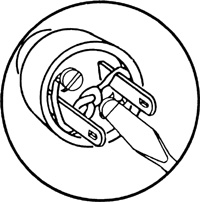
Pull one wire around each terminal to the screw. ()(fig. 8)fig 9 Tighten the screw Insulation should come to the screw but - photo 32 ) (fig. 9)Tighten the screw Insulation should come to the screw but not under it - photo 33 . Tighten the screw. ()(fig. 10)fig 11 Your Reward The appliance or lamp is back in working - photo 34

Next page
Light

Font size:

Reset

Interval:

Bookmark:

Make

Similar books «Simple Home Repairs»

Look at similar books to Simple Home Repairs. We have selected literature similar in name and meaning in the hope of providing readers with more options to find new, interesting, not yet read works.


Reviews about «Simple Home Repairs»

Discussion, reviews of the book Simple Home Repairs and just readers' own opinions. Leave your comments, write what you think about the work, its meaning or the main characters. Specify what exactly you liked and what you didn't like, and why you think so.