Dragons & Fantasy
By Kythera of Anevern
Designed by Shelley Baugh
Project Editor: Meghan ODell
Copyeditor: Rebecca J. Razo
2009, 2011 Walter Foster Publishing, Inc. Artwork 2009, 2011 Joana Contreras (Kythera of Anevern).
All rights reserved. Walter Foster is a registered trademark.
Digital edition: 978-1-6105-9856-9
Softcover edition: 978-1-6005-8068-8
This book has been produced to aid the aspiring artist. Reproduction of work for study or finished art is permissible. Any art produced or photomechanically reproduced from this publication for commercial purposes is forbidden without written consent from the publisher, Walter Foster Publishing, Inc.
3 5 7 9 10 8 6 4 2
CONTENTS
INTRODUCTION
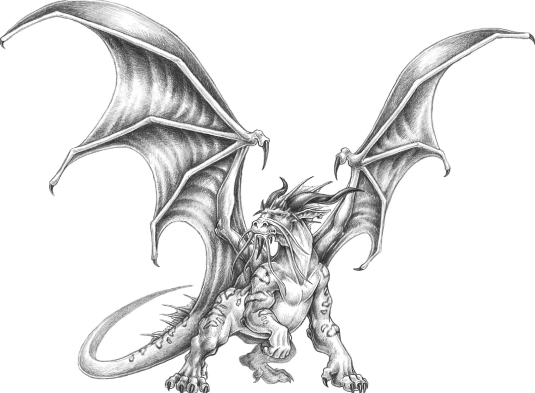
The world we live in, though mundane, is a wonderful place, full of marvels in our past and present. Part of our history, however, lies in the fantastic. The human imagination stretches beyond the limits of the things that we can see and touchfairies, dragons, elves, and other creatures of all shapes and sizes have had a place in our culture for centuries, being found in everything from myths and legends to songs and art. The challenge contemporary artists face is bringing the fantastic to life on the page, breathing life into the mythical with graphite, paint, ink, or pixels on a computer screen.
Most art instruction begins with drawing what you see, translating the world around you into lines on a page. With practice, this becomes easy enough because we can see these things and learn how to mimic their shapes and textures on paper. But what about the things we cant see, the fabulous creatures that are conjured up by the most far-flung corners of our imagination?
After months of struggling with the challenge of making my fantasy creatures look believable, I finally came to the realization that the tools for creating the fantastic have their roots in the mundane. As much as I didnt want to draw vases of flowers, dolls, and lemons in dishes, I figured out that I had to be able to find the ordinary in the extraordinary to make my fantasy creatures come to life on the page.
Of course, what works for me might not work for you because everyone thinks (and draws) differently. The trick is figuring out what works for you. I hope the methods and techniques I describe in this book will be a good starting point for youa basis from which to cultivate your own methods and techniques. Heck, Ive been doing this for years and I still remain in a constant state of evaluation, always reconsidering my techniques and my ways of thinking.
So keep one eye on the stars (anything is possible), but keep the other on the horizon, where you might catch a glimpse of something that helps bring the fantastic just a little bit closer. You never know when you might see a dragon in a cat ferociously chasing a mouse, or a wine-drenched satyr in an iguana basking on a sunlit branch.

TOOLS AND MATERIALS
There are many types of tools and materials available for an artist to use. On the other hand, sometimes walking into a large art supply store can result in sensory overload, and youre left wondering if you really need all of the amazing things on the shelves. All of these tools have potential and can be a lot of fun, but lets start with the basics. Experiment as much as you can to discover which tools work best for you.

Pencils Wood-cased drawing pencils are available in varying degrees of hardness, from very hard (9H) to very soft (9B); HB pencils are used for middle grades. The higher the number that accompanies the letter, the harder or softer the lead. (For example, a 4H is harder than a 2H, and a 4B is softer than a 2B.) You can buy woodless pencils, which also come in varying degrees and are great for covering large areas with tone or for making quick sketches. My favorite sketching tool is a mechanical pencil, which can be loaded with graphite leads of different sizes. I almost never heave home without my .5 mm and .7 mm HB mechanical pencils. Clutch pencils are similar to mechanical pencils but hold only one thicker 2 mm lead, which is ideal for broad strokes. Know that tones vary among manufacturersone brands HB may look very different from another brands, so try to stick with one brand for consistency.
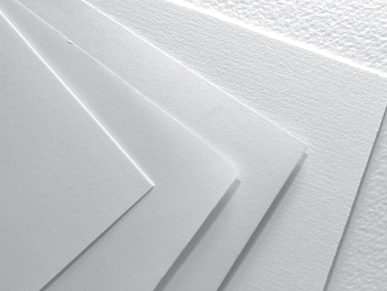
Paper Drawing paper comes in different sizes and textures. Some textures are better suited to certain materials than others: When working in graphite, a paper that has some texture (tooth) is preferable, because the graphite adheres better; when working with pen and ink, smoother paper is usually better. Experiment with different kinds of paper to see how your drawing materials react. Just make sure your paper is acid free, as this paper will last for a long time and wont yellow with age.
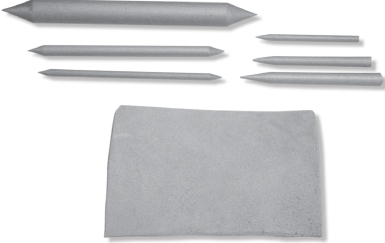
Blending Tools These tools can be used to help blend the graphite on the page. Blending stumps (above left) are sticks of highly compressed paper pulp. Like pencils, they wear down as they are used, but you can restore a blunt point by carefully sanding the point with fine-grain sandpaper. Tortillons (above right) function much the same as blending stumps, but they are made of tightly rolled paper. For large areas, blend with a chamois cloth (above center). You can wrap the chamois around your finger for best results. Never use just your finger to blend as the natural oils in your skin can damage the paper.
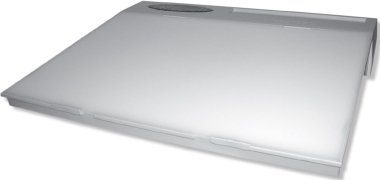
Light Table A light table (also called a light box) is a great tool for transferring a messy sketch to good paper. Tape your sketch to the surface of the light table, cover the sketch with a clean sheet of drawing paper, and flip the switchthe fluorescent bulb illuminates your drawing and will help you accurately trace the lines of the sketch onto a nice sheet of drawing paper. You can get the same effect by taping your sketch and drawing paper to a bright window, but this will only work during the day.

Erasers Erasers can be used to correct mistakes, create visual effects, and even draw! The white plastic eraser (above left) is smooth, simple, and more or less all-purpose. The next eraser, a gum eraser, is softer but has a tendency to crumble and leave a mess if used too roughly. The next two are kneaded erasersthese can be molded into different shapes and sizes, as shown. Instead of rubbing the eraser on the page as you would with a plastic or gum eraser, gently dab the kneaded eraser on the page to lift the graphite. The last two stick erasers are similar to clutch pencils in that they each hold a single white plastic eraser stick. The soft brush pictured here is useful for brushing away eraser crumbs. You can smear the graphite or damage the paper if you use your hand, and you might end up with a wet drawing if you try to blow away the crumbs.
Next page

