To Chris, thank you for all your tireless work and never ending support. Without you none of this would be possible. You are the straight line to my squiggle.
Contents


F or as long as I can recall, Ive been artistic. Id draw on anything handy, even paper towels, and after years of honing my napkin-art skills, I hoped to parlay them into a career. I became an artist for hire, doing everything from portraits to murals, but knew Id need steady work, lest I literally starve!
My brother-in-law pulled strings to get me a job in a local market. There, I sliced lunch meats and learned the subtle differences between thin-sliced and shaved. This may not have been much improvement over my napkin-art era, but all the while I was also pursuing my creative endeavors. One day, hearing about my artistic leanings, my boss asked if I would take over from the retiring cake decorator. I had only made one cake in my life, but I was willing to learn. Within a week, I had madeand soldmy first professional offering.
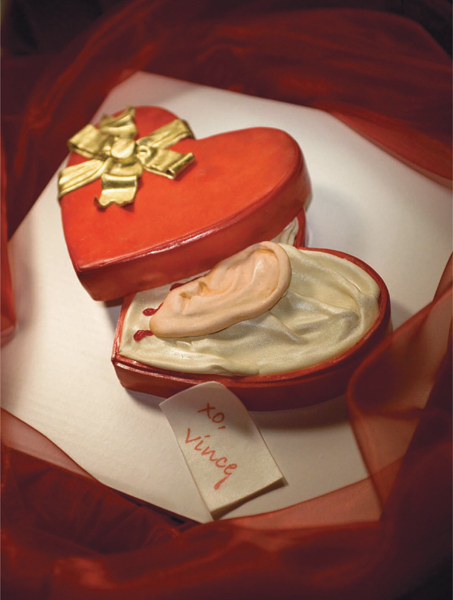
Years passed, and my unexpected career continued, despite numerous attempts to escape. Then, in 2004, I decided to fully embrace the mediumbut on my terms. I launched my own business in 2005, submitting my website (www.debbiedoescakes.net) for promotion to a pioneer in the field. She loved my work, but advised, remove the dead-rat cake. With this, I knew I was on to something, and have continued to embrace subjects others warn against, creating a niche for myselftwisted cakes. In this book, let me share with you my offbeat celebration of the weird, wacky, and wonderful.
Debbie Goard

BAKING TOOLS
An assemblage of tools used to bake cakes and create structures
1 SHEET AND ROUND PANS
2 VINYL WRAP for covering boards
3 MINIBALL PAN / CUPCAKE PAN
4 MEASURING CUP
5 FLOWER POT for baking flowerpot-shaped cake
6 SPORTS BALL PAN for baking sphere shapes
7 SIFTER
8 HOT-GLUE GUN used to attach ribbon
9 CUPCAKE LINERS
10 DRILL for attaching screws
11 COPPER TUBING for creating ax handle, etc.
12 PLIERS for bending copper
13 SIDE CUTTERS for cutting copper
14 WOOD SCREWS AND SCREWDRIVER used to secure dowels to board
15 DOWELS used as supports
16 WOOD BOARD used as a base for cakes that require screws/dowels

DECORATING TOOLS
A collection of traditional and unconventional tools used to decorate and complete the cakes.
1 LIGHT BOX for tracing
2 CRME BRULE TORCH for scorching and searing
3 SCALE
4 AIRBRUSH / COMPRESSOR to color cakes
5 FONDANT SMOOTHER
6 STYROFOAM BALL to create lightweight, inedible shapes
7 BURLAP for adding texture on icing
8 PAINTBRUSHES
9 MODELING TOOLS to add detail
10 CRAFT KNIFE
11 ROTARY FONDANT CUTTER a cutting wheel to cut even fondant strips
12 LARGE ROLLING PIN to roll out larger amounts of fondant
13 COFFEE STIRRERS to add detail
14 RULER
15 AIRBRUSH COLORS specially formulated colors to be used in the airbrush
16 LUSTER AND DISCO DUSTS edible dusts for adding sparkle and sheen
17 CMC to add firmness to fondant. When added to sugarpaste, it acts as a quick-drying, synthetic form of gum tragacanth, ideal for modeling paste.
18 SILVER HIGHLIGHTER to create shiny, metallic paint
19 GEL COLOR edible color for tinting and painting fondant
20 PALETTE to mix colors
21 SMALL ROLLING PIN
22 SCISSORS
23 SCRUB BRUSH to add textures
24 WAVY KNIFE to cut fondant fries
25 SERRATED KNIFE
26 SPATULA
27 MONOFILAMENT to make whiskers
28 LINED VINYL used as an impression mat
29 WAFER PAPER edible paper for logos, signs, etc.
30 METAL MESH for adding texture
31 TOOTHPICKS to secure fondant pieces
32 WIRE for antennae
33 FLOWER VEINER to add detail on gelatin pieces
34 GLOVES for mixing colors
35 PARCHMENT TRIANGLES to create icing bags
36 FLORAL WIRE to create legs, stems, etc.
37 WIRE CUTTERS for cutting wires
38 EDIBLE MARKERS used to draw logos, add detail, etc.
39 LARGE ICING BAG / QUICK ICE TIP
40 BENCH SCRAPER to smooth icing
41 DECORATING TIPS nozzles used to pipe icing/cut shapes
42 SQUARE CUTTER
43 ROUND CUTTER SET
44 PLASTIC CUPS to hold colors and glazes
45 CURVED SPATULA, SMALL OFFSET SPATULA, SMALL SERRATED KNIFE for icing curved surfaces
46 MEASURING SPOONS
MODELING CHOCOLATE
YIELDS 3 CUPS (700 ML)
12 oz. (340 g) chocolate candy discs or coating chocolate
/ cup (75 ml) light corn syrup
glass bowl
microwave
spatula
parchment or waxed paper
Place chocolate in glass bowl. Microwave for about 45 seconds, stir with spatula, then return to microwave for an additional 45 seconds or less (time will vary, based on microwave model; be careful not to burn chocolate). Remove from microwave. Add corn syrup, stirring mixture with spatula until well blended. Do not overmix. Turn out and spread mixture onto waxed paper or parchment, then cover. For best results, let set overnight.
GANACHE
YIELDS 2 CUPS (470 ML)
8 oz. (225 g) semisweet chocolate, chopped or chips
1/ cups (400 ml) heavy whipping cream
1 teaspoon pure vanilla extract
glass bowl
small saucepan
spatula
Place chocolate in glass bowl. Set aside. Pour heavy whipping cream into saucepan, set over medium high heat. Stirring often, bring cream to a boil. Remove cream from heat and pour over chocolate. Stir with spatula until chocolate is fully melted. Mixture will be smooth and glossy. Stir in vanilla extract. Leave to set at room temperature for about an hour, or refrigerate for about 30 minutes until mixture is a spreadable consistency.
CREAM CHEESE ICING
YIELDS 3 CUPS (700 ML)
8 oz. (225 g) cream cheese
4 tablespoons or / stick (55 g) unsalted butter
Next page
