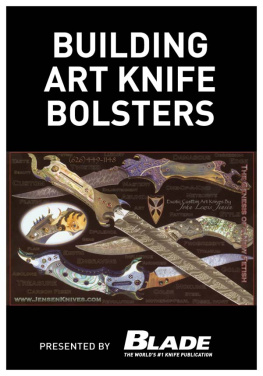
Joe Kertzman - Building Art Knife Bolsters
Here you can read online Joe Kertzman - Building Art Knife Bolsters full text of the book (entire story) in english for free. Download pdf and epub, get meaning, cover and reviews about this ebook. year: 2012, publisher: F+W Media, genre: Home and family. Description of the work, (preface) as well as reviews are available. Best literature library LitArk.com created for fans of good reading and offers a wide selection of genres:
Romance novel
Science fiction
Adventure
Detective
Science
History
Home and family
Prose
Art
Politics
Computer
Non-fiction
Religion
Business
Children
Humor
Choose a favorite category and find really read worthwhile books. Enjoy immersion in the world of imagination, feel the emotions of the characters or learn something new for yourself, make an fascinating discovery.
- Book:Building Art Knife Bolsters
- Author:
- Publisher:F+W Media
- Genre:
- Year:2012
- Rating:3 / 5
- Favourites:Add to favourites
- Your mark:
- 60
- 1
- 2
- 3
- 4
- 5
Building Art Knife Bolsters: summary, description and annotation
We offer to read an annotation, description, summary or preface (depends on what the author of the book "Building Art Knife Bolsters" wrote himself). If you haven't found the necessary information about the book — write in the comments, we will try to find it.
Take it from one meticulous knifemaker, the bolsters of an art knife are the centerpieces. John Lewis Jensen takes it easy on novice makers and enthusiasts by concentrating solely on the bolsters of his fancy art knife named Alchemy. Jensen talks safety, materials, layering, grinding, sanding, drilling, tapping and attaching of the bolsters to the knife handle.
Building Art Knife Bolsters — read online for free the complete book (whole text) full work
Below is the text of the book, divided by pages. System saving the place of the last page read, allows you to conveniently read the book "Building Art Knife Bolsters" online for free, without having to search again every time where you left off. Put a bookmark, and you can go to the page where you finished reading at any time.
Font size:
Interval:
Bookmark:


John Jensens art knives are highly regarded in the knifemaking community as innovated edged collectibles. The making of just the bolster area of one of his art knives is explained in this chapter, and it alone takes hours to complete.
With training in jewelry, sculpture and metal smithing, my method of knifemaking tends to be a bit old school. My education from the Rhode Island School of Design instilled precision, innovation and problem solving, among other things. Yet, the main focus was in the education, knowledge and understanding of the age-old methods of complete hand fabrication. My working methodology is in many ways an over-the-top style of doing things, and that is how people view my work.
Feel free to take my particular style and apply it in your own way. I realize most people dont want to make 150 to 350-plus-hour knives!
Another advantage, in addition to tightening up skills, is that my style of construction is rather timeless, and so does not necessarily entail the need of an amazingly outfitted workshop. Most of what I do does not require advanced equipment, and I think that it is more applicable to a larger audience. Of course, the more tools and equipment the better!
At first glance, people often mistake my fixed blades for folding knives. This is due to the layering of materials and embellishment that I employ in the construction of all of my knives. While making knives, I can incorporate anodizing, layering, inlays, under-lays, carving, cutaways, color, depth and dimension in an unending number of combinations, choices and treatments.
Aside from working closely with several damascus smiths, I also forge and use my own damascus steel, as I did here for the blade of this knife,
Overall, fixed blades have always been my first true love. They give me a much larger canvas on which to work, and that, in turn, gives me a larger palette from which to draw. With fixed blades, Im not constrained by size, design or mechanical movements. While all of my knives are made to the same exacting standards as more traditional using blades, and therefore are fully functional, I want my knives to be viewed as sculpture suitable for display.
Even though my construction techniques are being applied to a fixed blade in this case, they can also be adapted to the making of folders.
My inclusion here in this book, specifically on bolster construction, is just one part of a much larger educational project. The construction of the overall core frame of this knife can be viewed on my website, www.jensenknives.com, under the Process section. This chapter is actually Part Two of the overall documentation of the Alchemy knife project.
This is a complex bolster because there are no straight lines and it doesnt simply follow the outside profile of the knife. The sequence and construction of these bolsters is a microcosm of the techniques and issues you would face in most aspects of knifemaking, so what you learn here can take you much further than just this specific application.
It is important to take a moment and remember safety equipment. On this particular project, as with all aspects of knifemaking, eye protection is essential. You might also want to consider hearing protection, especially when using the band saw. A band saw can make a high-pitched, ear-damaging whine, particularly when cutting titanium. A respirator can come in handy depending on how sensitive you are to dust, and in particular here when using cutting fluid. It certainly is a good idea to use these lines of protection at all times.
Another thing to check into before starting is the condition of your tools. Make sure your tools, equipment and machines are in proper working order. They should be well oiled, have new, sharp cutting blades and grinding belts. Work on clean, flat surfaces. Most importantly for the sake of precision is that work surfaces are perfectly square in relation to band-saw blades, grinding belts and drill-press chucks.

The author draws and refines knives on paper, working out all issues in terms of design and proportions.
He says the finished knives are usually a 98-percent match to his original drawings. This particular drawing
is of a knife he named Alchemy, and he outlines how to build the bolster of Alchemy in this chapter.
The following is a list of tools and materials that I used to create the bolsters of Alchemy. In order of appearance, they are: a 4-inch-by-36-inch belt grinder; Scotch brand permanent double-stick tape; a vise; an X-Acto blade; Crazy Glue; a metal-cutting band saw and metal-cutting blade; a metal square; Burr King or Bador belt grinder with flat platen and table attachment; oscillating spindle sander (laminate top preferred because metal tabletops will scratch up your materials surfaces more); Dykem steel bluing layout fluid; measuring calipers; small clamps; scribe; center punch; rawhide or plastic mallet; drill press; #50 drill bits; scraper; nail polish remover or acetone; small riffling file; number punch set; 1-inch-by-2-inch-by-3-inch precision blocks; hand tap wrench; 2-56 taps; 320-grit sandpaper; heavy duty wire cutters or a jewelers saw; cup bur; Flex Shaft or Dremel tool; 1-inch-by-30-inch belt grinder; small, slotted screwdriver; 2-56 screws; file machine or rotary files; 18-inch drill bits; and a lathe.
Of course youre also going to need whatever material you choose to make your bolsters. In this case, I am using Timascus, or pattern-welded titanium, available exclusively from Alpha Knife Supply.

This photo shows the back (bottom) side of the front bolster. As evident, there are some rough tooling marks that needed to be smoothed.
Because my work is so complicated, my first step is to draw and refine everything on paper, working out all of the issues in terms of design and proportions. Once this is done, I make about six Xerox copies of the drawing that will be cut and pasted to material as needed.
In the case of these bolsters, I had Timascus on hand already. It came precision-milled from the supplier in a 18-inch thickness. However, as you can see in the accompanying photo, there are some rough tooling marks that should be eliminated. The smoother the contact surfaces are to other contact surfaces, the tighter the overall fit of the knife parts. It is important and critical, to me anyway, that components be air tight, and that there are absolutely no visual gaps between materials.
I hand sand the flats. Even though I am technically using the 4-inch-by-36-inch belt sander, I am not turning it on, as that would be a bit too aggressive in this case. The piece is small and would be hard to hold against a moving belt. It could easily get away from me, which could damage the piece and/or my hands! I simply hand sand it with even pressure on a 320-grit sanding belt.
Im not trying, in particular, to remove thickness, only to eliminate the slightly irregular tool marks. This takes a bit of elbow grease, especially with the material being titanium. I just want to smooth out the surface. I have carefully cut out the bolster section from my overall drawing and double-stick taped this shape down to the topside of the raw material that I want to be my front bolster.
Font size:
Interval:
Bookmark:
Similar books «Building Art Knife Bolsters»
Look at similar books to Building Art Knife Bolsters. We have selected literature similar in name and meaning in the hope of providing readers with more options to find new, interesting, not yet read works.
Discussion, reviews of the book Building Art Knife Bolsters and just readers' own opinions. Leave your comments, write what you think about the work, its meaning or the main characters. Specify what exactly you liked and what you didn't like, and why you think so.

