Dedicated to the Study of Sword Making
LET THE AUTHOR WALK YOU THROUGH THE BUILDING OF ONE OF THE BIG BLADES, THE LENGTHLY LOPPERTHE SWORD!
BY DON FOGG

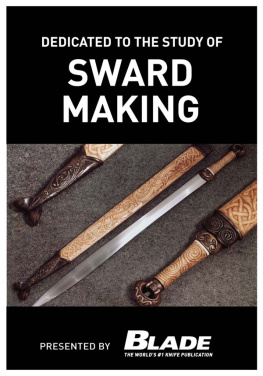
Will your sword turn out as beautifully as the Celtic Chieftan by Jake Powning?
The time is right for a new age of swords. It is not the need for weapons that stimulates this resurgence, but rather a convergence of interests, that of the modern swordsman and the modern blade smith. Each group is dedicated to the study of its craft, each with teachers and individuals intent on mastery.
Blade smithing has been revived in the past 25 years. Stimulated by the development of the custom knife market, the craft has grown from the inclusion of a handful of makers to a well-established core of several hundred smiths. The custom knife market was based initially on handmade utility knives for the sportsman, but it rapidly evolved into an area of collectibles, and the scope of the knives broadened.
Concurrent with the development of the blade smithing craft, the martial arts community began to experience an explosion of interest. In both areas, it would take years of practice and study before students developed the skills and discipline required of mastery. It seems that every year there is a new blockbuster movie that features swords. Video games and animated characters all have come to feature the sword. Couple this with the popularity of the martial arts and we seem to be entering a revival of this medieval sidearm.
The sword comes in many forms and shapes. Each culture developed its own particular style and method of construction. The study of the sword provides a unique view of history. There are several good online resources for general information and background, including http://www.vikingsword.com/, http://therionarms.com/index.shtml and http://www.swordforum.com/.

This short sword with a carved-ebony handle was fashioned by the author, Don Fogg, and is an example of what can be accomplished by following his step-by-step sword making instructions.

The author, Don Fogg, shown here taking a sword billet to the power hammer, says there are no schools for sword smithing and very few classes. To learn the craft, you will have to be self-motivated and dogged in your pursuit (and reading BLADEs Guide To Making Knives will help tremendously!).
SWORD TOOLING
There are specific tooling requirements to make swords. Interestingly, you do not need a deep, or long, fire to do the hot work on a lengthy sword blade. Heating more than a 5- or 6-inch section will only cause problems in forging. If you heat a longer section, the blade will bend as you are working on it.
Traditionally, charcoal would have been used to forge swords. There are many plans and designs for building a charcoal forge. Coal forges are particularly popular with blacksmiths because of the versatility of the fire. Many blade smiths have switched to propane forges. A poropane forge is relatively inexpensive and simple to construct. For details on building a forge like the one I use, visit my web site www.dfoggknives.com and check out the Bladesmithing section. I would also have you refer to my extensive links section for other sites on the craft.
I use two forges when I am working. The first is built on a 15-inch-diameter pipe standing vertically 18 inches high. The burner comes in at the bottom of the forge at a tangent, allowing the flame to burn in a circular flow following the interior of the forge.
There are two doors cut opposite each other at the top of the forge. This allows longer sections to be passed through the forge. The burner is constructed of standard pipe fittings using 1 12-inch pipe attached to a 100 cfm shaded pole blower. The air is conrolled with a flap on the intake of the blower, and the gas is controlled by a needle valve. I use the large forge for welding damascus billets and for breaking down stock.
For the actual blade forging, I use a much smaller version of the same forge. It is built on an 8-inch pipe with a considerably smaller blower. This forge gives a 5-inch heat on the bar and allows me to pass the point out of the forge so that it doesnt overheat.

Pictured is a sword-size forge, but on the smaller side.

The initial forging step is to prepare the overall shape of the sword blade. The profile and thickness of the steel are hammered to form.

Here is the authors large forge.
FORGING OF THE LONG BLADE
The initial forging step is to prepare the overall shape. The profile and thickness of the steel are hammered to form. The Japanese call this initial shape the sunobe . It prepares the billet for the final edge beveling and shapes the tang. Careful forging at this point will make the final forging go smoothly.
I work from round stock primarily because I have the tools to break down the round bar, and keeping just a few sizes on hand gives me the entire range of possibilities.
The initial stage involves breaking the steel down to bar stock. During this process, I am setting my dimensions and thickness. The next step is to forge the tang and point shapes. When I have finished, I have a rough bar with the preshape of my desired sword in the proportional thickness.
Once the sunobe is formed, then the edge bevels can be established. I have found that beginning the forging by establishing a mini bevel with light hammer blows allows you to find the center of the bar and serves as a registration point when you lay the bar on the anvil. You can feel the flat of the mini-bevel.
Forge the bevels a section at a time. It is helpful to forge the bevel up from the edge instead of forging down to the edge. If you forge toward the edge, it tends to get too thin before the entire flat has been established. Forging the bevel up toward the ridgeline moves more metal quickly and helps to maintain control.
I find that if you are careful to check that the bevel is equal on both sides, then keeping the edge in the center pretty much takes care of itself. I do not forge the section down completely before moving to the next section. When you do move an unforged section, it is important to work from it to the forged section. If you dont, then you will induce a bend in the blade as it transitions from thin to thick.
As you forge the bevels, it is important to register the flat on the anvil and to strike the work piece at the same angle as the bevel. Adjust your hammer hand to that position and lock it in. It is helpful to strike in the same spot on the anvil and at the right angle. Move the work piece as opposed to moving the hammer. The tong hand is the brains; the hammer hand is the force.

