GEOMETRICAL TOOLS.
T OOLS FOR M ARKING AND S CRIBING .
T HE simplest of these is the lead pencil, which is of a flat oval section sharpened to a chisel edge; if sharpened to a point, the pencil wears away quickly and is capable of marking a fine, solid line for only a few minutes together. There is a greater body of lead in the chisel edge, which therefore lasts some time before requiring to be re-sharpened. Steel scribing and marking tools are illustrated by ) commonly used in workshops is ground down from an old table knife.

Fig. 1.Chisel-end Marking Awl.
S TRAIGHT-EDGE .
A straight-edge 15 ft. long, 6 in. wide, and  in. thick is large enough for all practical purposes of the joiner, mason, bricklayer, engineer, millwright, etc. The best material is pine, it being the least affected (permanently) by change of temperature or weather. The pine board must be cut from a straight-grown tree, as a board from a crooked trunk will not keep parallel and straight for any length of time, owing to the grain crossing and recrossing its (thickness) edge. Straight-edges are made from all parts of boards cut from whole logs, but they cannot be relied upon to keep perfectly straight and true for any length of time. A strip that has been made without regard to the position it had in the whole tree will have to be trued up occasionally, and it therefore can never be relied upon unless tested each time it is required to be used, which is a great annoyance.

Fig. 2.Striking Knife and Marking Awl.
T ESTING S TRAIGHT-EDGE .
To test the truth of a straight-edge having the above measurements, get a clean board 1 ft. longer and about 7 in. or 8 in. wide. Lay the straight strip at about the centre of the board, and with a sharp pencil draw a line on the board along the trued edge of the strip, keeping the side close to the board, and making the line as fine as possible. Now turn the strip over, placing the edge on the other side of the line, and if the trued edge is perfectly straight the line also will appear so. If the line is wavy, the edge must be planed until only one line is made when marked and tested from each side; mark a fresh line for each test, otherwise there will be confusion and inaccuracy. One edge now being perfectly true, proceed with the other edge. Set a sharp gauge to the required width, and mark the second edge lightly on each side of the rule, working the gauge from the true edge; then the wood is planed off to the gauge marks, and the second edge tested as to its being true with the first one, using the pencil line, as before. A still more delicate test than the gauge line for parallelism is by the use of a pair of callipers. The points of the callipers are drawn along the edges, and if they are perfectly parallel there will be no easy or hard places, the presence of which might possibly not be detected by the pencil line. If the edges will stand both these tests, the strip is perfectly straight and parallel.

Fig. 3.Home-made Striking Knife.

Fig. 4.Whitworth method of Testing Straightedges.
W HITWORTH M ETHOD OF T ESTING S TRAIGHT-EDGES .
Sir J. Whitworths famous method of trueing engineers straight-edges should interest the woodworker. Three straightedges are prepared singly, and each is brought to a moderate state of accuracy; two of them, A and B (), are compared with each other by placing them edge to edge, and any irregularities found are removed, the process being repeated until A and B fit each other perfectly. The third straight-edge, C , now is compared with both A and B , and when it fits perfectly both these two, then there is no doubt whatever that the three are straight, approximating to the truth in proportion to the labour that has been spent upon them. Why this is so is obvious when it is remembered that though A may be rounded instead of being straight, and B may be hollow sufficiently to make them fit each other perfectly, yet it is impossible for C to fit both the rounded and the hollow straight-edge.

Fig. 5.Testing Surface with Straight-edges.
T ESTING S URFACES WITH S TRAIGHT-EDGES .
How surfaces are tested for winding with straight-edges is shown by , from which it is obvious that if the work has warped ever so slightly a true straight-edge must disclose the fact, as it could not then lie flat on its edge across the work. If the board is in winding, each straight-edge will magnify the error. If the winding is wavy, the edges will touch at certain points, and in other places light will be seen between them and the work. Taking a sight from one straight-edge to the other is another test.
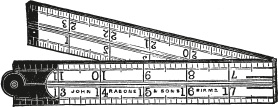
Fig. 6.Two-ft. Four-fold Rule.
R ULES .
A 2-ft. four-fold boxwood rule ( shows a combined rule and spirit level, the rule joint also being set out to serve as a protractor. This tool may prove useful in special circumstances, but its use as a spirit level is not recommended, it being preferable to have rule and level two quite distinct tools.
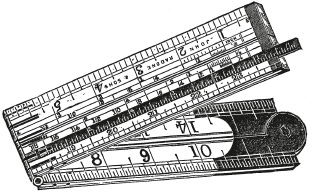
Fig. 7.Rule with Brass Slide.

Fig. 8.Two-ft. Two-fold Rule.
D IVIDING A B OARD WITH A R ULE .
A reliable method of dividing a board of any given width into any number of parts is illustrated by ; draw a line right across, and upon this line mark off from the rule every 2 in., as 2, 4, 6, etc. Remove the rule, and draw lines parallel with the edge of the board, intersecting with the marks upon the oblique line, thus obtaining six parts, each really  in. wide. The principle of this is simple: 2 in. is the one-sixth part of 1 ft., and whatever be the slant of the rule across the board (and the narrower the board the greater will be the slant) each 2-in, mark must denote a one-sixth part of the width. Say a board anything less than 24 in. in length or width is to be divided into eight parts; then as 3 in. is one-eighth of 2 ft., use a 2-ft. rule in the same manner as before, and mark off at every 3 in.
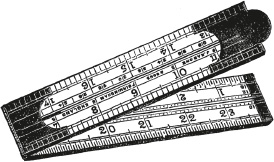
Fig. 9.Rule with Double Arch Joints.
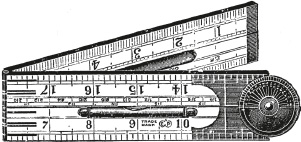






 in. thick is large enough for all practical purposes of the joiner, mason, bricklayer, engineer, millwright, etc. The best material is pine, it being the least affected (permanently) by change of temperature or weather. The pine board must be cut from a straight-grown tree, as a board from a crooked trunk will not keep parallel and straight for any length of time, owing to the grain crossing and recrossing its (thickness) edge. Straight-edges are made from all parts of boards cut from whole logs, but they cannot be relied upon to keep perfectly straight and true for any length of time. A strip that has been made without regard to the position it had in the whole tree will have to be trued up occasionally, and it therefore can never be relied upon unless tested each time it is required to be used, which is a great annoyance.


 in. wide. The principle of this is simple: 2 in. is the one-sixth part of 1 ft., and whatever be the slant of the rule across the board (and the narrower the board the greater will be the slant) each 2-in, mark must denote a one-sixth part of the width. Say a board anything less than 24 in. in length or width is to be divided into eight parts; then as 3 in. is one-eighth of 2 ft., use a 2-ft. rule in the same manner as before, and mark off at every 3 in.
