• Complain

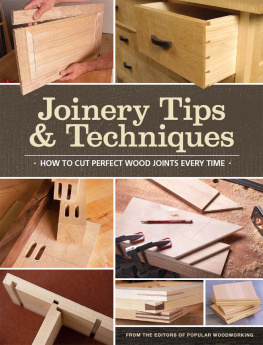
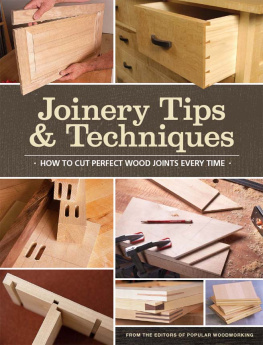
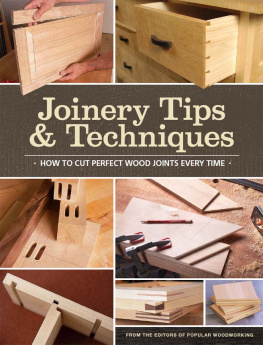
Joinery tips & techniques : how to cut perfect wood joints every time

Here you can read online Joinery tips & techniques : how to cut perfect wood joints every time full text of the book (entire story) in english for free. Download pdf and epub, get meaning, cover and reviews about this ebook. City: Cincinnati, Ohio, year: 2012, publisher: Popular Woodworking Books, F+W Media, genre: Home and family. Description of the work, (preface) as well as reviews are available. Best literature library LitArk.com created for fans of good reading and offers a wide selection of genres:

Romance novel Science fiction Adventure Detective Science History Home and family Prose Art Politics Computer Non-fiction Religion Business Children Humor

Choose a favorite category and find really read worthwhile books. Enjoy immersion in the world of imagination, feel the emotions of the characters or learn something new for yourself, make an fascinating discovery.

Unknown Joinery tips & techniques : how to cut perfect wood joints every time
  • Book:
    Joinery tips & techniques : how to cut perfect wood joints every time
  • Author:
  • Publisher:
    Popular Woodworking Books, F+W Media
  • Genre:
  • Year:
    2012
  • City:
    Cincinnati, Ohio
  • Rating:
    4 / 5
  • Favourites:
    Add to favourites
  • Your mark:
    • 80
    • 1
    • 2
    • 3
    • 4
    • 5

Joinery tips & techniques : how to cut perfect wood joints every time: summary, description and annotation

We offer to read an annotation, description, summary or preface (depends on what the author of the book "Joinery tips & techniques : how to cut perfect wood joints every time" wrote himself). If you haven't found the necessary information about the book — write in the comments, we will try to find it.

From the lowly butt joint to the vaunted dovetail, joinery makes a woodworking project stronger, attractive and durable. Learn how to make the most common woodworking joints using hand tools and power tools, with tips to speed and improve your work. Also included are plans for jigs to make your work easier and more precise, advice on building frame-and-panel doors and step-by-step instructions for lots of dovetails, including sliding dovetails. If youre just starting out in woodworking, or if youre looking for a way to just improve, we have got the joint for you! Read more...
Abstract: From the lowly butt joint to the vaunted dovetail, joinery makes a woodworking project stronger, attractive and durable. Learn how to make the most common woodworking joints using hand tools and power tools, with tips to speed and improve your work. Also included are plans for jigs to make your work easier and more precise, advice on building frame-and-panel doors and step-by-step instructions for lots of dovetails, including sliding dovetails. If youre just starting out in woodworking, or if youre looking for a way to just improve, we have got the joint for you!

Unknown: author's other books


Who wrote Joinery tips & techniques : how to cut perfect wood joints every time? Find out the surname, the name of the author of the book and a list of all author's works by series.

Joinery tips & techniques : how to cut perfect wood joints every time — read online for free the complete book (whole text) full work

Below is the text of the book, divided by pages. System saving the place of the last page read, allows you to conveniently read the book "Joinery tips & techniques : how to cut perfect wood joints every time" online for free, without having to search again every time where you left off. Put a bookmark, and you can go to the page where you finished reading at any time.

Light

Font size:

Reset

Interval:

Bookmark:

Make
JOINERY TIPS TECHNIQUES HOW TO CUT PERFECT WOOD JOINTS EVERY TIME FROM THE - photo 1
JOINERY TIPS & TECHNIQUES

HOW TO CUT PERFECT WOOD JOINTS EVERY TIME

FROM THE EDITORS OF POPULAR WOODWORKING

Thank you for purchasing this Popular Woodworking eBook Sign up for our - photo 2

Thank you for purchasing this Popular Woodworking eBook Sign up for our - photo 3

Thank you for purchasing this Popular Woodworking eBook.

Sign up for our newsletter and receive special offers, access to free content, and information on the latest new releases and must-have woodworking resources! Plus, receive a coupon code to use on your first purchase from ShopWoodworking.com for signing up.

or visit us online to sign up at httppopularwoodworkingcomebook-promo - photo 4

or visit us online to sign up at

http://popularwoodworking.com/ebook-promo

Introduction

Joinery Its just like it sounds how things are joined together. When its applied to furniture, joinery relates to how the pieces go together. But not just how they fit together, because joinery can also refer to how they stay together. Certain woodworking joints offer different levels of strenth to the joint, and depending on what youre building (drawers, perhaps) strength can be an important consideration in your choice of joinery.

This book is filled with a variety of woodworking joints, many overlapping and expanding on one another. The most fundamental joints are covered, as well as some unusual and esoteric joints. The information is collected from multiple authors, and youll find that not every woodworker makes a joint exactly the same way. One of the classic disucssions is about the dovetail joint, and whether to cut the pins, or tails first. The discussion can be quite lively, and weve simply allowed the authors to make their point and let you decide what plan fits your project best.

Along with the how-to information on joinery, weve included a number of jigs that will make your joinery work easier and more accurate. Not everyone wants or needs a jig, but again were sharing the information and letting you make the final decision.

We hope you find the information informative and educational, and that you enjoy a little bit of entertainment along the way.

DAVID THIEL, EDITOR

Chapter Basic Joinery BY NICK ENGLER There are three basic saw cuts - photo 5

Chapter
Basic Joinery
BY NICK ENGLER

There are three basic saw cuts: crosscuts, rips and miters. Crosscuts are made perpendicular to the wood grain, rips are cut parallel to the grain and miters are made at angles diagonally across the grain. None of these requires elaborate jigs or complex techniques, but they are the building blocks to basic joinery on the table saw.

Rips and crosscuts are used to form many joints, including the basic edge and butt joints, which can be used to glue up a tabletop or door frame. These two cuts are also used to cut rabbets, grooves and dados. And a variation of these cuts will create a miter joint.

Miters

Miters can be the most frustrating cuts to make. Angled cuts are harder to measure and lay out than crosscuts. To make a mitered frame perfect, both the inside and outside dimension of the piece must match on each component. You should start with accurate measuring tools and some basic math, and then you will need to test and retest your setup to ensure its precision.

When you make a miter cut on a table saw, you run into a problem associated with crosscuts the factory-supplied miter gauge is too small to offer adequate support for guiding most boards. To properly support the work, you must fit the gauge with an extension fence or replace it with a sliding table.

Even when using an adequately sized miter gauge, boards are inclined to creep during a miter cut because of the rotation of the blade into the cut. One way to compensate for this is to add a stop to your miter gauge fence as shown above. Your stop will also help you make repeatable, accurate miter cuts every time.

PRO TIP Picture-perfect Miters To make sure your miters are perfect start - photo 6

PRO TIP:
Picture-perfect Miters

To make sure your miters are perfect, start with a new zero-clearance throat insert on your table saw. Bring the blade up through the insert until the blade height is about above the height of your frame material. Turn off the saw. After the blade has stopped, use a straightedge to make a mark, extending the line of the blade slot the full length of the insert. This will let you see exactly where the blade will cut. Add a sacrificial fence to your miter gauge that extends past the blade to eliminate tear-out. You can also extend the cut line to the sacrificial fence for extra alignment accuracy.

Accurate angles are another problem on table saws. The stock miter gauge and blade-tilt scale on most table saws even the best ones are notoriously imprecise. And you cant use a drafting triangle to set every possible angle you might want to cut. You must use the scales to estimate the degree setting, then thoroughly test the setup until you have it right.

Once the miter gauge angle is properly set, make the miter cuts. If the boards are to be joined by miter joints (such as the members of a frame), you must make mirror-image miters. Note: A single miter joint is comprised of one left miter and one right miter. To do this, flip each board end-for-end, keeping the same edge against the gauge as you cut the ends. Only in rare instances when you cant flip the board should you have to readjust the angle of the miter gauge to cut left and right miters.

A simple stop clamped to your miter fence will keep your piece from slipping - photo 7

A simple stop clamped to your miter fence will keep your piece from slipping during the cut.

To create accurate matching miters or butt joints for frame work flip the - photo 8

To create accurate, matching miters (or butt joints) for frame work, flip the work piece end-for-end keeping the same long edge against your miter gauge, as shown here.

You also can cut a miter by tilting the blade rather than angling the miter gauge. This procedure is similar, but there is an important difference when cutting left and right miters. As you rotate the board end for end, the same face must rest against the table. Note: You can switch faces if you first switch the miter gauge to the other slot.

Bevels

The procedure to make a bevel is similar to the way you make a miter, but you must set the blade at the proper angle, rather than the miter gauge. Measure the angle between the blade and the table with a triangle or a protractor.

If you rip a bevel or chamfer, make sure the blade tilts away from the rip fence. This gives you more room to safely maneuver the board and reduces the risk of kickback. On right-tilt saws, you will have to move the rip fence to the left side of the blade (as you face the infeed side of the table saw).

TIPS & TRICKS
Next page
Light

Font size:

Reset

Interval:

Bookmark:

Make

Similar books «Joinery tips & techniques : how to cut perfect wood joints every time»

Look at similar books to Joinery tips & techniques : how to cut perfect wood joints every time. We have selected literature similar in name and meaning in the hope of providing readers with more options to find new, interesting, not yet read works.


Reviews about «Joinery tips & techniques : how to cut perfect wood joints every time»

Discussion, reviews of the book Joinery tips & techniques : how to cut perfect wood joints every time and just readers' own opinions. Leave your comments, write what you think about the work, its meaning or the main characters. Specify what exactly you liked and what you didn't like, and why you think so.