Osprey Modelling 34
Modelling the P-51 Mustang
Stan Spooner
Consultant editor Robert Oehler Series editors Marcus Cowper and Nikolai Bogdanovic
Contents
Introduction
Whether or not you agree that the North American P-51 Mustang was the best fighter of World War II, the fact remains that up until its entry into the war, there wasnt a fighter that could carry out the long-range escort mission so vital to the success of the Americans daylight bombing efforts. Without the escorting of those bombers, US losses would have been much higher and the war much longer and bloodier. Very few aircraft can have such a significant place in history as the P-51 but such is the legacy of this Merlin-powered aircraft.
When the modelling community first had a chance to build the P-51 Mustang in 1/48 scale it was thanks to Hawk over 40 years ago, but as far as creating a true modellers model, thanks go to Monogram. Over 30 years ago they were the first to issue both the P-51B and the P-51D in this now-popular scale. For the time, they were state of the art with finely moulded details in both the cockpit and wheel wells, raised but delicate panel lines and accurate shape and proportions. With a little bit of work, these kits could be turned into quite a nice model. These kits were all we had until the 1970s when Otaki released their P-51D. This offering was the first to have recessed panel lines, although the detail was somewhat simplified. In the 1980s Hasegawa ushered in the era of modern kit making for this subject with their P-51D. With finely engraved details and modern moulds, this kit was everything the modelling community was looking for. Over the years, the Hasegawa kit has been issued many times with all types of extra parts to make everything from the F-51D to the P-51 used for test purposes with wingtip-mounted jets! In the mid-1990s, Accurate Miniatures decided to pay homage to the unsung Mustangs with Allison engines. Their offerings of these airplanes were Accurate Miniatures first 1/48-scale kits and by todays standards they look a bit simple; however, they are easily built into beautiful models. The Tamiya P-51D came to the market with superior engineering although a somewhat simplified cockpit. Next came their P-51B, which has a much-improved cockpit and is a truly beautiful kit. Another manufacturer that has come to the market is Classic Airframes with their P-51H, which has an accurate shape and nice resin details. Finally, Modelcraft of Canada has brought us the ultimate incarnation of this family tree, the F-82 Twin Mustang. Whichever variant of this plane you want to build, there is a 1/48-scale kit out there for you.
Building a well-worn P-51A
| Subject: | P-51A |
| Primary modeller: | Mark Glidden |
| Paint and final assembly: | Marcus Nicholls |
| Skill level: | Advanced |
| Base kit: | Accurate Miniatures P-51A Mustang (3402) |
| Scale: | 1/48 |
| Additional detail sets used: | True Details interior detail set (48481); Ultracast prop blades (48138); Eduard photo-etch detail set (48134); Verlinden exposed Allison engine detail set; Cutting Edge Mk 8 resin gunsight (48156) |
| Decals: | From ICM Models P-51A kit and spares box; Mike Grant 1/48-scale instrument decals |
| Paint: | Various Tamiya acrylics, Hannants Xtracrylics matte varnish |
Accurate Miniatures 1/48-scale P-51A in the box
Although a little on the old side, this kit still manages to hold its own against newer offerings. Accurate Miniatures has done a very nice job of moulding the fuselage with separate cowling parts to accommodate the modelling of different versions of the early Mustang.
The cockpit
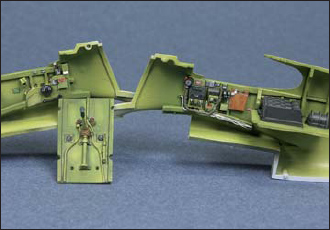
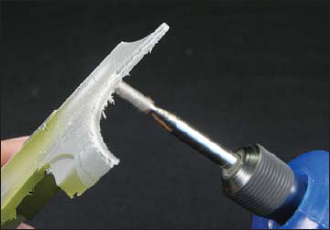
The two round alignment pins on the inside of the fuselage had to be removed to fit the resin parts. The resin cockpit sidewalls were sanded on a flat piece of sandpaper to remove the backing. This also opened up the spaces between ribs. On the left side of the cockpit, two photo-etch dials from the Eduard set were added, along with styrene disc for the centre of the trim wheel. Using the True Details resin cockpit set actually requires you to use a combination of resin and kit parts to assemble the cockpit. The Eduard photo-etch rudder pedals were used instead of the resin ones, which were removed. Resin parts were primed with Mr Surfacer 1000, which prepared the parts for painting and helped smooth out the surface. The instrument panel was painted Tamiya XF-1 Black in the recessed area and XF-69 NATO Black on the outside. This was done to give it some depth and interest. A mix of Tamiya XF-3 Yellow (two parts) to XF-5 Green (one part) was used for the interior green. The cockpit was pre-shaded with XF-69 NATO Black. Mike Grant 1/48-scale instrument decals were used on the instrument panel. The dial faces were punched out with a Waldron punch and die. Care must be taken when using these decals, as they scratch easily. Micro-Sol was then applied to get the decals to conform to shape. The flare gun mount was made from .04in. styrene rod, sheet styrene and .5mm springs. A hole was drilled into the side of the fuselage and the rod. The sheet styrene was cut into squares and sanded to the correct shape using a round file. Everything was then carefully glued together. The flare gun mounting hole was then drilled out with a .033in. drill bit. The resin canopy hinges were sanded down and replaced with some spare photo-etch parts.
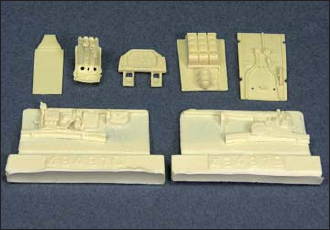
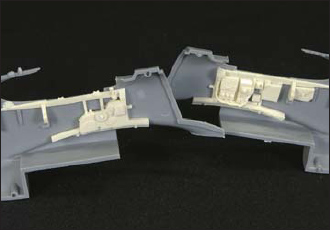
This shows the resin parts that come in the True Details update set. This set adds a great deal of depth and detail to the simple kit interior.
This shows how the parts fit into the cockpit walls.
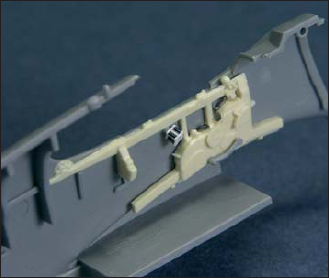
This view shows the scratch-built flare gun port. The port was made from Evergreen stock and small springs picked up at a shop in Japan. This is a key detail that was otherwise missing.
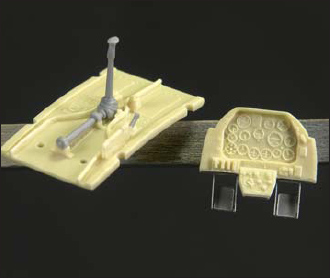
Here is the resin cockpit floor and instrument panel using kit stick and photo-etch pedals.
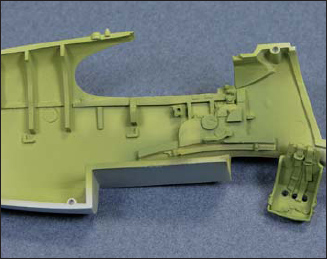
Here, the cockpit has been painted with a basecoat of interior green and then highlighted.
This shot shows the completed cockpit before assembly. All details have been brush painted with acrylic paint.

