About the author
In 1994, Louise Walkers The Traditional Aga Cookery Book was published. It marked the beginning of a remarkable series of titles that have been consistent sellers and a source of inspiration and reassurance for tens of thousands of Aga owners all over the world.
Louise has written seven Traditional Aga titles to date. She runs cookery classes from around the four-oven Aga in her home in Bath, and travels to Aga shops all over the United Kingdom to demonstrate to both new and seasoned Aga owners.
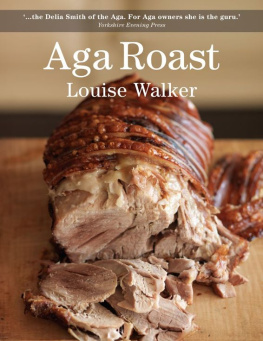
Aga Roast is her eleventh book.
Contents
Roasting in the Aga
One of the best meals to come from an Aga is a roast!
For so many families a roast meal has become a rarity or a meal for a special occasion. For many people meat is now eaten less on a day to day basis than a few years ago so a roast is regarded, rightly, as special.
Roasting meat is often discussed during my cookery demonstrations and a good roast joint will always sell an Aga to a wavering would-be owner. Because a roast meal is so special, often a time for family and friends, it is important to get everything right, without the cook being totally frazzled! In this book I have given a lot of hints and tips that I have garnered over the years to help you produce the prefect roast.
So, first things first: find yourself a good butcher. You cannot hope to serve a good roast meal with poor quality meat. Look for a butcher who is welcoming, where the staff are helpful and can cut the joint to suit your needs. The shop should look and smell clean and the meat on display should look fresh and be well presented. A good butcher will know where his meat comes from and he will probably have cared for and butchered the meat himself. If he sells his meat with pride, you will want to return to his shop often.
A good butcher should have a loyal following and once found you should only buy your meat from that butcher they all need our support. I travel half an hour out of Bath to buy my meat. It is a small effort to pay for the quality of the meat and the service that I receive from Brian Mitchard. I very rarely buy meat anywhere else.
Hanging and butchering
Choosing a good piece of meat is very important whether it be for fast or slow roasting. And what ever joint you buy it will need to be well hung. Hanging allows the flavour to develop and the muscle to tenderise. It also allows the meat to dry out so that there will be less shrinkage during cooking. This reduction in weight does of course cost the butcher and so meat that has been well cared for by a butcher will often cost more than a quickly slaughtered and butchered piece of meat.
Meat for roasting needs to come from parts of the animal where there is little movement, for example the breast meat on birds is more tender than the wing, the sirloin (back) of beef is more tender than the shin. These muscles need less time to tenderise and will roast well. Slow roasting can be more of a compromise where a slightly cheaper cut will become tender with slightly longer cooking, something for which the Aga is perfect.
Meat on the bone has more flavour and cooks more quickly than a rolled joint but boned and rolled joints are popular for easy carving.
Resting
It is essential to give roast meat time to rest at least 1520 minutes after removing from the oven and before carving. During cooking the juices from the meat move to the outside of the joint. Resting allows the juices to seep back into the joint which will make carving easier and the meat more tender to eat. This allows time to make the gravy and cook the last minute vegetables.
Remember to add any juices that come from the meat during resting or carving to the gravy for added flavour.
Carving
The idea of carving a joint seems to throw some people into a panic.
It has long been tradition that the man of the house will carve. This of course originated so as to free the cook (the woman!) to do all the final bits and pieces for the meal. For special occasions the meat is often carved at the table with a little ceremony so the carver needs to feel confident.
Before attempting to carve get equipped with some basic good-quality tools.
It is easiest to carve on a wooden board. Choose one that has a channel to catch all the juices. You can also carve on a shallow plate, again easy to carve on but with a shape to catch the juices. I find a non-slip mat under these useful.
Youll also need a carving knife and fork with a steel to sharpen the knife. The forks for carving have long prongs to hold the meat steady and some have finger guards as well. The knives should have a long blade with curved ends. It is useful to have knives of different lengths for different meats and joints. Serrated knives only tear meat and should be avoided.
The most important thing about a knife is its sharpness. Keep it sharpened with a steel or good sharpener and if needed ask your butcher to sharpen the knife periodically.
The aim of carving is to cut slices of meat that will look appetising and be evenly sliced. Carve the meat as thinly as possible and dont scoop out any pieces. Arrange the carved slices neatly on the board or plate.
BEEF
Rolled and boned joints are sliced across the grain.
Slow-cooked joints such as brisket are best sliced at a 45 degree angle.
Fillet cooked individually and sliced into medallions.
Rib of beef on the bone should be chined by your butcher. This loosens the backbone from the ribs. When carving, remove the backbone along with any yellow tendon before carving off the ribs. Loosen some of the meat from the rib bone and carve off the thin slices and then repeat the loosening as you work your way along the joint.
LAMB
Rack of lamb must be chined by the butcher to enable easy carving. Remove the chined bone and then carve down between the ribs so you end up with cutlets.
For leg of lamb , I find this method easier than the usual V cut down to the bone: hold the shank bone that will be exposed slightly from the roasting (use a clean napkin for this). Start on the round side and cut off slices from the shank end parallel to the bone. Turn the leg round as you go.
Loin or saddle . Carve long slices of meat parallel to the back bone. Once cut, slide the knife underneath to release the slices. If they are too long cut each slice in half. Turn the joint over and carve the fillet.
Shoulder . This is a fiddly joint to carve and as a result is often cooked boned. However the meat when cooked on the bone is wonderfully sweet. Hold the joint firmly with a fork and with the thickest part of the joint uppermost. Cut the meat out in a V section in the middle of the joint which will be meaty and without bone. Find this with some probing with the tip of the knife. Carve off slices of meat from the blade bones and the knuckle ends.
VEAL
Veal joints are carved in the same way as lamb.
PORK
Rolled joints . Remove the crackling first; slide the knife underneath it and remove. Cut into strips for serving. Cut thin slices of meat across the grain.
Leg of pork . Cut thin slices down to the bone.
Crown roast . Carve this as you would a rack of lamb.
Loin of pork . Remove the chine bone. Run the knife between the remaining meat and bones and ease off on to a board. Slide the knife under the crackling and remove ready to cut in to strips. Carve the meat in to thin slices
Ham . Hold the ham by the knuckle and carve as for leg of lamb.
Next page
