Haynes - The complete photo guide to clothing construction
Here you can read online Haynes - The complete photo guide to clothing construction full text of the book (entire story) in english for free. Download pdf and epub, get meaning, cover and reviews about this ebook. year: 2014, publisher: Creative Publishing international, Inc.;Creative Publishing intl, genre: Home and family. Description of the work, (preface) as well as reviews are available. Best literature library LitArk.com created for fans of good reading and offers a wide selection of genres:
Romance novel
Science fiction
Adventure
Detective
Science
History
Home and family
Prose
Art
Politics
Computer
Non-fiction
Religion
Business
Children
Humor
Choose a favorite category and find really read worthwhile books. Enjoy immersion in the world of imagination, feel the emotions of the characters or learn something new for yourself, make an fascinating discovery.

- Book:The complete photo guide to clothing construction
- Author:
- Publisher:Creative Publishing international, Inc.;Creative Publishing intl
- Genre:
- Year:2014
- Rating:5 / 5
- Favourites:Add to favourites
- Your mark:
The complete photo guide to clothing construction: summary, description and annotation
We offer to read an annotation, description, summary or preface (depends on what the author of the book "The complete photo guide to clothing construction" wrote himself). If you haven't found the necessary information about the book — write in the comments, we will try to find it.
The Complete Photo Guide to Clothing Construction helps you master all of the techniques needed to sew clothes--including tops, dresses, pants, skirts, and even outerwear. This technique-driven book follows the entire process of clothing construction, including a section on the sewing machine and other tools/materials used, information on working with patterns and fitting, laying out the pattern pieces, cutting and marking, and on through every step of construction to the final button. Large, detailed photos guide you from start to finish and help give you a visual basis for learning the skills. This comprehensive guide is a long-lasting reference for anyone who sews clothes. It fills in all the technique details not supplied by manufacturers of the clothing patterns that most sewers use for all of their projects. The Complete Photo Guide to Clothing Construction explains the reasons behind the methods, warns of pitfalls to watch out for, and provides you with valuable tips that help you reach a satisfying, successful end with every project. Examples show both mens and womens fashions as well as childrens clothes.
Haynes: author's other books
Who wrote The complete photo guide to clothing construction? Find out the surname, the name of the author of the book and a list of all author's works by series.


The complete photo guide to clothing construction — read online for free the complete book (whole text) full work
Below is the text of the book, divided by pages. System saving the place of the last page read, allows you to conveniently read the book "The complete photo guide to clothing construction" online for free, without having to search again every time where you left off. Put a bookmark, and you can go to the page where you finished reading at any time.
Font size:
Interval:
Bookmark:

I love to sew. It is my passion, my love, my business, and my hobby. What I especially enjoy sewing are garments, particularly dresses. Learning to sew your own clothing can change a person. It teaches you to love and understand your body, it educates you on the work it takes to construct something you might buy without much thought, and it allows you to express yourself in a personal and unique way. It might sound like a stretch to say that sewing your own clothing can change the world, but it can lead to some profound conversations about a handmade or store-bought lifestyle.
Sewing, like cooking or any other craft, is much easier with the right tools and knowledge. I hope this book encourages you to try a few things for the first time, or to revisit a skill you might need to brush up on. I have included all the basic skills required for garment construction, and, for those of you who are ready, Ive included some skills that are beyond basic, such as French seams and rolled hems.
At the end of every section you will find Anatomy of a Garment sidebars with photos of different garmentseverything from shorts, to childrens wear, to dresseswith lists highlighting all the skills and elements needed to construct each piece. Many people underestimate how many skills are necessary to assemble a simple dress. These examples shine a light on what goes into creating the clothing we wear every day.
I hope you enjoy the book and I look forward to hearing from you on my website or blog at www.ChristineHaynes.com. Happy sewing!
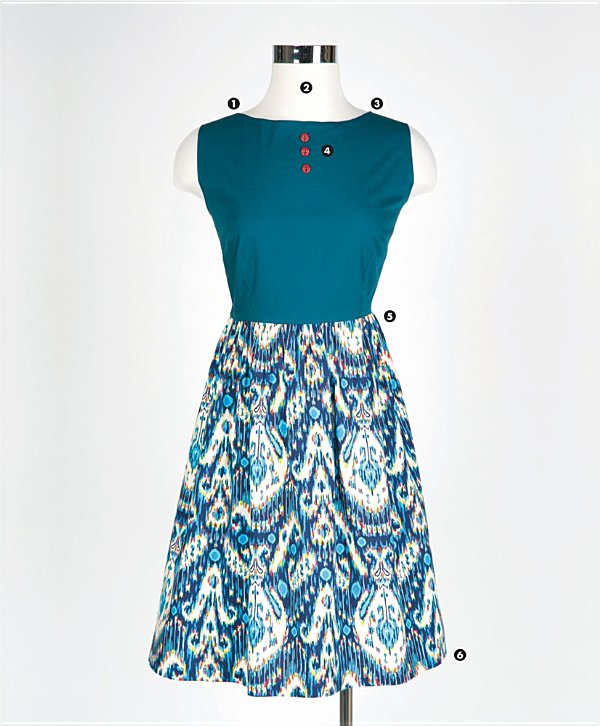
Anatomy of a Garment
Understitching (1)
Invisible zipper (2)
Facings (3)
Flat buttons (4)
Gathering (5)
Hand stitched hem (6)
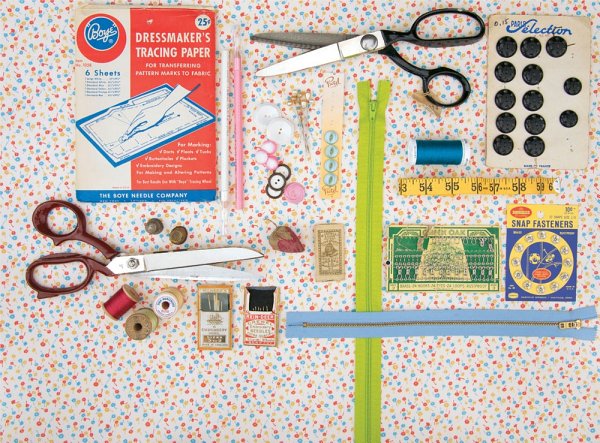
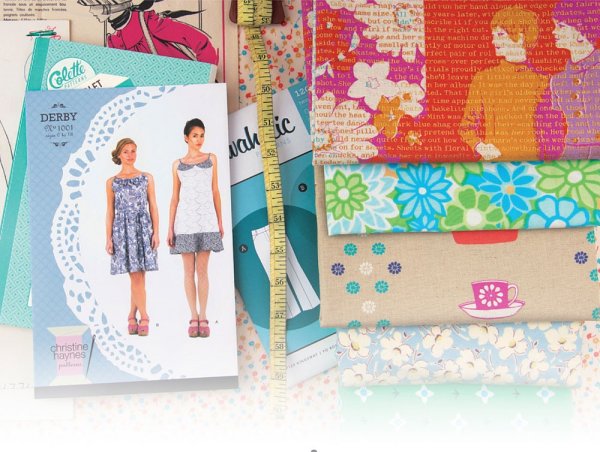
A s with any hobby or craft, having the right tools will not only make the end result better, but it will also make the journey a much more enjoyable one. In this section, we explore all the key tools needed to get started with sewing, move you forward, and help you finish every garment on your to-do list. We begin with the most important tool, the sewing machine, and work our way through each item you might want to consider purchasing. There is no shortage of handy items on the market, but you certainly do not need all of them. In this section, I will suggest the best tools for the tasks at hand.
The most important tool in your collection is your sewing machine. Machines can vary dramatically from the most basic to elaborate computerized machines, but what is most important is that your machine can do the basics well: the straight stitch, a zigzag stitch, and buttonholes. These are the key stitches you will use when assembling a garment, and even the most basic of machines should be able to offer you these choices.
Additional stitches that will come in handy are the three-step zigzag, a blind hem, and a stretch option for straight stitch sewing. These stitches will make it easier to sew certain elements, allow you more fabric choices, and provide additional options when finishing your garments.
Because every machine is different, I highly recommend reading your manual from cover to cover. If you purchased a used machine or have lost your manual over the years, most can be found on the Internet by searching for the make and model of your sewing machine. Even the most experienced sewer can learn a thing or two by reading what the manufacturer has written about your particular machine.
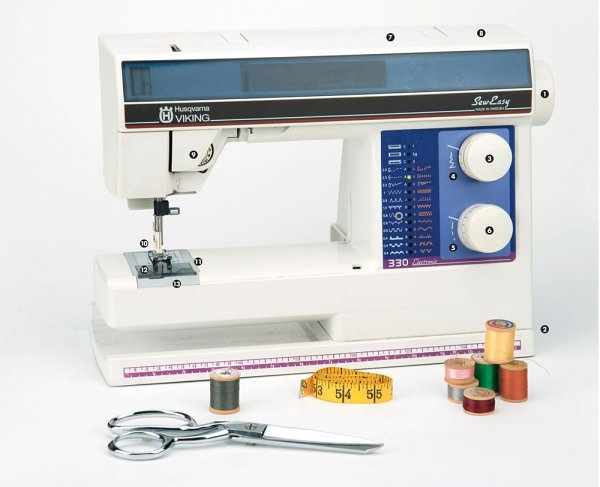
While all machines are different, most will have all of the following parts, although.
When you turn the hand wheel toward you, you are manually making the same movement inside the machine as when you place your foot on the floor pedal. If you need to move forward at a stitch-by-stitch pace, turn this wheel toward you to do it manually. Avoid turning the hand wheel away from you when the sewing machine is threaded; this moves the threads in reverse, causing a thread knot and jam under the presser foot.
Under the hand wheel youll find a plug for the electrical power cord and the foot pedal cord. Some machines have two separate cords for the electricity and the foot pedal, while on other machines they are joined into one cord. Either way, the cord(s) plug in on the lower part of the side of the machine and are accompanied by the power switch, which also turns on an interior light to illuminate your sewing area. The foot pedal rests on the floor. Position it with the lower side facing you and press with your foot to power your machine. It works much like a car pedal; the harder you press on it, the faster the machine will go. The sensitivity of each pedal can take some getting used to.
On my machine, the stitch selection and stitch width share the same dial, but on yours the stitch selection may have its own dial or button. The stitch selection dial allows you to choose the stitch with which youd like to sew. Some machines have many options, while others have only a few. Turn your knob or push your button to select the desired stitch, and then adjust your length and width accordingly.
For straight stitch sewing, each machine will require you to adjust your stitch width so that the needle is in the center position. Note that all machines are different, and that the center position is not always in the center. Refer to your manual to determine the center position for your make and model, as this is what the seam allowance measurements are based upon. If you are not in the correct position, the seam allowance distance stated on the foot plate will not be accurate. For stitches that have side-to-side width to them, like a zigzag stitch, the stitch width dial sets your stitch from narrow to wide, and everything in between.
The stitch length dial adjusts the length from stitch to stitch. For a straight stitch, the length is from each entry into the fabric. For a zigzag stitch, the length can be adjusted to match the width to create a variety of combinations of short and wide, long and narrow, long and wide, and so on. Your stitch length always needs to be adjusted based on the type and thickness of the fabric. Keep in mind that the heavier the fabric, the longer the stitch length should be.
All machines come with a button or switch to sew in reverse. The main reason to use this is for sewing a backstitch. Learn more about backstitching in the Sewing Machine Stitches section ().
The spool of thread rests on the spool pin. Some are horizontal with a cap to hold it in place, and some are vertical on the top of the machine. Many machines with vertical spool pins have a second pin alongside the first for dual thread topstitching with a twin needle. Check your manual to see if your machine has a preference for the unspooling direction of your thread.
Font size:
Interval:
Bookmark:
Similar books «The complete photo guide to clothing construction»
Look at similar books to The complete photo guide to clothing construction. We have selected literature similar in name and meaning in the hope of providing readers with more options to find new, interesting, not yet read works.
Discussion, reviews of the book The complete photo guide to clothing construction and just readers' own opinions. Leave your comments, write what you think about the work, its meaning or the main characters. Specify what exactly you liked and what you didn't like, and why you think so.