Publisher: Amy Marson Creative Director: Gailen Runge Art Director/Book Designer: Kristy Zacharias Editor: Liz Aneloski Technical Editors: Alison M. Schmidt and Mary E. Flynn Page Layout Artist: Kristen Yenche Production Coordinator: Jenny Davis Production Editor: Joanna Burgarino Illustrator: Jessica Jenkins Photo Assistant: Mary Peyton Peppo Dedication To those hearts that are diligently sewing the perfect handmade outfit for that special person. If it were not for those sewists and their will to create, this book would not exist. I dedicate this book to those sewists and to future readers who will experience the unique joy of making handmade clothing! Acknowledgments Although I am a sewing mom, I dont always have the chance to make clothes for my daughter. However, when I do find the time to make a dress, a skirt, or even a simple tee, its always worth it.
She is sure to express her thanks and excitement whenever possible: to her friends, to the family, and of courseto me! I would like to thank my husband, Jung, who always puts me at the top of his priorities, and my three children, Chan, Caleb, and Veronicamy stars forever! And a special thanks to Veronica for helping me tremendously while I was working on the designs for the book. Another thanks to June and Calvin, my dear friends who are always quietly and cheerfully helping me, whatever the need. And to John, who helped me with processing the patterns, as well as Christine, who makes me smile. I also want to mention my friends Patrick, Betty, and Glenda for their support and assistance. In addition, I want to thank my dear friend Thelma and her daughter, Isabelle, who was kind enough to try on the patterns for this book! I missed you both throughout the whole process of writing this book, and I wish little Isabelle a happy, healthy future. Special thanks to my sewing buddies Hye Kyung, Jung and Young Mi, Yoon, who helped make the samples and provided wise advice.
A special thanks to Cloud9 Fabrics, Fat Quarter Shop, Riley Blake Designs, and Michael Miller Fabrics for providing fabrics of excellent quality for the garments in this book! Finally, a big thank-you to Liz, Alison, and the publishers for guiding me through the whole process and for making the book-writing experience so pleasant. IntroductionOnly a century ago, all the clothes we wore were sewn by our mothers, grandmothers, and aunts. Sewing has skipped a generation, or more, in many families, so most of us did not grow up watching clothing being made. Maybe this is why so many sewists are intimidated by the thought of sewing clothing. Many people have asked me the question, Isnt it difficult to sew clothing? My reply is the same every time: Women throughout history have done it, so why cant we? We feel challenged, not because it is impossible, but because we have never done it before. Many thought elastic-waist pants were difficult to make, but when I showed how to make them using my simple, beginner-friendly pattern, the same people always agreed: Wow! That was easy! One of my goals in writing this book is to make sewing clothes less intimidating and more approachable. I want to help the reader overcome fear and open up a brand new world in which sewists of all levels can make their own perfect apparel.
Just try some of these patterns; youll see how easy they are. 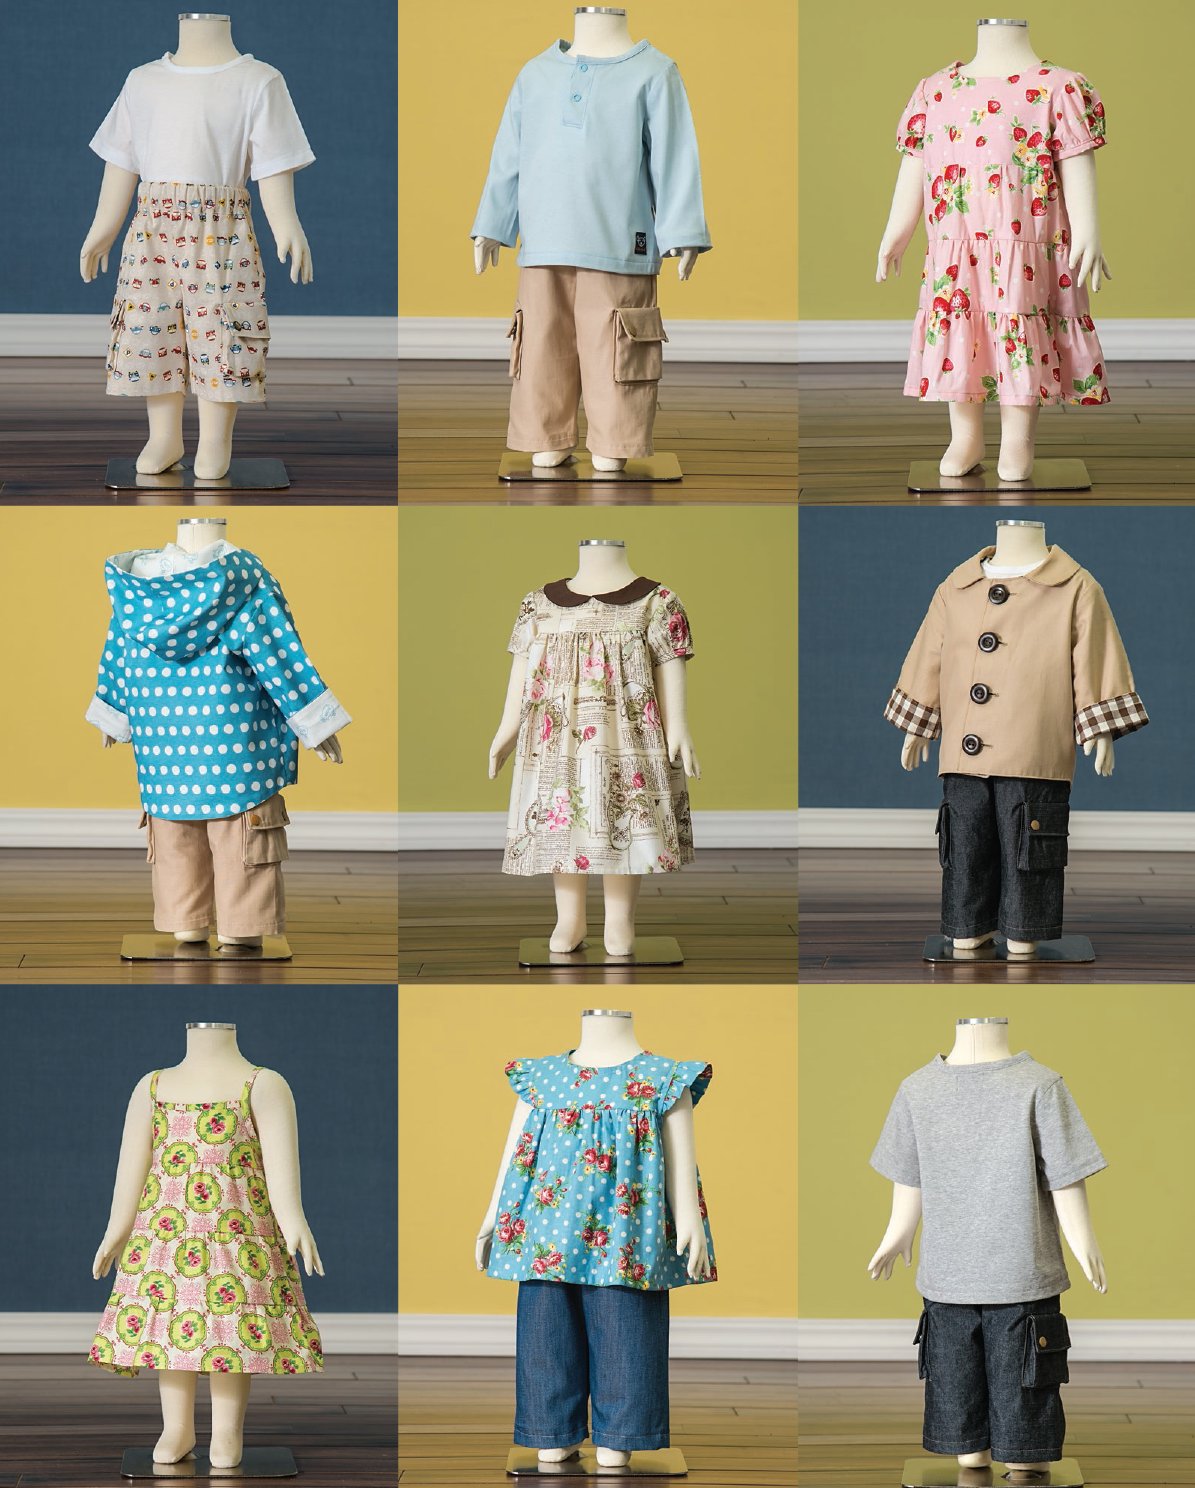 The Basics Choosing Fabrics When making clothing, it is important to choose the fabric type based on the garment and its intended use, so please refer to the chart below when considering your options. I used mostly easy-to-obtain, lightweight cotton and quilting-weight cotton for the samples in this book. Cotton is very comfortable and is efficient at absorbing sweat, so it is a great option for childrens clothing. Linen/cotton blend fabric works very well for dresses, pants, and coats. Denim is a common material for pants, but it also works great for dresses and jackets; besides purchasing brand-new fabric, consider recycling old jeans! Single knit/jersey fabrics are most often used for making T-shirts, while heavier double knit is preferred for jogging suits.
Lightweight corduroy is another versatile option when you need warmth. Also, consider using laminated cotton to make waterproof jackets. It is wise to prewash all fabrics used in garment making. It prevents shrinkage and dye bleeding in the finished garment. Iron using the manufacturers instructions, which are usually printed on the end of the bolt of fabric. 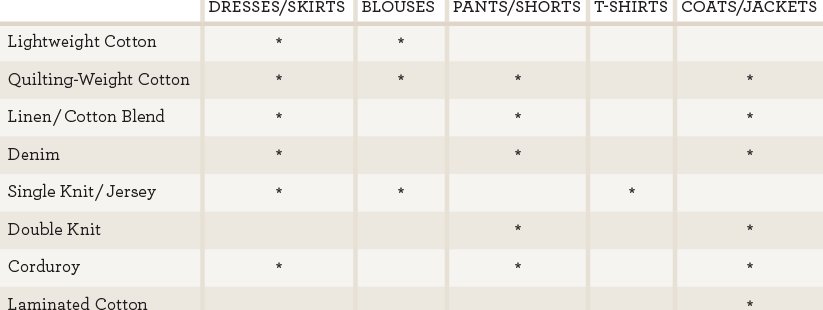 Pattern Symbols
  Pattern Notches
  Notch the triangular point marked on the pattern to make matching the pattern pieces easy.
Be careful not to notch too deep into the seam allowance! You can also cut the notch outward to avoid that. 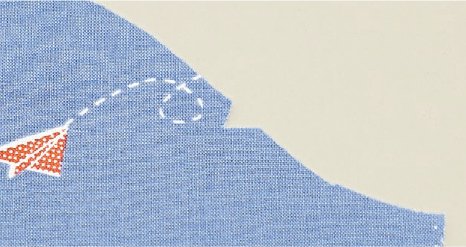 NOTEPlease use the measurements in the chart below when choosing what size garment to make. The sizes of sewing patterns can vary from those of ready-to-wear clothing found in stores.SIZE CHART
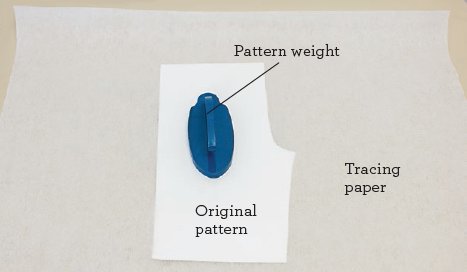
 Tracing the Patterns The patterns in this book are printed with multiple sizes together on the pattern pullouts. You will need to trace the pieces for the size garment you are making onto your own paper. Place tracing paper on top of the pattern and position sewing weights to hold the paper in place.
  Some pattern pieces have style variations in the neck, collar, or closure.
  Some pattern pieces have style variations in the neck, collar, or closure.
Some can be cut in multiple lengths. Follow the cutting instructions for each project and the notes on the pattern pieces to trace and cut the directed shape or length. You can also use this feature to make any short-sleeve top into a long-sleeve top. TIP It can be difficult to tell the difference between the right and wrong sides of solid-colored fabrics. Once you figure out which is which, mark the right side using a washable pen. Cutting Layouts Fold the fabric as shown in the cutting layout and then place the pattern on the folded fabric or a single layer, as indicated.
Cut out the pieces. These cutting layouts assume a directional print. Depending on the size you are making, or if your fabric is not a directional print, you may be able to place your pattern pieces closer together, which will require less fabric. However, for stripes, plaids, or large graphic prints, I encourage you to purchase extra fabric and carefully arrange the pattern pieces on the fabric so that the fabric design will match when the garment is sewn together. Finishing Seams The seam allowances of clothing need to be finished to ensure that during use or laundering they do not ravel or fray, or else the seams could come apart. One method to finish the seams is to use a serger.
Next page




 The Basics Choosing Fabrics When making clothing, it is important to choose the fabric type based on the garment and its intended use, so please refer to the chart below when considering your options. I used mostly easy-to-obtain, lightweight cotton and quilting-weight cotton for the samples in this book. Cotton is very comfortable and is efficient at absorbing sweat, so it is a great option for childrens clothing. Linen/cotton blend fabric works very well for dresses, pants, and coats. Denim is a common material for pants, but it also works great for dresses and jackets; besides purchasing brand-new fabric, consider recycling old jeans! Single knit/jersey fabrics are most often used for making T-shirts, while heavier double knit is preferred for jogging suits.
 Pattern Symbols
  Pattern Notches
  Notch the triangular point marked on the pattern to make matching the pattern pieces easy.
 NOTEPlease use the measurements in the chart below when choosing what size garment to make. The sizes of sewing patterns can vary from those of ready-to-wear clothing found in stores.SIZE CHART
 Tracing the Patterns The patterns in this book are printed with multiple sizes together on the pattern pullouts. You will need to trace the pieces for the size garment you are making onto your own paper. Place tracing paper on top of the pattern and position sewing weights to hold the paper in place.
  Some pattern pieces have style variations in the neck, collar, or closure.