One of t he major problems we find that the subscribers to our website ( FreeDigitalPhotographyTutorials.com ) face is not k nowing what it takes to compose a great photo.
Oft en, a photographer will spend long day s capturing photos only to return with a set of images that he or she is not completely satisfied with. Sure, the lighting and exposure may have turned out great, but the overall composition of the photos leaves something to be desired. In short, they lack that w ow factor that they see in other photographers shots .
A great picture is often a mixture of several ingredients, such as beautiful light, subject matter, the perfect moment, timing and mood, but most importantly its personal vision and composition!
Composition is the foundation in which great photography is built upon. A photo may be properly lit and contain good subject matter, but if it is doesnt have good composition it will never be considered more than an amateur shot.
You see, learning the tricks professionals use to craft a great image design and discovering how they incorporate these into composition will lay the foundation for you to create amazing photographs. In fact, o nce you master the art of composition, youll know exactly what elements it takes to compose a great shot before you even touch the shutter button! As a result, it will free you up to concentrate on the other ingredients that go into making a beautiful photograph .
When you finish reading this book be sure to check out our other book s Mastering Aperture in Digital Photography , Mastering Shutter Speed in Digital Photography and Mastering Exposure in Digital Photography to discover other ingredients that can really make your photos shine . More information on these title s can be found at the end of this book in the section Other Books on Photography.
The Rule of Thirds
One of the most fundamental principles of photographic composition is the rule of thirds. In fact, i ts such an easy composition technique to master , yet has a very powerful effect on an image. Once learned, youll know how to properly frame your photos in a way that places your subject in one of the most appealing spots within the image.
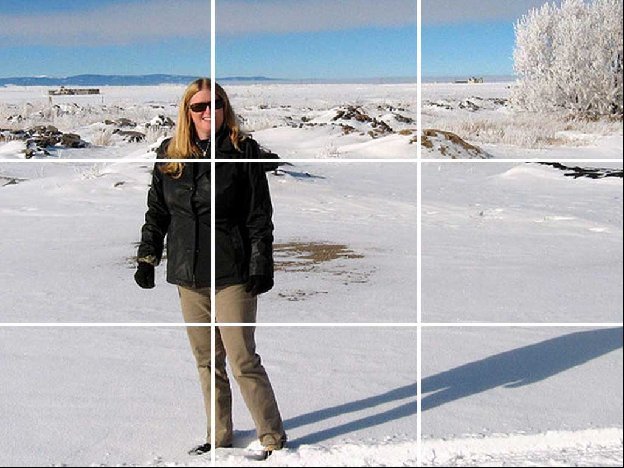
The theory behind the rule of thirds is that if you break an image up into th irds, so you have nine equal parts (imagine a grid) , and place your subject on one of the intersecting lines , youll have a photograph that is much more attractive to the viewer.
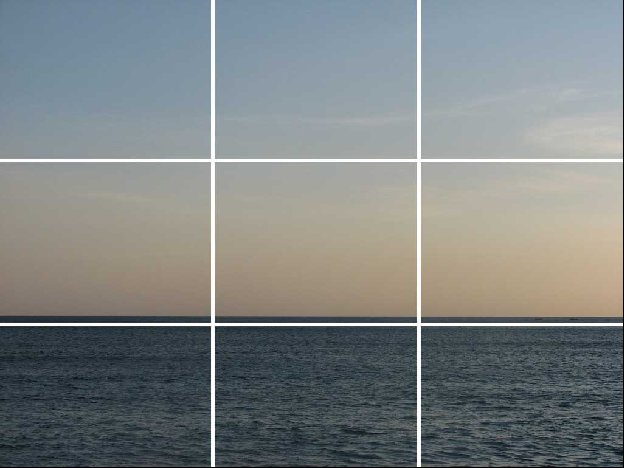
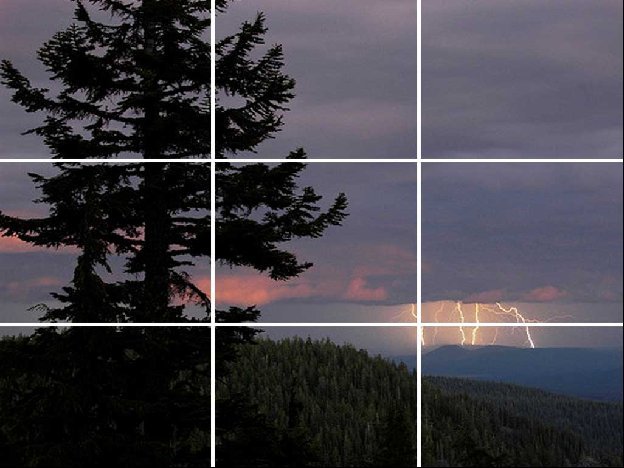
Below, is an example of the intersecting parts that make up the rule of thirds . Imagine this grid as you look through the viewfinder of your camera.

The Rule of Thirds Adds Interest to Photographs
What many new photographers dont know is that placing a subject in the middle o f a photo tends to make the photo feel boring to the viewer . A photo that s framed like this is predictable and lacks visual tension.
However, b y simply sliding your subject over to one of the intersecting lines of the rule of thirds grid , your photo immediately becomes more appealing because its unpredictable. Aligning your subject in this manner enhances the visual tension in the photo, making it more interesting to the viewer.
 Photo by Rosemary
V isual tension tends to make for better photogra phic composition s. This is why the rule of thirds is so powerful. Its amazing how making such a simple adjustment within the frame can take a potentially boring photo and make it more dynamic to look at.
The next time you go to take a photograph, imagine the intersecting lines of the rule of thirds grid on top of your viewfinder. Then, place your subject on one o f the four intersecting points.
Placement for Vertically Tall Subjects
If you have a vertically tall subject, line it up so that it touches either both of the left or right points.

Photo by Michael Miller
Placement for Horizontally Long Subjects
If you have a horizontally long subject, line it up so that it touches eithe r the two top or bottom points.

Photo by DM Kreuz
Placement for a Dominant Vertical and Horizontal Subject
If you have a dominant vertical and horizontal subject within the frame, choose either the left or right two points and the top two or bottom points to align each with.

Photo by Jeremy Howard

Photo by Roger Alcantara
How to Use Symmetry in Photography
In the last chapter , you learned about the rule of third s and how positioning a subject off-center in a photo results in a better composition. While this is true , and you should follow that advice more often than not , its also important that you understand how symmetry can also be used to capture a great photograph . Yes, p ositioning a subject in the center of the frame can result in a boring photo, but there is a trick that can take a boring symmetrical photo and turn it into something captivating to look at. Youll learn this this trick in the pages that follow.
By definition, symmetry in an image is when it can be split down the middle and the left and right sides of the photograph are mirror images of each other. In geometrical terms, imagine taking a photo of a triangle or a square. If you cut that image in half, both sides of the photo would mirror each other. Thats symmetry.
Dont get hung up on the idea that to have symmetry in an image it has to be an exact mirror image on both sides. Rarely is anything in our natural world perfectly symmetrical. As long as the image is close enough to looking the same on both sides we consider it a symmetrical photo.
How Do You Achieve Symmetrical Photos?
To achieve a symmetrical photo all you have to do is fill your frame with something that is almost, if not perfectly identical on both sides of the frame. Look for repetitious items within your scene and try to shoot a photo with them placed evenly apart.


 Photo by jprime84
 Photo by Rosemary


