Andrew Dewar - Bible Origami Kit: Paper-Folding Fun for the Whole Family!
Here you can read online Andrew Dewar - Bible Origami Kit: Paper-Folding Fun for the Whole Family! full text of the book (entire story) in english for free. Download pdf and epub, get meaning, cover and reviews about this ebook. year: 2012, publisher: Tuttle Publishing, genre: Children. Description of the work, (preface) as well as reviews are available. Best literature library LitArk.com created for fans of good reading and offers a wide selection of genres:
Romance novel
Science fiction
Adventure
Detective
Science
History
Home and family
Prose
Art
Politics
Computer
Non-fiction
Religion
Business
Children
Humor
Choose a favorite category and find really read worthwhile books. Enjoy immersion in the world of imagination, feel the emotions of the characters or learn something new for yourself, make an fascinating discovery.
- Book:Bible Origami Kit: Paper-Folding Fun for the Whole Family!
- Author:
- Publisher:Tuttle Publishing
- Genre:
- Year:2012
- Rating:3 / 5
- Favourites:Add to favourites
- Your mark:
Bible Origami Kit: Paper-Folding Fun for the Whole Family!: summary, description and annotation
We offer to read an annotation, description, summary or preface (depends on what the author of the book "Bible Origami Kit: Paper-Folding Fun for the Whole Family!" wrote himself). If you haven't found the necessary information about the book — write in the comments, we will try to find it.
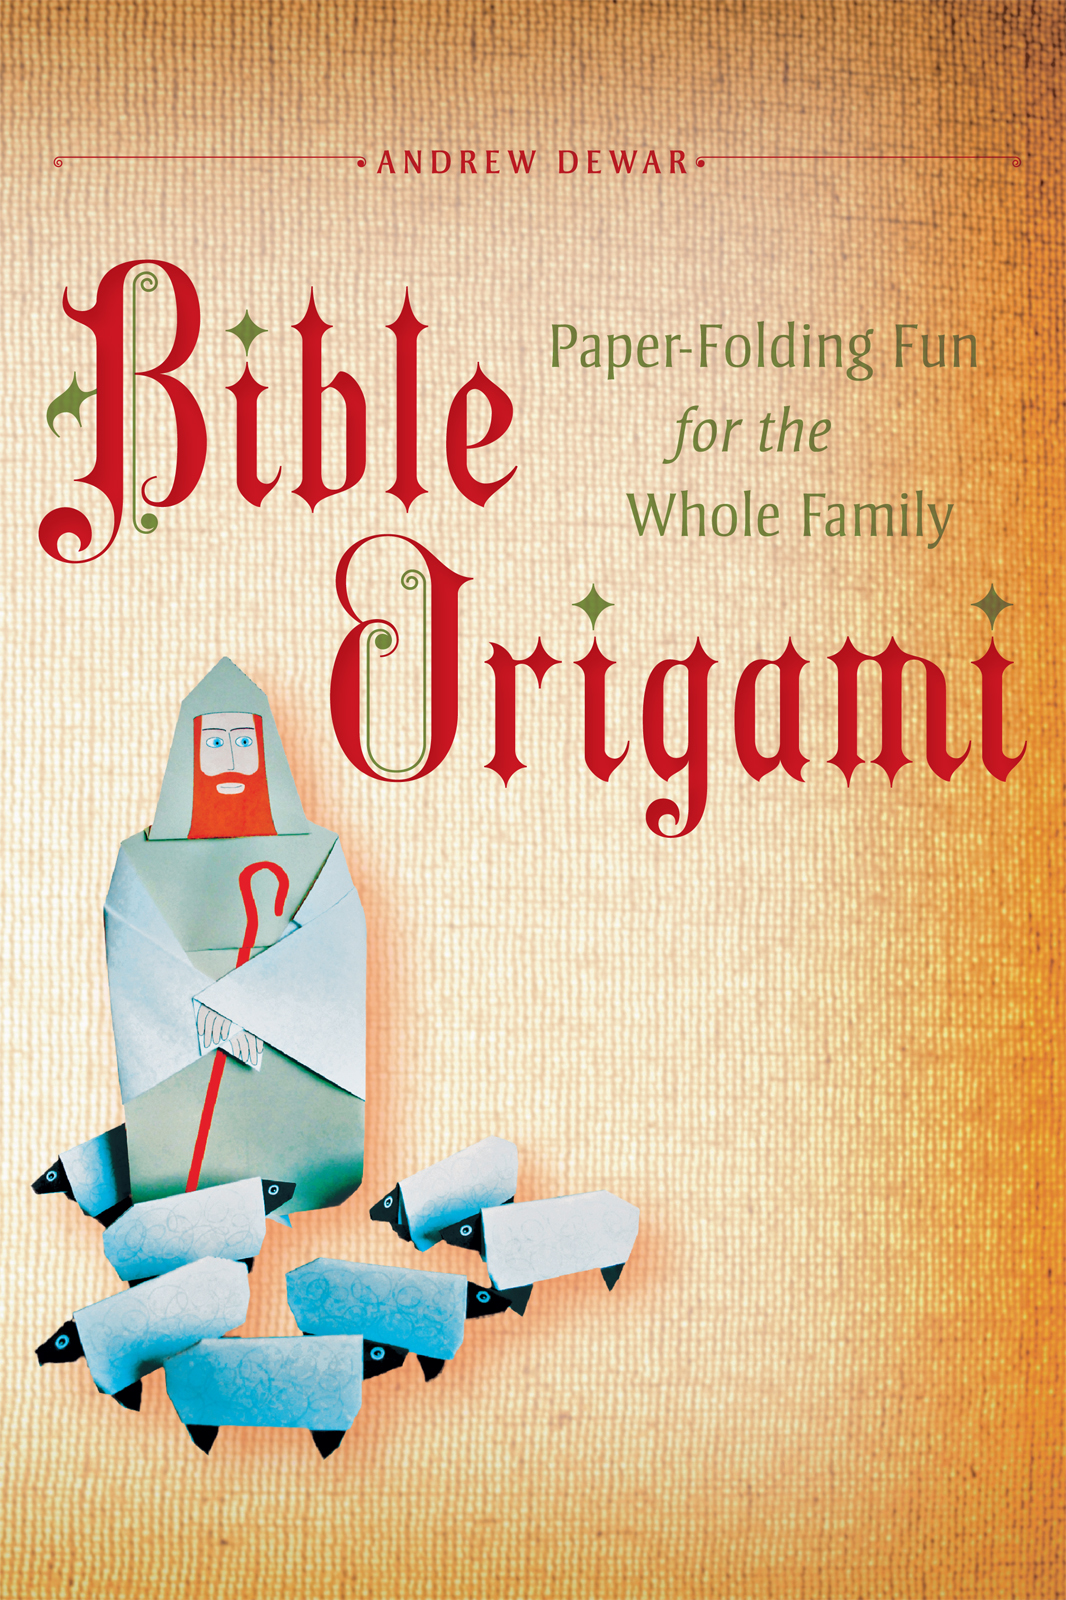
Befold! Combine the ageold art of easy origami paper folding with the greatest stories from the Bible!
Perfect for children and young adults, this boxed paper craft kit contains everything beginner to advance paper folders will need to create colorful paper figurines from famous Biblical stories and assemble them on origami background tableaus to help retell the stories.
Each Biblical tale is introduced, followed by an explanation of the significance of all the folded paper figures in the story. The finished origami pieces can then be used to reenact these timeless stories, or to create inspiring dioramas. These reenactments using origami paper figures and background help bring the sacred Bible stories alive for your family, youth group or Sunday school class.
This do-it-yourself paper craft kit contains:
A fullcolor 64-page booklet
Step-by-step folding instructions
Easy-to-follow diagrams
72 sheets of 2sided folding paper in a variety of sizes and colors
72 models and 6 different backdrops to make 9 scenes.
The Bible is not just a book. It is also a fountain, from which springs forth great sprays of art music and literature. There has always been a tradition of presenting the Bible visuallyjust think of how sculptures, illuminated manuscripts, and stain glass can often capture the message of the Bible better than printed words. Origami is a natural medium to express religious teachings because it is both interactive and beautiful. This fun origami for kids kit will make scripture come to life again and again!
Origami projects include:
The First Christmas
Easter
Adam & Eve
Noahs Ark
The Tower of Babel
Jacobs Ladder
Jonah and the Whale
The Good Shepherd
The Annunciation
Andrew Dewar: author's other books
Who wrote Bible Origami Kit: Paper-Folding Fun for the Whole Family!? Find out the surname, the name of the author of the book and a list of all author's works by series.


Bible Origami Kit: Paper-Folding Fun for the Whole Family! — read online for free the complete book (whole text) full work
Below is the text of the book, divided by pages. System saving the place of the last page read, allows you to conveniently read the book "Bible Origami Kit: Paper-Folding Fun for the Whole Family!" online for free, without having to search again every time where you left off. Put a bookmark, and you can go to the page where you finished reading at any time.
Font size:
Interval:
Bookmark:

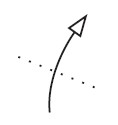 Fold this way
 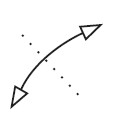 Fold and unfold
 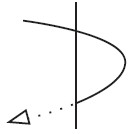 Fold around behind
 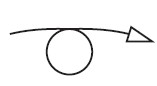 Flip the whole piece over
 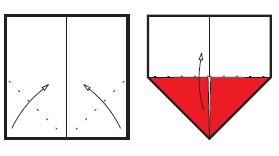 Most pieces start with the paper color side down. The drawings show the front in color, and the back in white.
 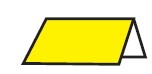 This is a mountain fold; it looks a bit like a mountain.
  And this is a valley fold.
 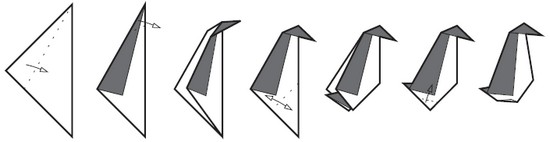 Some shapes are made with reverse folds. Start by creasing the paper along the fold lines.
 Open out the paper slightly, reverse each of the folds, and recrease them to make a neat corner. Above are diagrams for an outside reverse fold followed by an inside one (and on to complete a bonus penguin). The directions tell you to fold on such-and-such a line, but if you use your own paper you wont have the lines. No worry! Just remember that in origami folds are usually made so that corners and edges meet, or folds start at half-way points. The diagrams show you which edges and corners to use. 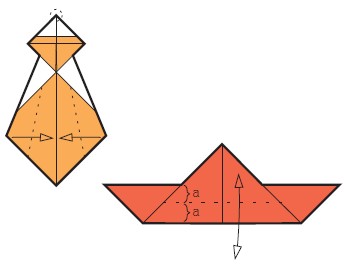
Basic Folds There are only so many ways to start folding origami projects.
A few of the most common ways are called bases, and are used as starting points for folding diagrams. Here are the bases used in this kit. Waterbomb Base The waterbomb base is the beginning of the famous waterbomb, but it is also the beginning of many other projects. Here is an easy way of doing it. 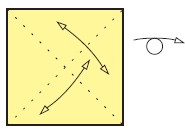 Start with the color side down. Fold and unfold from corner to corner.
Flip the paper over. 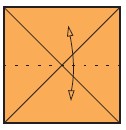 Fold the paper in half and unfold it again.
 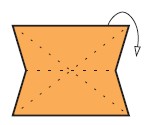 Collapse the sides away from you along the creases youve made.
 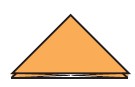 This is the finished waterbomb base. Blintz Base The blintz base is named for the pastry it looks like. Some projects fold the corners in just once, and some fold the paper two or three times, but either way the process is the same.
The first step is to find the center of the paper. 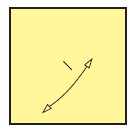 Start with the color side down. Line up opposite corners and crimp the paper with your finger to make a tiny crease in the middle.
 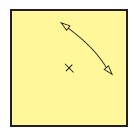 Crimp the paper again in the other direction to find the center. A tiny crease wont be as noticeable in the finished piece as a long fold would be.
 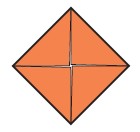 This is the finished blintz base.
Fish Base This base looks a bit like a fish without a tail. This is the finished blintz base.
Fish Base This base looks a bit like a fish without a tail.
It has two flaps in the middle that can be used to make fins, legs, and all sorts of things. 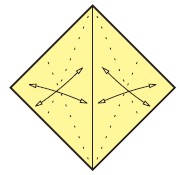 Start with the color side down. Fold and unfold to the centerline from the top and bottom corners.
 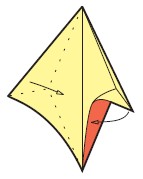 Fold the corners in to the centerline.
 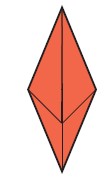 Press down the folds to crease the paper underneath and the fish base is finished.
Bird Base The bird base is the beginning of classic origami pieces like the Japanese crane. 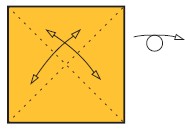 Start with the color side up. Start with the color side up.
Fold and unfold from corner to corner. Flip the paper over. 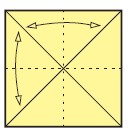 Fold and unfold vertically and horizontally.
 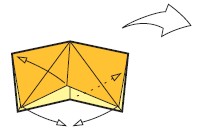 Push the bottom corners together while swinging the center corners out.
 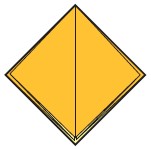 Heres an expanded view of the base so far.
 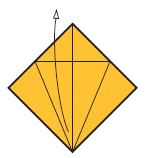 Pull up the bottom corner and reverse the folds.
 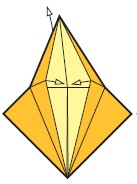 Here it is part of the way through.
 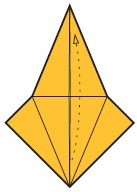 Do the same on the other side.
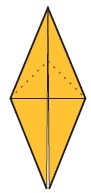
Font size:
Interval:
Bookmark:
Similar books «Bible Origami Kit: Paper-Folding Fun for the Whole Family!»
Look at similar books to Bible Origami Kit: Paper-Folding Fun for the Whole Family!. We have selected literature similar in name and meaning in the hope of providing readers with more options to find new, interesting, not yet read works.
Discussion, reviews of the book Bible Origami Kit: Paper-Folding Fun for the Whole Family! and just readers' own opinions. Leave your comments, write what you think about the work, its meaning or the main characters. Specify what exactly you liked and what you didn't like, and why you think so.