• Complain

Recorded Books Inc. - Origami Japanese Paper-Folding

Here you can read online Recorded Books Inc. - Origami Japanese Paper-Folding full text of the book (entire story) in english for free. Download pdf and epub, get meaning, cover and reviews about this ebook. City: North Clarendon;Vermont, year: 2012, publisher: Tuttle Publishing, genre: Romance novel. Description of the work, (preface) as well as reviews are available. Best literature library LitArk.com created for fans of good reading and offers a wide selection of genres:

Romance novel Science fiction Adventure Detective Science History Home and family Prose Art Politics Computer Non-fiction Religion Business Children Humor

Choose a favorite category and find really read worthwhile books. Enjoy immersion in the world of imagination, feel the emotions of the characters or learn something new for yourself, make an fascinating discovery.

Recorded Books Inc. Origami Japanese Paper-Folding

Origami Japanese Paper-Folding: summary, description and annotation

We offer to read an annotation, description, summary or preface (depends on what the author of the book "Origami Japanese Paper-Folding" wrote himself). If you haven't found the necessary information about the book — write in the comments, we will try to find it.

Fold classic origami projects with this easy origami book. Origami, or paper folding has been a part of the Japanese craft tradition for over a thousand years. The creation of intricate origami paper figures through the simple process of folding is enjoyed by both adults and children, not only in Japan, but all over the world. In this book, Florence Sakade, well-known editor and designer of books on Japan, guides the reader through a wide range of origami creations. Featured are more than 50 items ranging from simple beginner origami projects to more difficult, complex ones. These include various animals, flowers, boxes, boats, and the ever-popular crane. A section on practical applications shows how origami can be used in mobiles, as party decorations, and for games. Each origami item is explained with diagrams and instructions and the finished items are shown in photographs. This origami book contains: - 96 page, full-color book - 50 origami projects - Clear, step-by-step directions - Colorful diagrams and photographsThe quick origami projects bring the art of origami to your fingertips and are sure to provide hours of creative entertainment for both children and adults. Origami projects include - Cat - Giraffe - Spaceship - Jet plane - treasure box - And many more.

Recorded Books Inc.: author's other books


Who wrote Origami Japanese Paper-Folding? Find out the surname, the name of the author of the book and a list of all author's works by series.

Origami Japanese Paper-Folding — read online for free the complete book (whole text) full work

Below is the text of the book, divided by pages. System saving the place of the last page read, allows you to conveniently read the book "Origami Japanese Paper-Folding" online for free, without having to search again every time where you left off. Put a bookmark, and you can go to the page where you finished reading at any time.

Light

Font size:

Reset

Interval:

Bookmark:

Make
DOLLS Step 1 Fold a squa - photo 1
DOLLS Step 1 Fold a square piece of paper Fig 1 so that the edge AB - photo 2
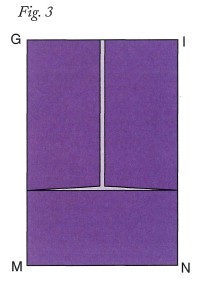
DOLLS Step 1 Fold a square piece of paper Fig 1 so that the edge AB extends over - photo 3Step 1 Fold a square piece of paper Fig 1 so that the edge AB extends over - photo 4 Step 1. Fold a square piece of paper (Fig. 1) so that the edge AB extends over as far as the center line AC as shown in Fig. 2. Step 2 Do the same with AD in order to get Fig 3 Step 3 Fold along MN - photo 5 Step 2. 3. Step 3 Fold along MN so that point C is over and above points B and D See - photo 6 Step 3. Step 3 Fold along MN so that point C is over and above points B and D See - photo 6 Step 3.

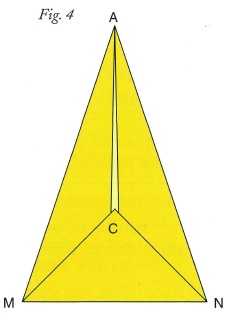
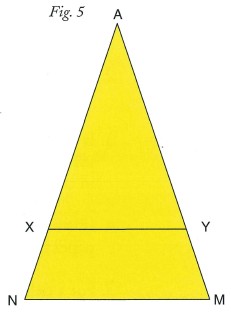
Fold along MN so that point C is over and above points B and D. See Fig. 4. Step 4 Turn the paper over and fold back MN along XY about two-fifths of the - photo 7 Step 4. Turn the paper over and fold back MN along XY about two-fifths of the way up (Fig. 6. Step 5 Fold points M and N forward along AY and AX so as to overlap each - photo 8Step 5 Fold points M and N forward along AY and AX so as to overlap each - photo 9 Step 5. Step 5 Fold points M and N forward along AY and AX so as to overlap each - photo 8Step 5 Fold points M and N forward along AY and AX so as to overlap each - photo 9 Step 5.

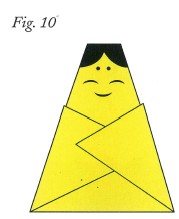
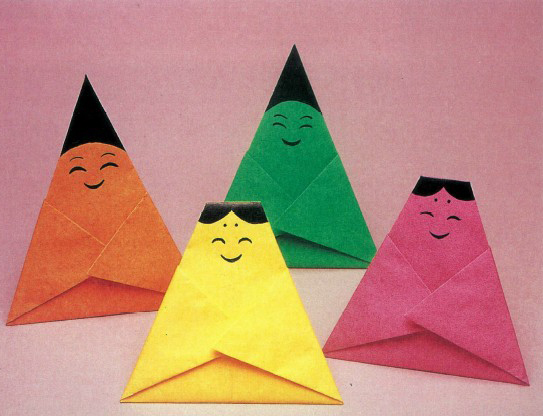
Fold points M and N forward along AY and AX so as to overlap each other, as in Fig. 7. Step 6 Complete the doll by drawing the face Fig 8 Step 7 To make - photo 10 Step 6. Complete the doll by drawing the face (Fig. 8). Step 7 To make a princess Fig 10 fold back the top of the head as shown in - photo 11Step 7 To make a princess Fig 10 fold back the top of the head as shown in - photo 12 Step 7.
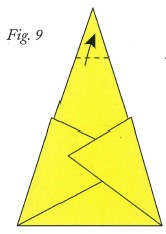
To make a princess (Fig. 10), fold back the top of the head as shown in Fig. 9. SHIP Step 1 Fold a square piece of paper down the center on line EF as - photo 13

SHIP Step 1 Fold a square piece of paper down the center on line EF as shown in - photo 14 Step 1. Fold a square piece of paper down the center on line EF, as shown in Fig. Step 2 Fold at GH and IJ so that edges AC and BD meet at the center line EF - photo 15 Step 2. Step 2 Fold at GH and IJ so that edges AC and BD meet at the center line EF - photo 15 Step 2.

Fold at GH and IJ so that edges AC and BD meet at the center line EF. This results in Fig. 2. Step 3 Fold at MN so that edge HJ reaches the center line XY thus forming - photo 16 Step 3. Fold at MN so that edge HJ reaches the center line XY, thus forming Fig. 3 Step 4 Pull out corners C and D in order to form Fig 4 Step 5 Fold - photo 17 Step 4.

Pull out corners C and D in order to form Fig. 4. Step 5 Fold backwards at OP so that the edge GI is directly under MN as shown - photo 18 Step 5. Fold backwards at OP so that the edge GI is directly under MN, as shown in Fig. 5. Step 6 Turn over to get Fig 6 Step 7 Fold so that the edge IG is over - photo 19 Step 6.
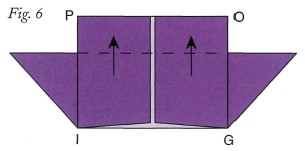
Turn over to get Fig. 6. Step 7 Fold so that the edge IG is over and above PO as shown in Fig 7 - photo 20 Step 7. Fold so that the edge IG is over and above PO, as shown in Fig. 7. Step 8 Bring point G forward and to the left so that it is directly over X - photo 21 Step 8.

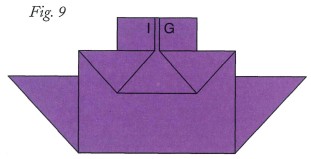
Bring point G forward and to the left so that it is directly over X, which is in the center. Fig. 8 shows how this is done. Do the same with point I in order to get Fig. 9. Step 9 Turn over and you have the ship shown in Fig 10 Draw portholes on the - photo 22Step 9 Turn over and you have the ship shown in Fig 10 Draw portholes on the - photo 23 Step 9.

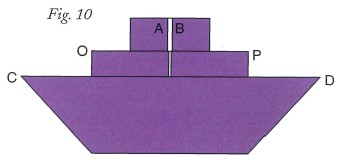
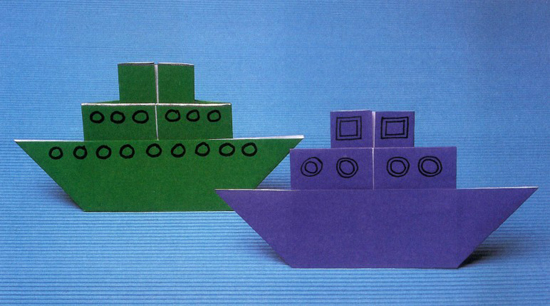
Turn over and you have the ship shown in Fig. 10. Draw portholes on the sides (see photograph). LANTERN Step 1 Fold a square piece of paper as shown in Fig 1 and then - photo 24

LANTERN Step 1 Fold a square piece of paper as shown in Fig 1 and then spread open - photo 25 Step 1. Fold a square piece of paper, as shown in Fig. Step 2 Fold the four corners A B C and D forward so that they meet at the - photo 26 Step 2. Step 2 Fold the four corners A B C and D forward so that they meet at the - photo 26 Step 2.
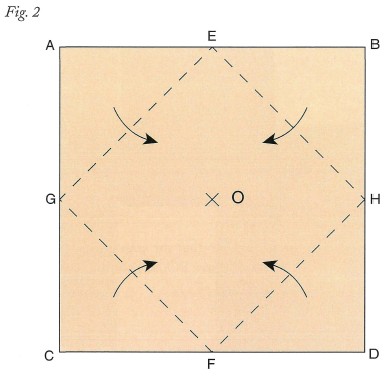
Fold the four corners A, B, C and D forward so that they meet at the center, as in Figs. 2 and 3. Step 3 Turn over and fold the four corners E F G and H so that they meet at - photo 27 Step 3. Turn over and fold the four corners E, F, G and H so that they meet at the center, as in Fig. 4. Step 4 Turn the paper over once more and you will have Fig 5 Step 5 - photo 28 Step 4.
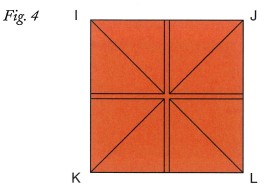
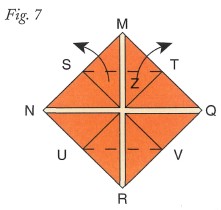
Turn the paper over once more and you will have Fig. 5. Step 5 Next fold the corners I J K and L forward once more to meet at the - photo 29 Step 5. Next, fold the corners I, J, K and L forward once more to meet at the center. Turn the paper and you will have Fig. Step 6 Using both thumbs push open MZ as in Figs 7 and 8 Do the same with - photo 30 Step 6. Step 6 Using both thumbs push open MZ as in Figs 7 and 8 Do the same with - photo 30 Step 6.
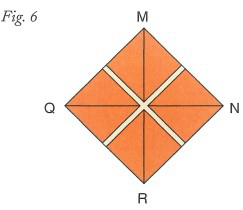
Using both thumbs, push open MZ, as in Figs. 7 and 8. Do the same with ZR and you will get Fig. 9. Step 7 Hang the lantern with a bamboo skewer and thread - photo 31

Next page
Light

Font size:

Reset

Interval:

Bookmark:

Make

Similar books «Origami Japanese Paper-Folding»

Look at similar books to Origami Japanese Paper-Folding. We have selected literature similar in name and meaning in the hope of providing readers with more options to find new, interesting, not yet read works.


Reviews about «Origami Japanese Paper-Folding»

Discussion, reviews of the book Origami Japanese Paper-Folding and just readers' own opinions. Leave your comments, write what you think about the work, its meaning or the main characters. Specify what exactly you liked and what you didn't like, and why you think so.