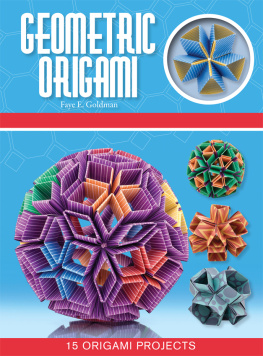
Geometric
Origami Kit
by Nick Robinson
A member of Penguin Random House LLC
Publisher: Mike Sanders
Associate Publisher: Billy Fields
Acquisitions Editor: Susan Zingraf
Development Editor: Kayla Dugger
Design Supervisor: William Thomas
Production Editor: Jan Lynn
Layout: Ayanna Lacey
Proofreader: Virginia V. Vought
PRODUCTION, LONDON
Digital Producer: Alex Valizadeh
Senior Digital Producer: Miguel Cunha
DIGITAL OPERATIONS, DELHI
Head of Digital Operations: Manjari Hooda
Producer: Rahul Kumar
Assistant Editor: Etika Kapil
DTP Designer: Manish Bhatt
Operations Assistant: Tauhid Nasir
Introduction
The world of geometry has aspects that resonate throughout the natural worldyou only need to look at fractals, logarithmic spirals, basalt rocks at the Giants Causeway, and even the shapes of honeycombs within a beehive. All of this can inspire creativity within origami. In a chaotic world, geometry offers order, symmetry, and beauty. This has been the case since the days of Plato and probably even earlier.
Geometry lies at the very heart of origami, regardless of what you make. All you need to do is to unfold an origami model and study the revealed crease pattern. Within it, you will find triangles, squares, and many other polygons, often revealing strong symmetry. To many people, the deeper you look into it, the more fascinating it becomes. There is also an interesting dichotomy between the impermanence of paper and the apparently solid shapes you can construct using it.
Whether you are new to origami or have experience with it, this book provides practical possibilities for creating geometric designs. By following the designs in the order they are presented, you can build on your base of knowledge and produce beautiful, finished results. This book may even inspire you to do some research to understand the angles and ratios that make up each design!
Fold slowly and neatly, and enjoy the exciting designs in this book!
Acknowledgments
I would like to thank the following creators for kindly allowing their work to be used within this book: Robert Foord (Diamonds), Mick Guy (Versatile), Hans-Werner Guth (Eifel Star/Jump Unit), Larry Hart (Snap Hexahedron), Mitsunobu Sonobe (Sonobe Unit), Boaz Shuval (Dodecahedron), Dave Brill (Segmented Unit), Vignesh Cumareshan (Bow Tie Cube), Francesco Guarnieri (Diamond Star), Francis Ow (Truncated Star), Denver Lawson (Bipyramid Blackberry/Bipyramid Dragon Fruit/Leaved Octahedral Skeleton), and various (Spinning Top/Truncated Cube).
With any origami design, there is a reasonable chance that similar designs have been independently created by others. Therefore, Id also like to give credit to Tomoko Fuse and Kunihiko Kasahara, both creative giants of geometric origami.
Thanks to Susan Zingraf, Kayla Dugger, William Thomas, and Mike Sanders at Alpha Books for the support and professionalism. To Tom Cuffe (of Irish Origami fame), thanks for proofreading the diagrams. To the British Origami Society, thank you for the support and inspiration. Id also like to thank my many origami friends around the world for their boundless friendship. To Rachel and the Riffs, thanks for the musical fun. Thanks to Andy Peake, the other half of my group Lost Garden. Last (but not least), Id like to thank Alison, my beautiful partner in lifes adventures; our children Nick and Daisy; plus our moggies Matilda and Rhubarb.
PART 1
TECHNIQUES
Before jumping in to the designs, Id like to give you some practical and theoretical information that will enable you to get the most from this book. To begin, you learn about the ideas behind geometric origami. I also talk about what kind of paper is best for origami, as well as how to fold it. The section devoted to symbols is invaluable not only for the designs in this book, but also for any designs you decide to fold from other sources, such as the internet. With the folding techniques, you get a chance to go over the basic folds used in origami and to get used to the art of folding paper neatly and accurately. You also get information on dividing a square into thirds, creating a 60-degree angle, and making a template, all of which are important to know when working on the designs.
PART 2
DESIGNS
The theory behind origami you have absorbed from the previous part can now be put into practice with the following designs. The designs are presented in order of difficulty (although that in itself is subjective, depending on what skills you already have), so I recommend you follow the sequencemore or less! Remember, fold slowly and neatly, and dont be afraid to throw a model away and start afresh if the paper becomes too tired.
The Principles of Modular Origami
A modular design is one made from several sheets of paper, each folded identically with flaps and pockets that interlock to create a stable design. Flat forms of modular origami are usually made up of polygons (a plane shape with straight sides), while three-dimensional versions are typically made up of polyhedra (a solid with flat faces).
The designs in this book are all modular; therefore, the following are principles you should keep in mind as you are assembling and combining.
Assembling the Designs
Because modular designs arent made from a single sheet of paper like more naturalistic origami designs, the issue of assembly becomes of vital importance. With the majority of geometric designs, the structural integrity of the final design isnt complete until the last unit is in place. Early stages of assembly can be frustratingas you insert the sixth unit of 12, the first may slide out and before you know it, the whole assembly collapses. My advice for this is to use small amounts of masking tape or miniature clothespins to act as extra hands for you, holding units together until the end.
Its also true to say that your first attempt at a modular design may well look a bit scruffy by the time it is complete. The ideal scenario for all modular units is to handle them as little as possible, since the paper can quickly become tired, with the sharp creases becoming relaxed and not holding in place as effectively. When you come to make the model for a second time, youll find your fingers know what to do and the model will be more accurate and neater and hence will hold together better.

