Dueep Jyot Singh - Teach Yourself Stitch Craft and Dressmaking Pattern Making and Drafting Layout: Volume III--Making Your Own Patterns for Dress Designing
Here you can read online Dueep Jyot Singh - Teach Yourself Stitch Craft and Dressmaking Pattern Making and Drafting Layout: Volume III--Making Your Own Patterns for Dress Designing full text of the book (entire story) in english for free. Download pdf and epub, get meaning, cover and reviews about this ebook. year: 2016, publisher: Mendon Cottage Books, genre: Children. Description of the work, (preface) as well as reviews are available. Best literature library LitArk.com created for fans of good reading and offers a wide selection of genres:
Romance novel
Science fiction
Adventure
Detective
Science
History
Home and family
Prose
Art
Politics
Computer
Non-fiction
Religion
Business
Children
Humor
Choose a favorite category and find really read worthwhile books. Enjoy immersion in the world of imagination, feel the emotions of the characters or learn something new for yourself, make an fascinating discovery.
- Book:Teach Yourself Stitch Craft and Dressmaking Pattern Making and Drafting Layout: Volume III--Making Your Own Patterns for Dress Designing
- Author:
- Publisher:Mendon Cottage Books
- Genre:
- Year:2016
- Rating:4 / 5
- Favourites:Add to favourites
- Your mark:
Teach Yourself Stitch Craft and Dressmaking Pattern Making and Drafting Layout: Volume III--Making Your Own Patterns for Dress Designing: summary, description and annotation
We offer to read an annotation, description, summary or preface (depends on what the author of the book "Teach Yourself Stitch Craft and Dressmaking Pattern Making and Drafting Layout: Volume III--Making Your Own Patterns for Dress Designing" wrote himself). If you haven't found the necessary information about the book — write in the comments, we will try to find it.
Dueep Jyot Singh: author's other books
Who wrote Teach Yourself Stitch Craft and Dressmaking Pattern Making and Drafting Layout: Volume III--Making Your Own Patterns for Dress Designing? Find out the surname, the name of the author of the book and a list of all author's works by series.


Teach Yourself Stitch Craft and Dressmaking Pattern Making and Drafting Layout: Volume III--Making Your Own Patterns for Dress Designing — read online for free the complete book (whole text) full work
Below is the text of the book, divided by pages. System saving the place of the last page read, allows you to conveniently read the book "Teach Yourself Stitch Craft and Dressmaking Pattern Making and Drafting Layout: Volume III--Making Your Own Patterns for Dress Designing" online for free, without having to search again every time where you left off. Put a bookmark, and you can go to the page where you finished reading at any time.
Font size:
Interval:
Bookmark:
Making Your Own Patterns for Dress Designing
Dueep Jyot Singh
Learning Series
Mendon Cottage Books

JD-Biz Publishing
Download FreeBooks!
http://MendonCottageBooks.com
All Rights Reserved.
No part of this publication may be reproducedin any form or by any means, including scanning, photocopying, orotherwise without prior written permission from JD-Biz CorpCopyright 2016
All Images Licensed by Fotolia, Pixabay, and123RF.
Disclaimer
The information is this book is provided forinformational purposes only. The information is believed to beaccurate as presented based on research by the author.
The author or publisher is not responsiblefor the use or safety of any procedure or treatment mentioned inthis book. The author or publisher is not responsible for errors oromissions that may exist.
Our books are available at
Download FreeBooks!
http://MendonCottageBooks.com
The first two books in our series have givenyou information about the basics of stitch craft, and how you aregoing to measure the figure properly so that you can start settingout your drafting pattern.
Drafting is the method with which you aregoing to draw the pattern of a garment, a given measurement on apiece of paper. Proper drafting is a systematic method whichinvolves a number of steps. Some of the measurements are going tobe lengthwise and some of them are going to be widthwise.
Proper drafting is going to depend on threeimportant factors. The first is of course the proper layout, properpattern making and after that, the cutting of the clothproperly.
So if you do not know the basics of properdrafting, and the layout of the design, you are going to have greattrouble making up the pattern with just haphazard and topsy-turvyknowledge. When I was a child, I used to see plenty of experiencedtailors who just took a couple of measurements, with their inchtape and with their eyes. After that they did some mathematicalcalculations in the air with their fingers, and noted down somenumbers on a piece of paper. After that, it was fascinating the waythey just picked up a pair of heavy shears, folded the cloth sothat the lower part was facing towards them.
And then they picked up a piece of tailorschalk, held down the cloth with something heavy so that it did notwrinkle up, took their tape measurements, and measured out thecloth properly. After that they did the cutting and then they gavethe stitching work to their underlings.

Hopefully, after we read this book, I and youare going to be so proficient in the basics of grafting, that weare going to understand each and every line on a drafting patternand exactly what it means.
For this, of course, we will need to know allabout proper drafting, the proper layout of the cloth, and makingpatterns.
So let us start with drafting.
What is the difference between drafting andlaying out the pattern? Drafting is the drawing out of the patternon a piece of paper. Laying out the pattern is cutting out thepieces of paper, according to the drafted design and then layingout the different pieces of paper properly on the cloth. After thatwe are going to cut the cloth, according to the pattern.
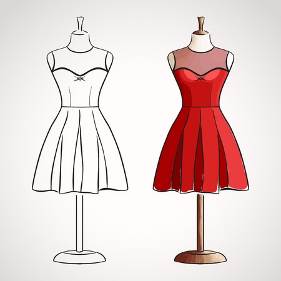
The ability to design a dress with the helpof lines and understanding the process is known as drafting. Everygarment out there is going to have a different drafting design. Youcannot make a pair of trousers, with a bodice design nor can apinafore design be used to design a blouse.

However, there are some basic designs whichcan be adapted and once you know all about them, you can do thedesigns of other clothes of that same type, by just a little bit ofadding, subtracting, multiplying, and dividing.
Drafting is made up of straight lines. It isalso made up of circular lines for which we normally use Frenchcurves and other drafting implements and tools.
There are some lines which are going to beused in your draft, as basic lines, which are common with everysingle design.
However, these designs are going to bemodified by adding or removing some extra lines around thesebasics, depending on the fashion and the garment which has to bemade.
For example, if your drafting is of a bodice,the neck, shoulder, and chest measurement is going to be in thebasic design. However, you can modify the shape of the neck into acircle, deep cut, square, or any other design depending on therequirements of the wearer. In the same manner, I can cut a pair oftrousers when I know the basic measurements and according to thedictates of fashion, I am going to put a pocket either on the beltline, or on the pleats, or even on the knees. If I wish, I canpepper the trousers with lots of pockets and make them bellbottoms,flared, narrow, leggings, stovepipe trousers, and whatever else Iwish by either adding some fabric or removing it in the design.
So once you know all about the basic mathwith which to calculate the basic measurements, you are going tobegin drafting in a systematic and methodical manner. Once that hasbeen done to your satisfaction, you can cut the garments to yourown requirements and stitch them.
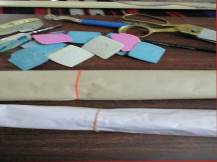

Some basic tools including an inch tape, aneraser, 2 pencils, one tracing wheel, a good pair of scissors,brown paper, tracing paper, and Tailors chalks in differentcolors.
Make sure that the basic drafting is donewith full measurements on a long and wide enough piece of paper.For drafting, you are going to need a sharp and dark pencil, a gooderaser, some French curves for the armholes and necklines,measuring tape, and of course paper sheets. After that, you aregoing to need a good pair of shears in order to cut the patternsout properly after you have marked them out.
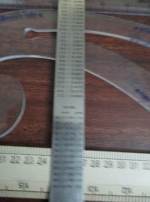
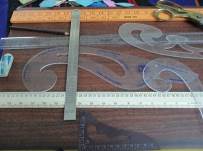
French curves and rulers, including an L-shapedwooden ruler.
You may want to do some practice cutting on aflat surface, either on your dining room table, or on the groundlike I do. The dimensions of the tabletop should be around 48 x30, which means that you have plenty of space to move around, whenyou are drafting the design.
Font size:
Interval:
Bookmark:
Similar books «Teach Yourself Stitch Craft and Dressmaking Pattern Making and Drafting Layout: Volume III--Making Your Own Patterns for Dress Designing»
Look at similar books to Teach Yourself Stitch Craft and Dressmaking Pattern Making and Drafting Layout: Volume III--Making Your Own Patterns for Dress Designing. We have selected literature similar in name and meaning in the hope of providing readers with more options to find new, interesting, not yet read works.
Discussion, reviews of the book Teach Yourself Stitch Craft and Dressmaking Pattern Making and Drafting Layout: Volume III--Making Your Own Patterns for Dress Designing and just readers' own opinions. Leave your comments, write what you think about the work, its meaning or the main characters. Specify what exactly you liked and what you didn't like, and why you think so.