Acknowledgments
I WISH to thank the following for material help in the preparation of this book.
Mrs. Dorothy Tyson of Sinking Spring, Pennsylvania for the information supplied on the colors and paint she used to decorate the chest in chapter 13.
Dr. John R. Bertrand, President of Berry College, Mt. Berry, Georgia, for permission to use information, take photographs, and make drawings of furniture made for Berry College by students under my direction.
The editors of Popular Science Monthly for permission to use material for a revised version of an article on the four-treadle loom I built. The original article was published by them in the October 1935 issue of Popular Science Monthly.
The editors of Early American Life magazine for permission to include material on the Chippendale lowboy, which appeared in their June 1977 issue and the Chippendale mirror which appeared in their August 1977 issue.
The editors of Fine Woodworking magazine for permission to use a photograph of the Highboy found in chapter 26 which appeared in their spring 1978 issue, and information on doing the cockleshell carving found in chapter 27.
Mr. Sam Lancet of Los Angeles, California for permission to describe his method of coloring curly maple, which appeared in Letters to the Editor, in the Fall issue of Fine Woodworking magazine, whose permission to use this information has also been given to me.
Mr. Bob Winger of Montoursville, Pennsylvania for permission to describe his method of coloring curly maple, which appeared in the Winter 1977 issue of Fine Woodworking magazine in Letters to the Editor, whose permission to use this information has also been given to me. These two procedures are set forth in chapter 9.
The late Leon M. Reinert of Boyertown, Pennsylvania for permission granted by him for me to photograph and make measured drawings of antiques belonging to him, in-eluding the curly maple desk in chapter 9, the country Sheraton settee in chapter 10, and the Dutch cupboard in chapter 11.
Bill Cowley, proprietor of the Bashful Barn Antique Shop, Boyertown, Pennsylvania, for permission to photograph and make drawings of the William and Mary dressing mirror in chapter 7.
A good friend with a large collection of antiques, who wishes to remain anonymous, for permission to photograph and make drawings of many pieces of fine furniture in his collection. His small utility cabinet is found in chapter 5 and his Sheraton desk in chapter 8.
My sister, Mrs. Estelle Harlacher, for permission to include in chapter 21 a walnut chest of drawers she inherited from our mother.
My nephew, Mr. Daniel Stauffer of Houston, Texas, for permission to include the early Pennsylvania walnut chest, which he inherited from his parents. The chest is shown and described in chapter 12.
My son, Bruce H. Gottshall, for taking and preparing most of the photographs for this book, and whose help, patience, and advice are and continue to be of inestimable value to me.
Ken Smith, photographer of Harrisburg, Pennsylvania, who took some of the photographs used in this book.
Agnes, my wife, for assistance in preparing the chapter on the loom, and whose deep interest, help, and advice are a constant source of inspiration.
Any others I may have inadvertently neglected to mention, and whose help has been extended to me in preparation of this book.
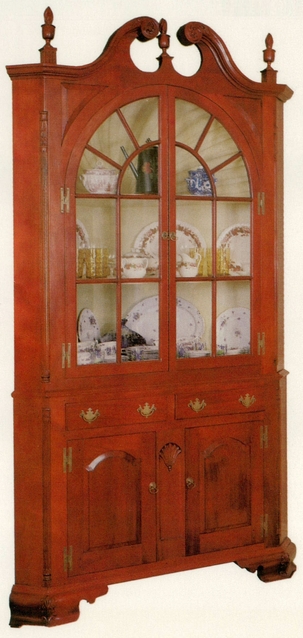
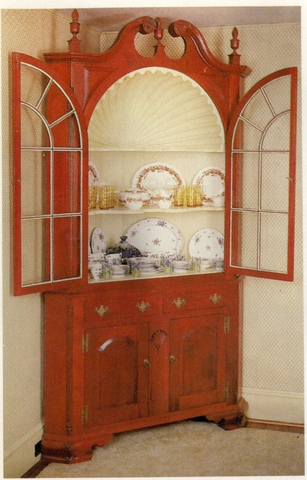
Shell-Top Corner Cupboard
How To Lay Out and Make Dovetail Joints
SINCE almost all of the projects shown and described in the following chapters require the laying out and making dovetail joints, I have devoted the first chapter of this book to describing methods and techniques for making these joints. Dovetail joints are an essential and important part of fine cabinetmaking.
In .
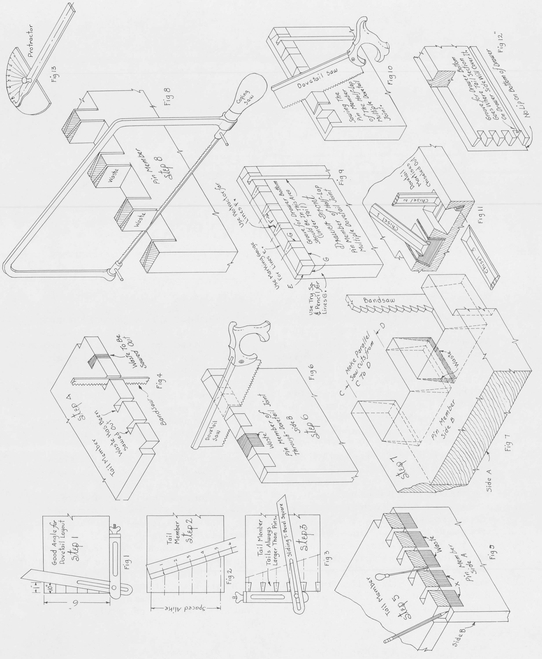
illustrates a practical method of going about it. Because dovetail joints are made on boards of various widths and because these widths are not always easily divided into the number of tails and pins needed, lay a ruler across the board at an angle, which permits you to divide the width of the board into the number of equal spaces needed. These spaces are not necessarily an inch apart; spacing units can be any convenient size.
Because my sliding T-bevel square is fairly large, I find the protractor shown in easier to use than the T-bevel for setting the angle. My protractor has a blade adjustable to any angle, which makes it a very convenient tool for this purpose.
In the drawings from shows how to remove the waste from the tail member. If this waste is carefully sawed out without crossing over the guidelines, very little trimming with a chisel or file is needed to true up the saw cuts.
When the saw cuts on the tail member are smooth enough to use as a pattern for laying out the angles on the pin member, place the tail member over the end of the pin member and mark these angles as in , which are drawn across the grain with a marking gauge, I never use a marking gauge to draw these lines. Gauge lines here are difficult, if not impossible to remove after the joint is made, while pencil lines can be erased or sanded to remove.
Most of the waste to be removed from the pin member can be cut out with a band saw. Study the procedure used in . Through-dovetails are prominently featured both structurally and decoratively on the projects in chapter 2, 4, 6, as well as others in this book. If you do not have access to a band saw, you can remove all of the leftover waste with a coping saw, after the angle cuts have been made with the dovetail saw.
A half-lap multiple dovetail joint, like the one in I have put numbers on the chisels to indicate the sequence to be followed when trimming out the waste.
Drawer fronts with protruding lips, like those shown in , require still greater care. They will be found on drawers on the highboy in chapter 26, the corner cupboard in chapter 27, and other projects in the book. With patience and time, you should have no difficulty making these joints. Be very careful when making these joints to figure measurements and drawer clearance very accurately so the drawer will slide easily into its opening when put together. The chances to plane drawer sides to get a better fit are practically nil after the drawer joints have been glued together. Notice too that no lip is made to protrude on the lower edge of the drawer front on such drawers, even though all four edges have molding on the drawer face.
Dovetailed Box
IN THE design of this small box, I exploit the dovetail corner joints and the contrasting colors of two kinds of beautifully grained wood. The woods used in are mahogany and poplar, though other kinds of wood like black walnut and maple could be substituted to get a similar effect.
Boxes have always intrigued me, not only because they are useful, but because they offer so many opportunities for the craftsman to exercise his artistic talents in decorating them.

