Stanton - I Can Do That: Furniture Projects
Here you can read online Stanton - I Can Do That: Furniture Projects full text of the book (entire story) in english for free. Download pdf and epub, get meaning, cover and reviews about this ebook. year: 2018, publisher: Penguin Publishing Group, genre: Home and family. Description of the work, (preface) as well as reviews are available. Best literature library LitArk.com created for fans of good reading and offers a wide selection of genres:
Romance novel
Science fiction
Adventure
Detective
Science
History
Home and family
Prose
Art
Politics
Computer
Non-fiction
Religion
Business
Children
Humor
Choose a favorite category and find really read worthwhile books. Enjoy immersion in the world of imagination, feel the emotions of the characters or learn something new for yourself, make an fascinating discovery.

- Book:I Can Do That: Furniture Projects
- Author:
- Publisher:Penguin Publishing Group
- Genre:
- Year:2018
- Rating:3 / 5
- Favourites:Add to favourites
- Your mark:
I Can Do That: Furniture Projects: summary, description and annotation
We offer to read an annotation, description, summary or preface (depends on what the author of the book "I Can Do That: Furniture Projects" wrote himself). If you haven't found the necessary information about the book — write in the comments, we will try to find it.
Stanton: author's other books
Who wrote I Can Do That: Furniture Projects? Find out the surname, the name of the author of the book and a list of all author's works by series.


I Can Do That: Furniture Projects — read online for free the complete book (whole text) full work
Below is the text of the book, divided by pages. System saving the place of the last page read, allows you to conveniently read the book "I Can Do That: Furniture Projects" online for free, without having to search again every time where you left off. Put a bookmark, and you can go to the page where you finished reading at any time.
Font size:
Interval:
Bookmark:

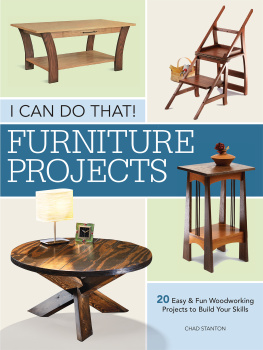
FURNITURE PROJECTS
Projects to Build Your Skills
Chad Stanton
![]()
WWW.POPULARWOODWORKING.COM

This book is dedicated to my father-in-law HanSang Kim who treats me like his real son, to my mother Linda Stanton who passed away during its writing and in appreciation of the love and support of my wife BoHyun Kim and good friend, "Safety" Dan Kine.
Special thanks to David Thiel, Ric Deliantoni and Scott Francis for their understanding and cooperation, and for working with me during a very difficult time in my life.
TABLES
SEATING
STORAGE
FUN STUFF
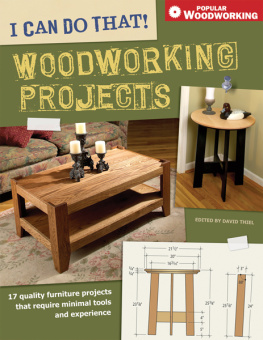
Curved Legged Coffee Table
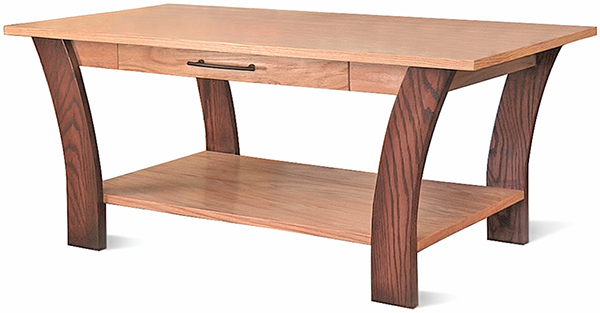
The living room is a great place for friends or family to gather for any social occasion. Its a place to relax, unwind and have a drink or two. Of course, youll need someplace to set that drink. This coffee table has plenty of space for setting things on top, and it also has a drawer on the front to store coasters, remote controls or anything else you wish to keep out of sight. Its not only functional, its quite attractive. The curved legs and the two-tone stain give this table a graceful look, making it a perfect centerpiece for the living room.
Since this is a larger project, construction from solid wood can be costly, so Ive designed it so you can make most of it from a single sheet of plywood. Perfect for limiting the strain on the wallet. But its not all plywood the curved legs are solid wood.
Begin this coffee table by making the plywood top. From the cut list, measure over from the edge of the plywood and make a pencil line. Use a straight-line jig for the circular saw and make a cut going with grain. The jig has a fence to guide the saw, and because the fence is perfectly in line with the blade it can be placed right on the line for an accurate cut ().
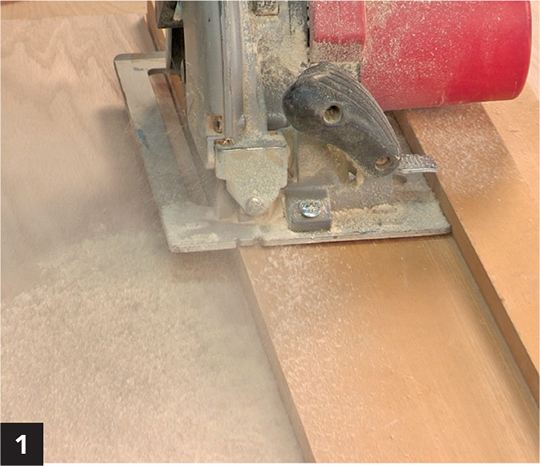
Use sacrificial boards underneath the plywood. Make sure to have the boards running perpendicular to the cut. This practice keeps the plywood from falling in on itself and pinching or binding the blade when making the cut. When using the circular saw, place the good side of the plywood face-down. Crosscutting plywood produces some tear-out on the top surface, leaving a very rough and jagged edge. To help eliminate this make a shallow cut first into the plywood. This is called a scoring cut.
Set the blade so it cuts no more than 18" into the plywood and make the scoring cut ().
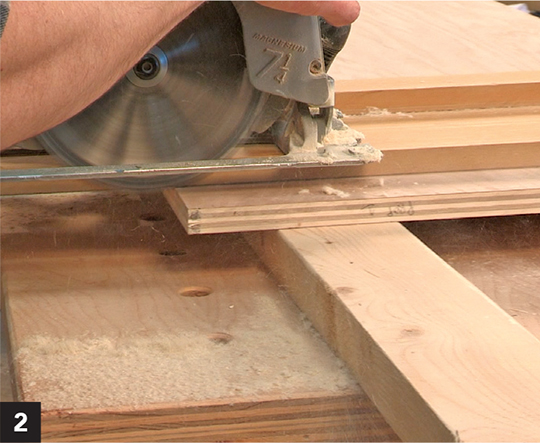
Then, without moving the jig, adjust the blade depth to make the full cut.
With the top cut to size, repeat the same procedure for cutting out the lower shelf.
Although the veneer faces of the plywood tabletop and lower shelf look fine, the rough plywood edges stick out like a sore thumb. Use edge banding to cover up the layers of plywood. Edge banding is a thin strip of veneer available in various wood species in this case Ive chosen banding in oak to match the oak plywood and has a heat-activated adhesive on the back, which can be applied using a common household iron.
When applying edge banding, common sense would say to cut the banding the same length as the edge being covered. However, as the glue begins to melt the edge band has a the tendency to slide. If the banding is the exact length, it might move from the original position and expose the plywood layers that I wanted to cover up. To avoid this, leave banding a little long and cut off the ends with a razor or knife after the glue sets.
The glue sets fairly quickly once the heat is removed. Still, its not a bad idea, while the edge banding is still warm, to use a scrap piece of wood to rub back and forth on the banding with some pressure to help make sure the banding is firmly applied.
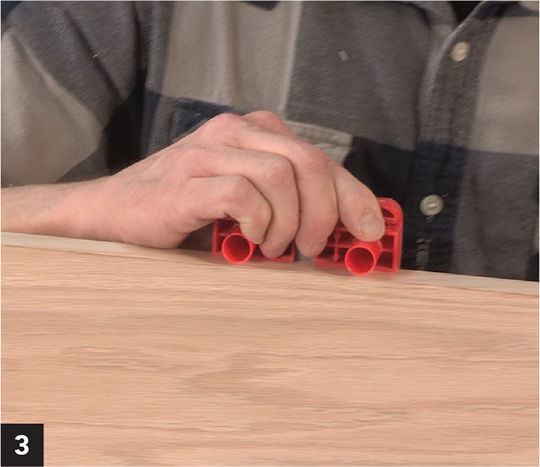
Use a razor blade to cut off the long ends. Edge banding is typically a bit wider than the plywood, so youll need to trim this flush, too. There is a tool that fits over the plywood and it is squeezed together tightly around both sides of the banding. It has two blades in it and while squeezing, push the tool to cut the excess waste off the banding. However, some tear out can occur while using this tool. Edge banding is real wood, and just like real wood going against the grain can produce tear-out. So while one side of the tool is cutting with the grain, the other side is going against the grain. TIP Separate the tool into two halves and trim each side individually, making sure to go with the grain().
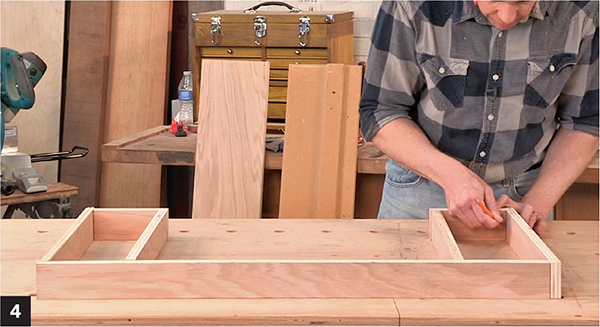
Once the top is done, set it aside and begin work on the table aprons. The aprons are plywood trimmed down to 212" with a circular saw guided by a straightedge or auxiliary fence. Crosscut the aprons to length on the miter saw. Lay the apron pieces out according to the plans and mark where the pocket holes will go. Pocket screws will attach the aprons together as well as fasten the top ().
Glue and screw the apron assembly together and set the assembly aside.
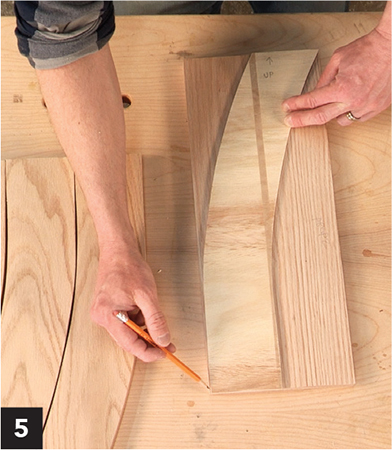
The legs are made from 1x8 solid oak, and each has a slight curve. Make a template from the plans, then use a pencil to trace the pattern onto each of the leg workpieces. Notice that the template goes from one corner to the other of the 1x8 ().
Cut out the legs with a jigsaw and clean up any rough edges with a file or sandpaper.
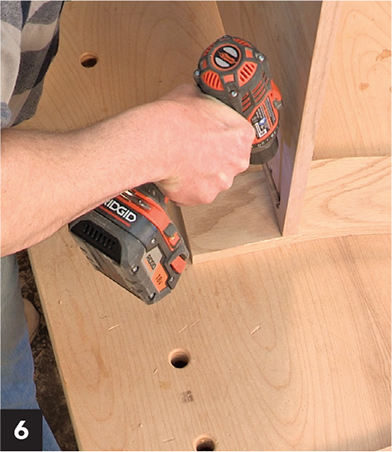
Its time for some assembly. From the plans, measure up and mark where the lower shelf will be positioned and use pocket screws to attach the legs to the shelf ().
After all four legs are attached to the shelf, turn the table upside down and place the apron assembly inside of the legs. This keeps the top of the legs flush with the top of the apron assembly. Measure an equal distance from side to side to get the apron assembly centered in the legs. Clamp the aprons to the legs to hold it in place, then drill clearance holes through the back side of the aprons. Finally, screw the apron assembly to the back side of the legs.
Font size:
Interval:
Bookmark:
Similar books «I Can Do That: Furniture Projects»
Look at similar books to I Can Do That: Furniture Projects. We have selected literature similar in name and meaning in the hope of providing readers with more options to find new, interesting, not yet read works.
Discussion, reviews of the book I Can Do That: Furniture Projects and just readers' own opinions. Leave your comments, write what you think about the work, its meaning or the main characters. Specify what exactly you liked and what you didn't like, and why you think so.