Table of Contents
Acknowledgments
The following individuals contributed ideas and activities to this book:
Elmida Baghdaserians, Eileen Bayer, Lauren Brickner-McDonald,
Lisa Chester, Barbara Cocores, Cheryl Collins, Dottie Enderle,
Phyllis Esch, Maxine Della Fave, Sandra Gratias, Ann Gudowski,
Marilyn Harding, Virginia Jean Herrod, Audrey Kanoff,
MaryAnn F. Kohl, Sandra Hutchins Lucas ,Gail Morris, Sandra Nagel,
Tracie O Hara, Charlene Woodham Peace, Terri L. Pentz,
Quazonia J. Quarles, Barbara Saul, Darleen Schaible, Sandy L. Scott,
Mary Jo Shannon, Susan A. Sharkey, Diann Spalding, Joan Stoer,
Jackie Wright, Cookie Zingarelli
Chapter 1
Breakfast
Omelet in a Bag
Use the ingredients listed or your child s personal
favorites to create this amazing omelet right inside a plastic bag!
Ingredients
cheese, cubed or shredded
eggs, 2 per bag
green pepper
ham, crumbled bacon, or
other meat (pre-cooked)
mushrooms
onion
red pepper
tomatoes
Tools
cooking pot
quart-size zipper-closure bag
Makes 1 serving
What to Do
Invite your child to help you prepare all of the ingredients, including chopping the tomatoes, red pepper, green pepper, mushrooms, and onion.
While you are preparing the omelet ingredients, bring a pot of water to a boil. You can either prepare the bacon, ham, or other meat before starting the activity or cook it with your child s help.
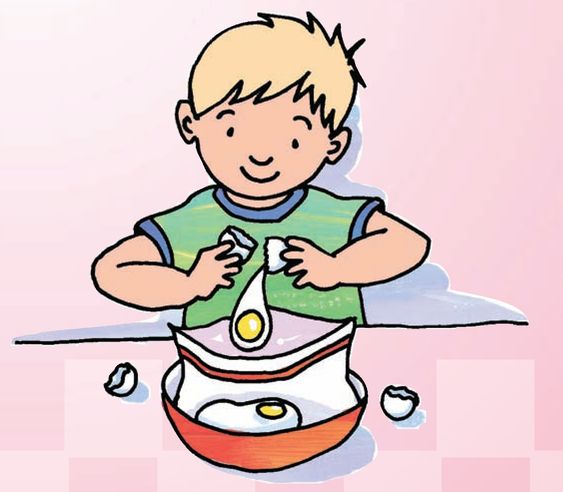
Once all of the ingredients are ready, show your child how to crack open an egg. Hold open the zipper-closure bag and let him put the eggs into it.
Secure the bag and have your child shake it to mix the eggs together.
Open the bag and encourage him to put any of the ingredients he would like in his omelet into the bag.
Remove the excess air from the bag, make sure the bag is zipped securely, and drop it into the pot (adult only).
Allow the bag to sit in boiling water for 13 minutes. You can cook 6 to 8 bags in each pot of boiling water.
Remove the bag from the water and let it cool. Help your child open the bag and prepare to be amazed as the omelet easily rolls out of the bag and onto the plate, ready to eat!
Teddy Bear Toast
Dont be surprised if your child gobbles up more of these delicious
bearsthan you bargained forthe combination of warm toast, melted
butter, and cinnamon sugar means you cant eat just one!
Ingredients
butter
cinnamon
raisins
sugar
whole-wheat bread or
bread of your choice
Tools
bear-shaped cookie cutter
(or any other cookie cutter
that your child likes)
butter knife
small bowl
spoon
toaster
What to Do
Mix cinnamon and sugar together in a small bowl.
Toast the bread in the toaster. Caution: Supervise closely and be sure that you remove the toast so that your child doesnt get burned.
Give your child a butter knife to spread butter on the toast while it is still very warm.
Encourage her to cut out a teddy bear shape using a bear-shaped cookie cutter.
Sprinkle the cinnamon-sugar mixture on top of the butter.
Add raisin eyes and buttons.
Enjoy... and then make more!
Smiley Eggs
Allow your child to take matters into his own hands with this
simple yet hearty breakfast. With delicious protein from
sunny-side-up eggs, this recipe will put a smile on the toast
and on your child s face!
Ingredients
1 egg*
bread slice
butter (optional)
sausage link
Tools
bowl
frying pan
plastic knife
toaster
Makes 1 serving
What to Do
Cook the sausage links on the stove for 10 15 minutes on medium heat (adult only). Flip them occasionally to ensure that they are cooked thoroughly. Remove from heat.
Help your child crack an egg into a bowl and transfer the egg from the bowl to a frying pan. Place the frying pan onto the stove (adult only) and set to medium heat.
As the egg cooks sunny side up, allow the sausage to cool and then cut the link into small slices.
Have your child put a slice of bread into the toaster and toast it lightly.
If you wish to use butter, give your child a plastic knife and encourage him to spread butter on the toast.
Now its time to assemble the smiley eggs! Take the piece of toast and put the sunny-side-up egg on the toast to create a smile.
Add two sliced sausage pieces to the bread to create eyes. Say good morning to your smiley face and then dig in!
*Safety Note: Eggs that are not thoroughly cooked may pose a health risk. Cooking eggs to a temperature of at least 160F destroys bacteria such as Salmonella. Sunny-side up and over-easy eggs often do not reach this temperature.
Hello, Pumpkin! Muffins
What better way to give your child a healthy dose of beta-carotene
than with a delicious and nutritious pumpkin muffin? The sweet taste
will keep her coming back for more, and the whole-wheat flour and
pureed pumpkin will pack a powerful nutritional punch.
Ingredients
1 cups canned pumpkin
2 eggs
cup water
cup butter, melted
1 cup flour
cup whole wheat flour
1 cup sugar
1 teaspoon pumpkin pie spice
teaspoon baking powder
1 teaspoon baking soda
teaspoon salt
teaspoon cloves
chocolate chips (optional)
raisins
Tools
large bowl
measuring cups and spoons
mixing spoons
muffin tin
small bowl
Makes 12 dozen muffins, depending on size
What to Do
Grease a muffin tin, or place muffin liners inside the muffin cups.
Preheat the oven to 350 (adult only).
Invite your child to mix all of the dry ingredients together in a large bowl.
Mix the wet ingredients together in a smaller bowl.
Show your child how to make a well in the dry ingredients. Then help her pour the wet ingredients into the well of the dry ingredients.
Mix gently until blended. If you want to add chocolate chips to the muffin mix, do so now.
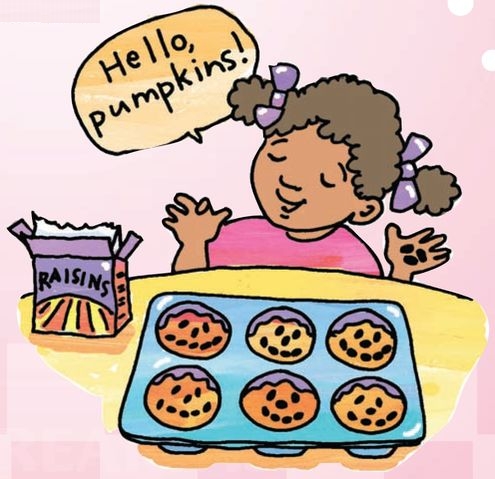
Fill the muffin cups about full. Give your child raisins to make faces on top of every muffin. Say, Hello, Pumpkin! each time she creates a face, and be prepared for giggles.
Bake for about 30 35 minutes, until a toothpick inserted in the center of a muffin comes out clean.


